
Most gardeners can agree that the taste of biting into a homegrown tomato beats anything you can buy from a store. That’s just one of the reasons why so many people have taken to growing their own tomatoes from seed to harvest.
Unfortunately, tomatoes are prone to many problems. One day they look great, and the next they’re wilting and diminished husks of what they used to be.
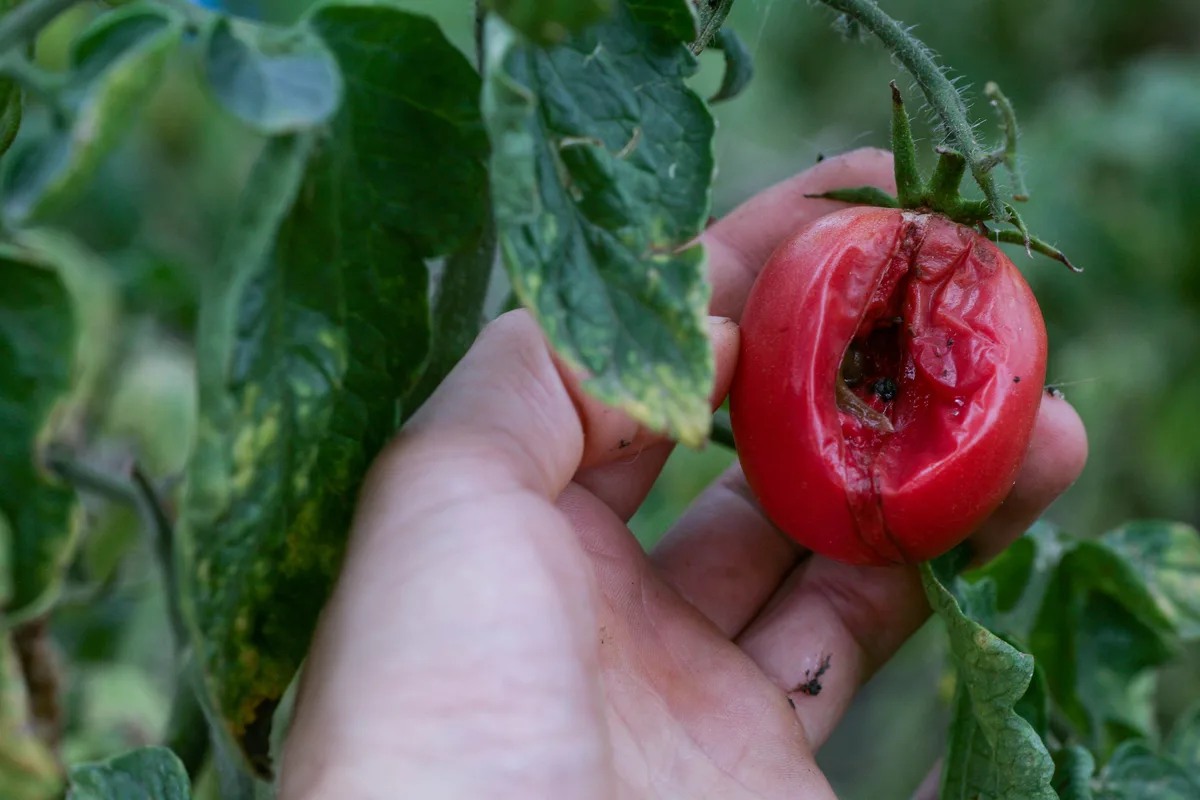
If you are a die-hard tomato fan, this list will help identify and fix any tomato problems, ensuring the elusive perfect tomato becomes a reality.
1. Lack of Sunlight
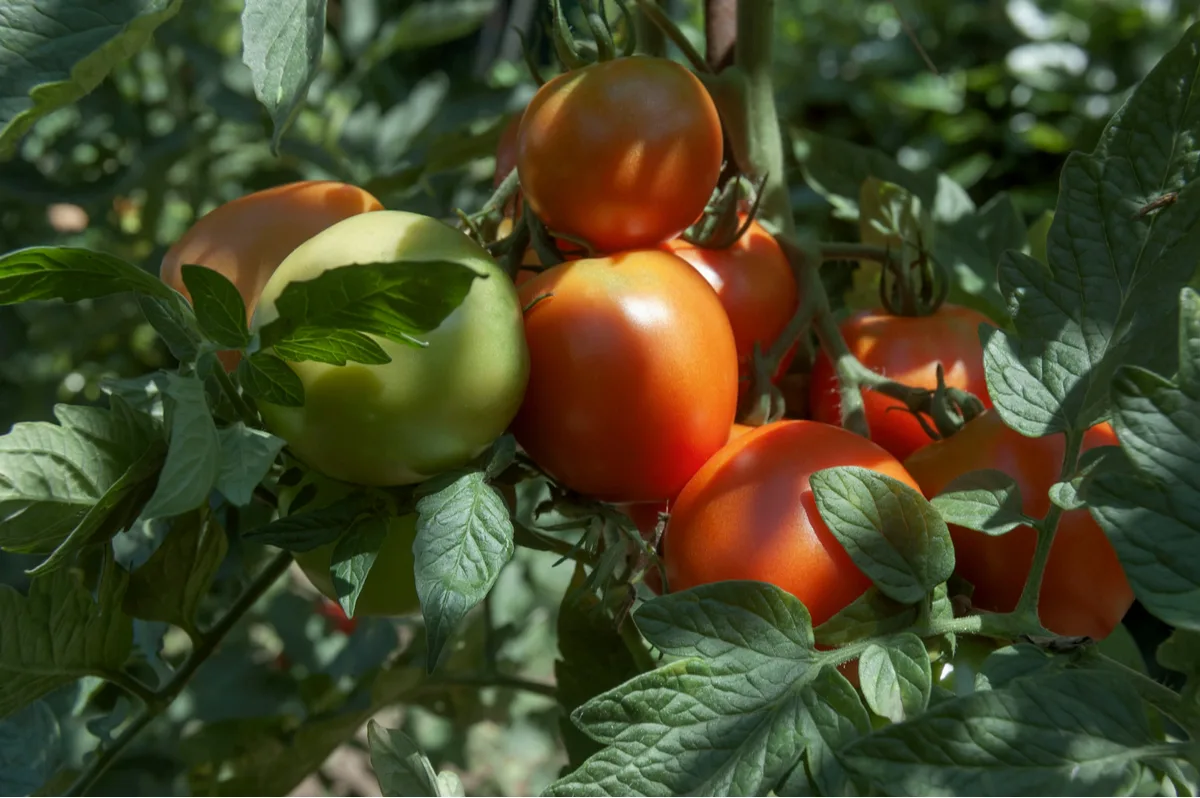
Tomatoes need at least 5 hours of sunlight a day at a minimum to grow and stay healthy. Give them less than that and the plants will have stunted, unhealthy growth. They won’t produce fruits either and become more prone to pest and disease problems.
Tomatoes are not shade-loving plants. Keep them in at least 6 – 8 hours of sunlight a day to prevent any growth or fruiting issues.
2. Incorrect Watering
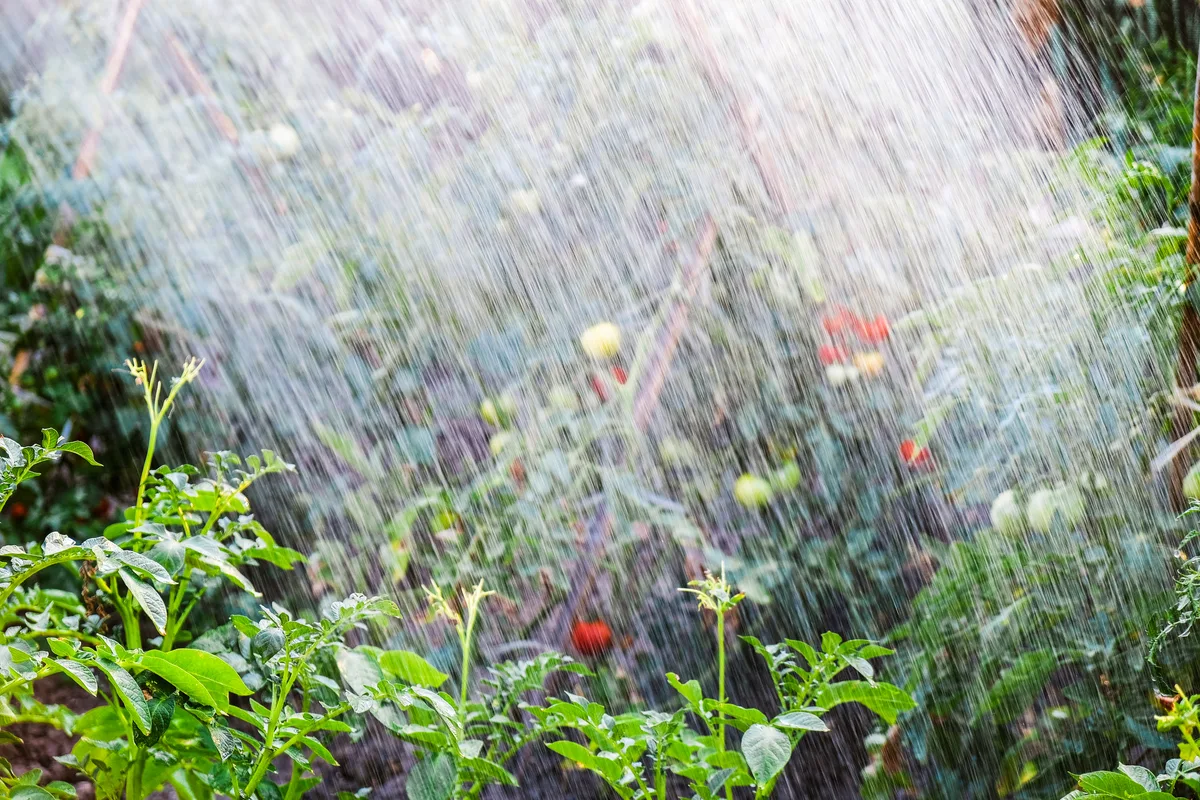
Correct watering is one of the most important tasks when growing tomatoes. It’s also the best prevention for fungal and bacterial diseases and stress in plants.
Tomatoes need water around 2-3 times a week during the growing season, occasionally more depending on temperatures. It’s also important to keep water off the leaves to prevent disease, so drip irrigation or watering at soil level is best.
The water should reach at least 6-8 inches below the surface to give the plant’s deep roots enough to keep it satisfied.
Irregular watering and overwatering cause the fruit to split. The tomato skin expands and contracts, causing it to break open. Over-watering can also cause the roots to rot and lack oxygen, causing further problems with growth.
Irregular and underwatering can cause the plant’s growth to stall, reducing flower and fruit production across the entire plant.
3. Incorrect Soil
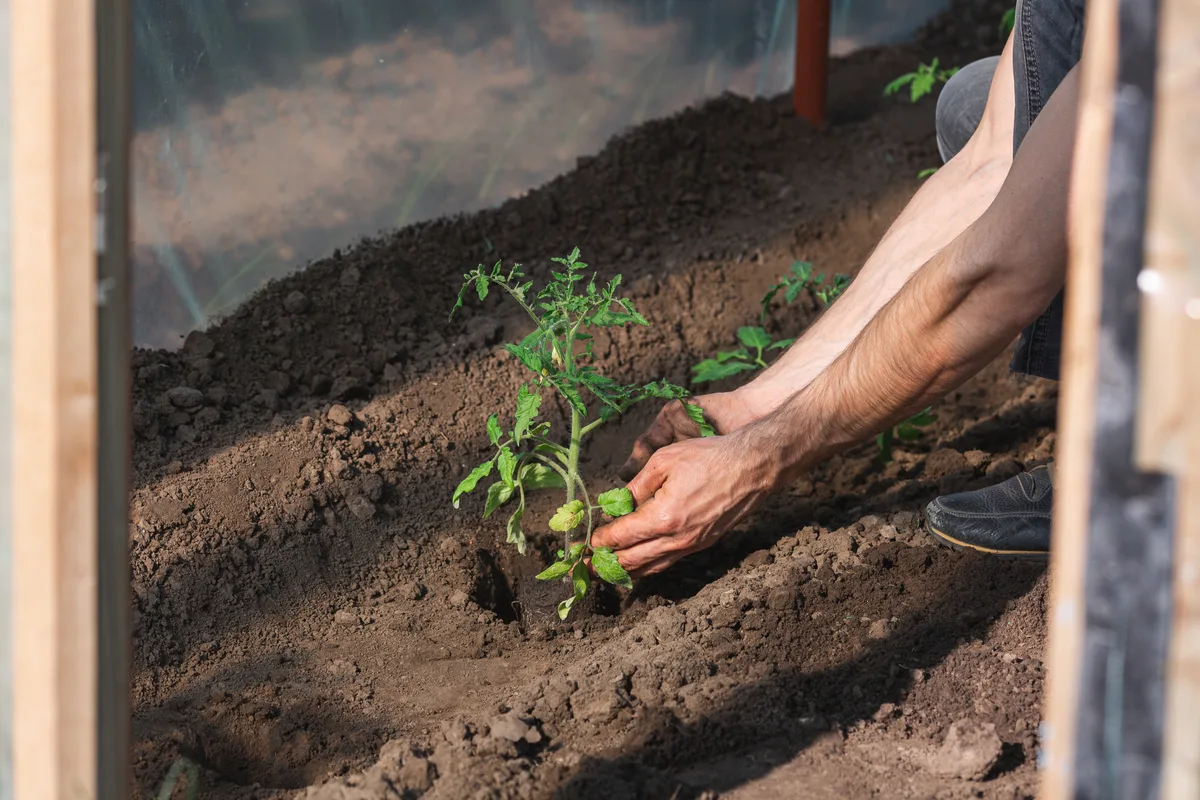
Tomatoes grow best in loamy rich soil, but will grow in almost any soil except heavy clay. In this case, rather grow in containers where the soil aeration and fertility can be easily controlled, or amend your garden soil to create a suitable environment. The soil should be loose and well-draining.
Tomatoes are heavy feeders and need extra nutrients at the time of planting in the form of compost or other organic materials. A lack of nutrients will stunt growth and prevent flowers and fruit from forming well.
Wet or clogged soils with no drainage will encourage fungal diseases and root rot, ultimately killing the plant.
4. Incorrect Temperatures
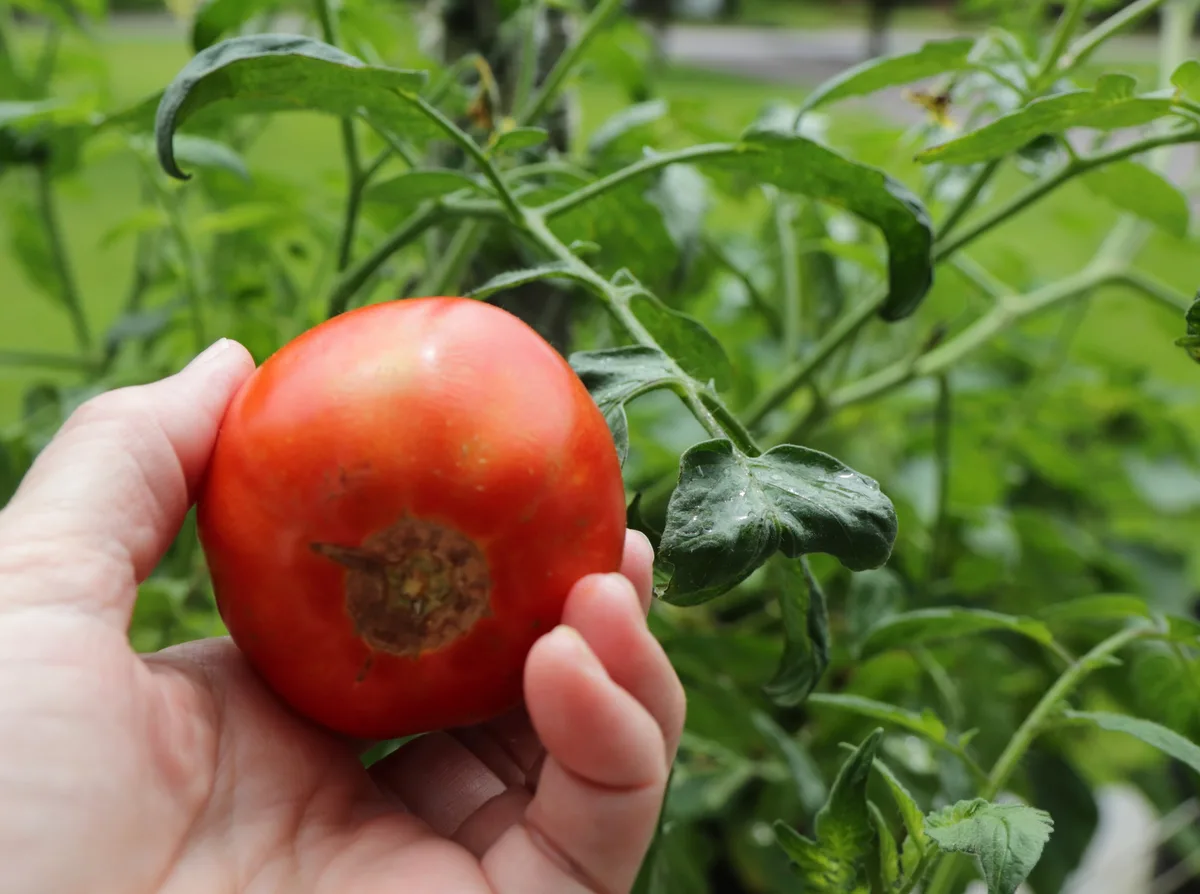
Although tomatoes are considered a summer plant, high temperatures can have devastating effects on their performance in the garden. Luckily, if given extra water and protected with a little shade, they should survive.
Fruiting tomatoes like a bit of heat, but care should be taken to avoid sunscald on the fruit. Sunscald develops on the side of the fruit that faces the sun, discoloring areas in patches that may blister.
Once the fruit has it, it can’t be reversed. In excessively hot, sunny weather, you may need to cover your tomatoes with a shade cloth to prevent sunscald.
High temperatures also stress the plants, causing them to wilt, produce fewer flowers and ultimately less fruit. Keeps plants watered and shaded while the sun is at its hottest.
Related Reading: 10 Ways To Protect Plants From Extreme Heat
5. Nutrient Imbalance
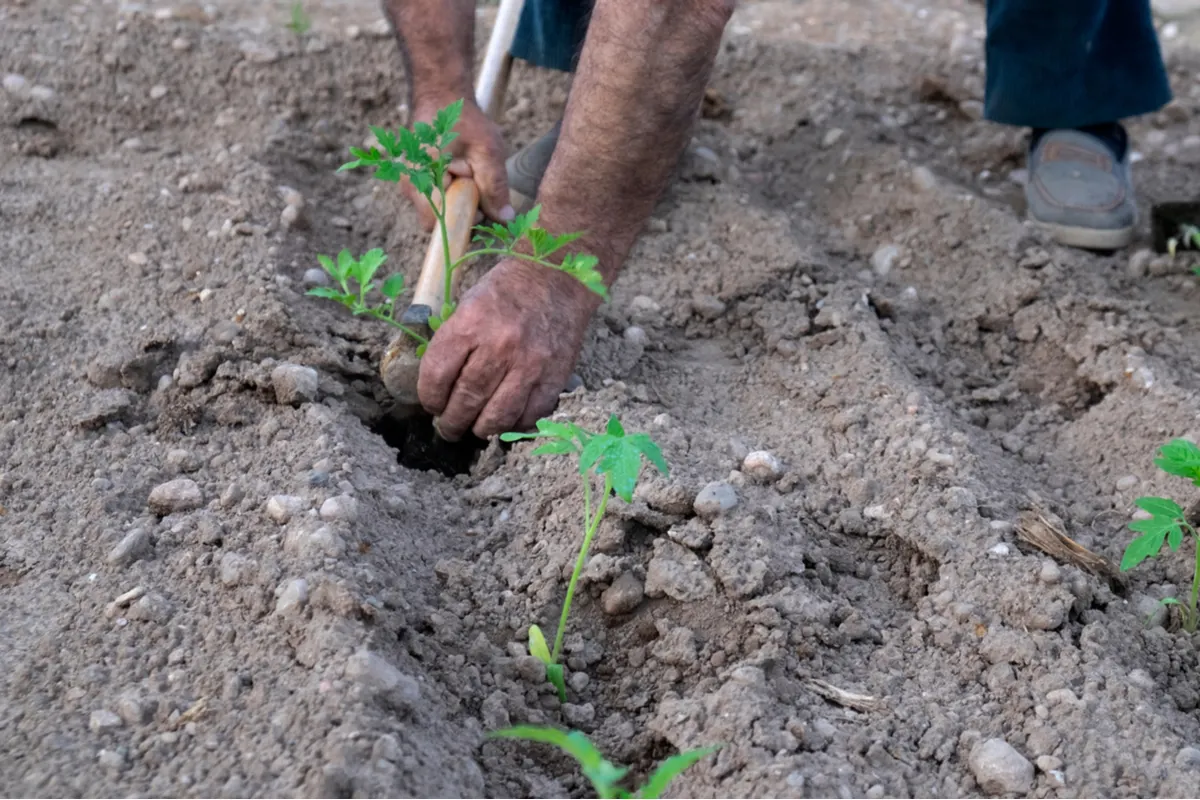
Tomatoes need the correct fertilizer to grow well and set fruit.
Avoid high nitrogen fertilizers right before fruiting as they direct energy toward leaf growth at the expense of the fruit. Use an organic fertilizer higher in phosphorus or one that is specifically formulated for flowers and fruit.
Avoid using the fertilizer directly on the roots as this may cause them to burn. If fertilizing when planting, rather mix the fertilizer into some soil, place that at the bottom of the planting hole, then cover it with more soil before adding the tomato plants.
Tomatoes are heavy feeders and need to be supplemented when fruiting with a flower and fruit formula that contains all the right macro and micronutrients:
- Nitrogen
- Phosphorous
- Potassium
- Calcium
- Magnesium
- Boron
- Zinc
A lack of fertilizer will show itself in poor growth, yellow leaves, purple stems, and a lack of flowers and fruit.
6. Overfertilizing
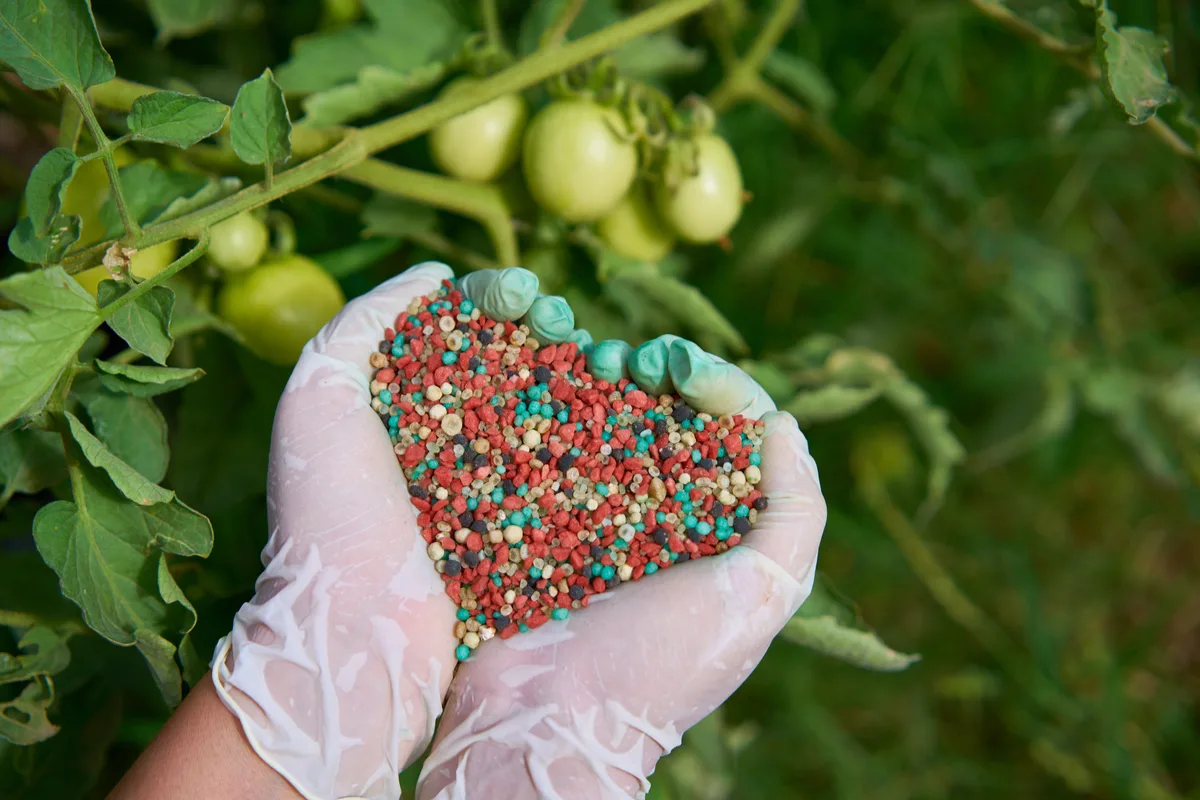
There is a fine balance when fertilizing tomatoes. Too little and tomato plants will not perform well, but too much and you could kill them in an instant.
The first sign of overfertilizing is yellowing leaves. This is caused by an excess of nitrogen in the soil that prevents the plant from absorbing enough water. Too much nitrogen will also cause the plants to be bushier with more leaves than flowers.
Also look for a build-up of sediment and fungus on the soil surface. This looks like white salts which can be removed manually by scraping off the top layer and adding a layer of mulch.
Tomatoes in pots can be flushed with water and allowed to drain well if overfertilized. Hold off on fertilizing for a while in the future. You’ll want to check out Tracey’s total tomato fertilizing guide.
7. Phosphorous Deficiency
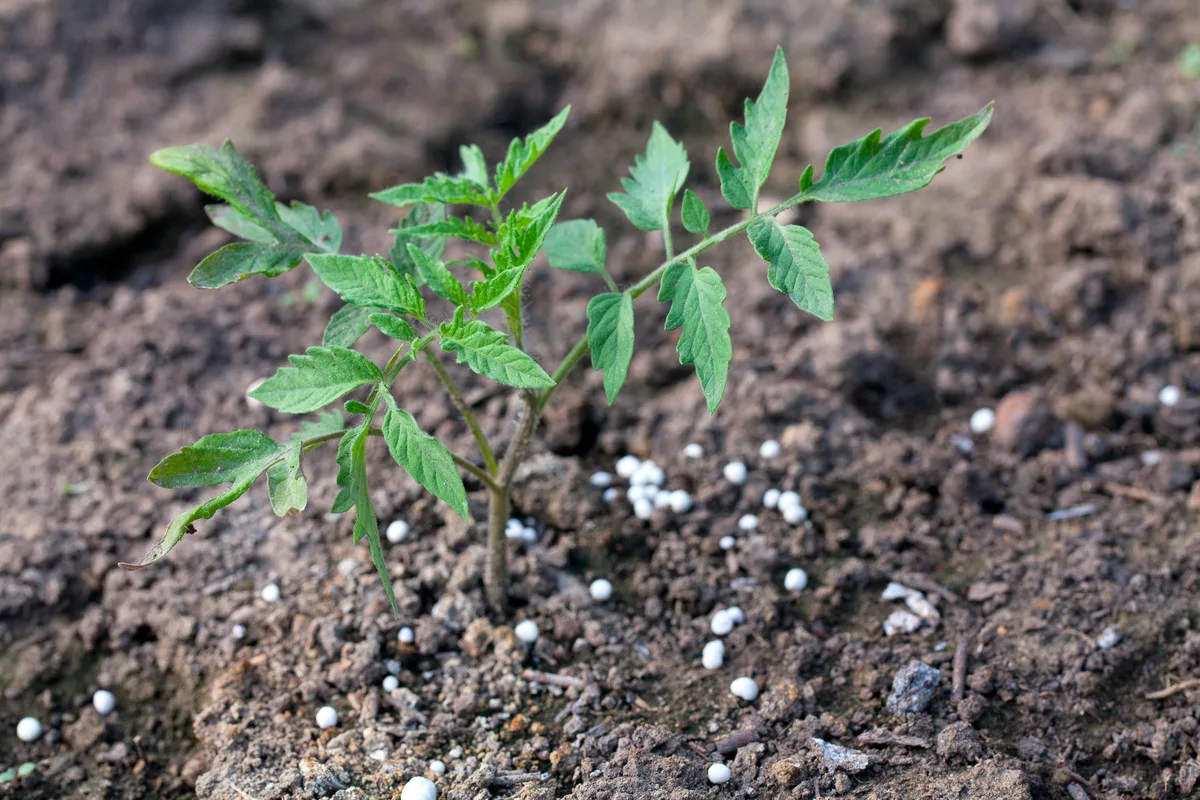
You may be giving your tomatoes enough phosphorous, but there are certain instances when phosphorous cannot be absorbed by the plant’s roots. Colder soils and very wet soils will inhibit the uptake of phosphorous. Incorrect pH – acidity below 6.5 or alkalinity above 7.5 – can also have an effect.
Look out for dwarf or stunted growth, with leaves turning purple or reddish-brown and curling. For a quick fix, incorporate a high phosphorous fertilizer into the soil – digging it in rather than just leaving it on top.
Alternatively, use a seaweed extract liquid fertilizer as a foliage drench to stimulate the plant’s enzyme system. This will spark it into absorbing nutrients from the soil.
In the long term, test the soil, adjust the pH and keep a regular fertilizing regime.
8. Calcium Deficiency
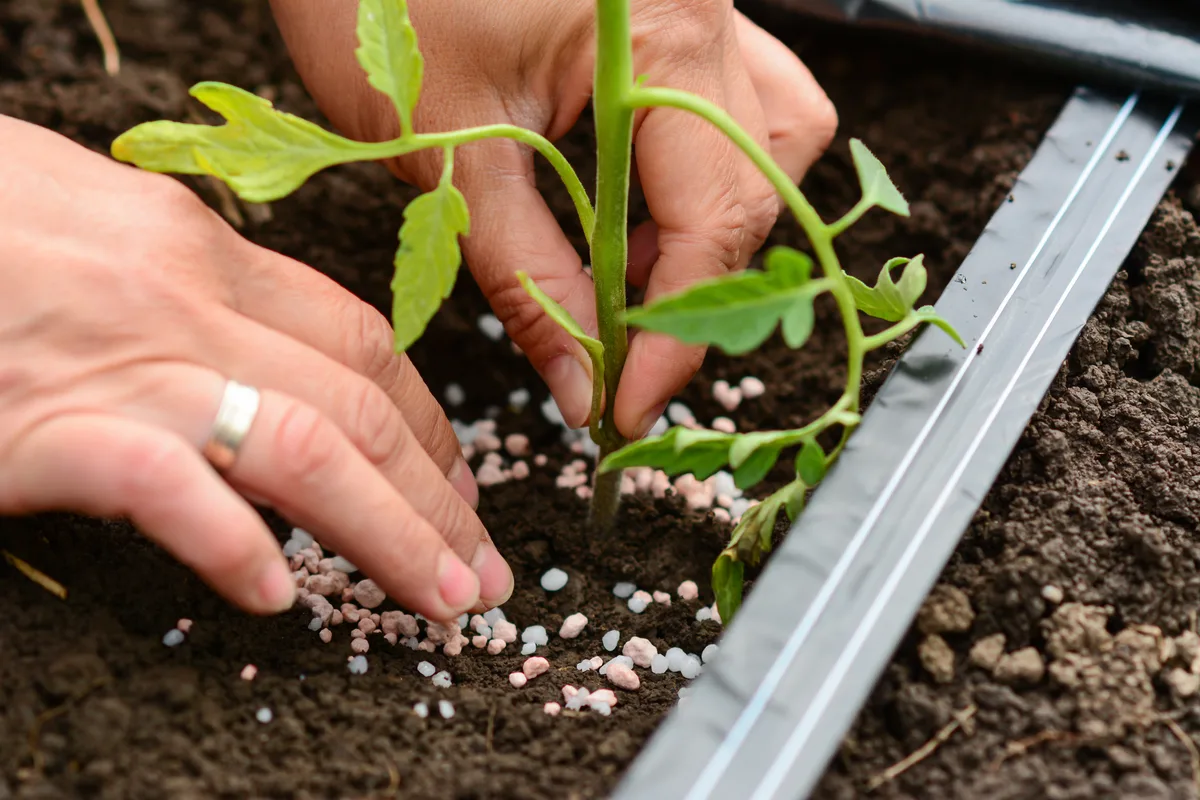
A calcium deficiency in tomatoes displays itself through curling leaves and dull color. This problem occurs more often in highly acidic soils, which can be resolved with agricultural lime to bring up the alkalinity.
Extra calcium can be added over time by digging processed eggshells into the top layer of soil. Alternatively, use a water-soluble calcium nitrate fertilizer to quickly get calcium to the roots of the plants and prevent diseases like blossom end rot.
9. Blossom End Rot
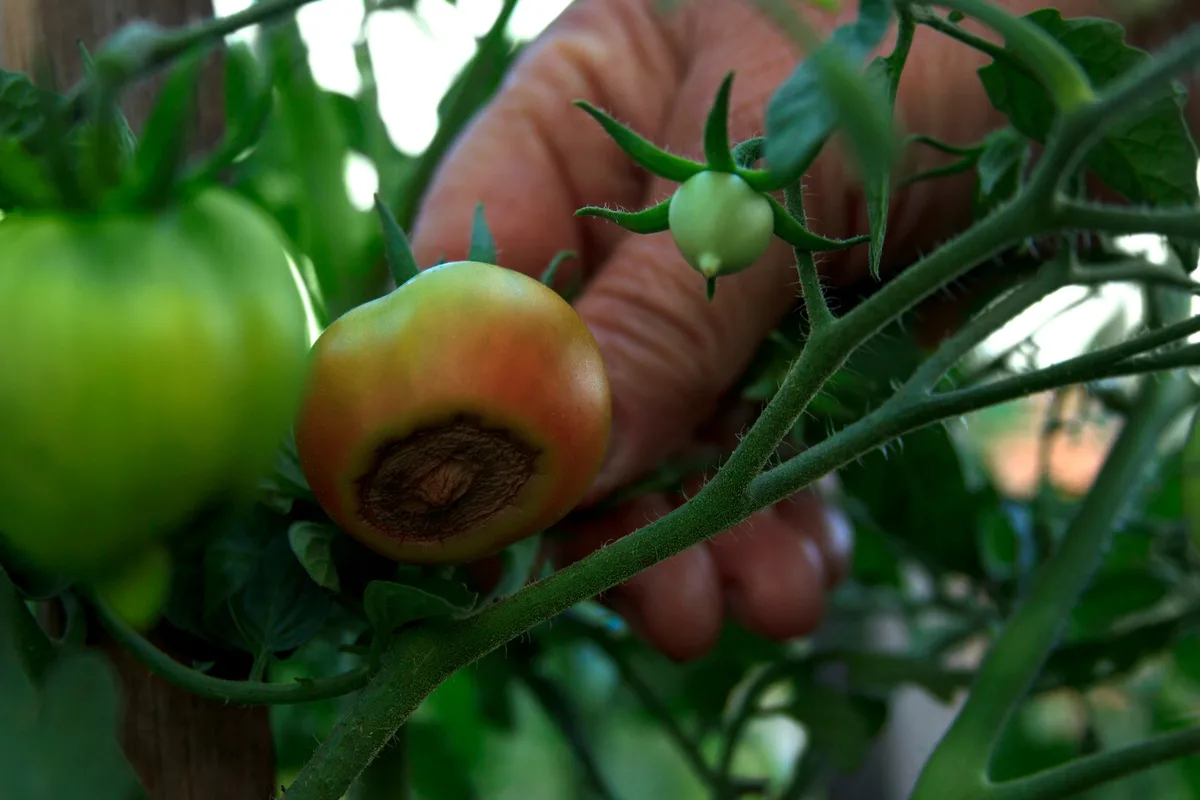
Blossom end rot is potentially the result of the plant not getting enough calcium, or more often, an inability of the plant to absorb calcium. The reasons for this could be drought, severe pruning and freezing temperatures.
The disorder is identified by the brown marks or rot that develop on the blossom end of the tomato. Serious infections produce a secondary black mold on the lesions. Sometimes the condition will present itself inside the tomatoes, not seen until the fruit is cut.
To fix or rather prevent the problem, test the soil’s pH and adjust by adding high-calcium limestone into the soil, preferably 2-3 months before planting tomatoes.
Use some of the tips mentioned under calcium deficiency and make sure all the basics of tomato growing are covered, including preventing overfertilizing which can induce blossom end rot.
10. Canker
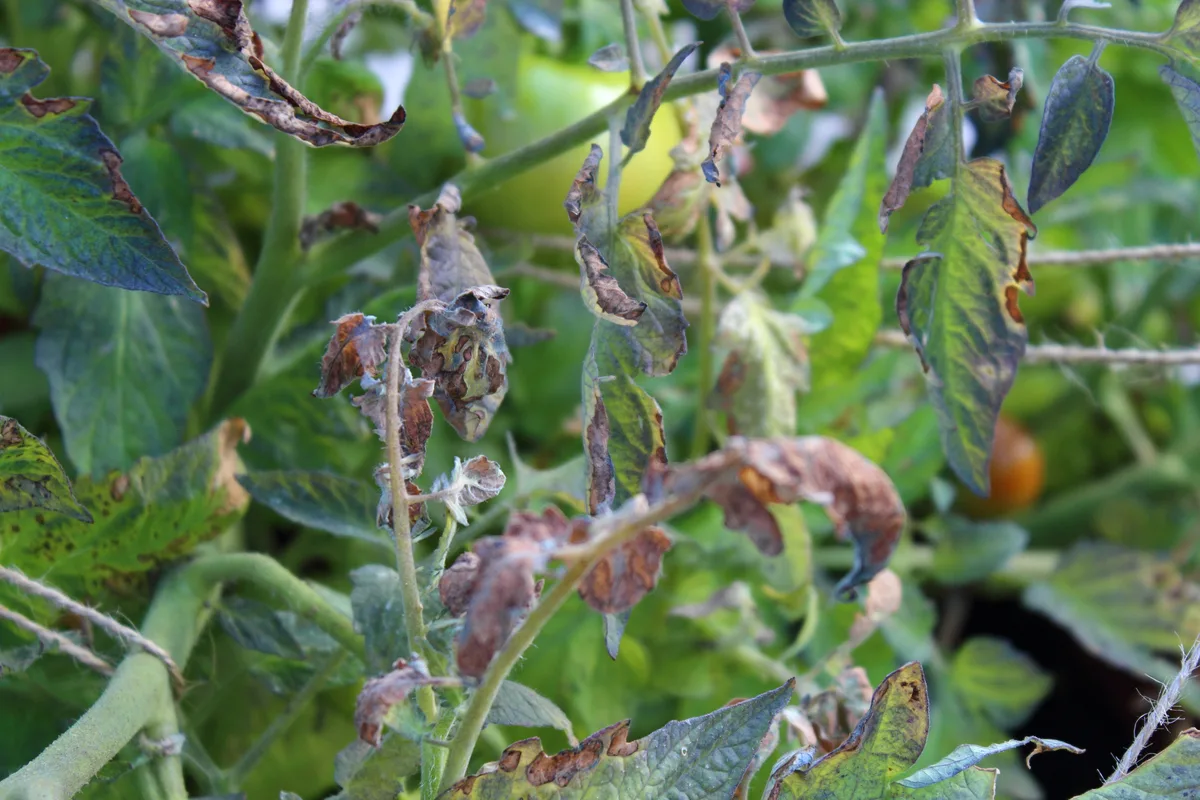
Bacterial canker starts with yellow dots on ripening fruits, surrounded by a dark circle. This bacterial disease Clavibacter michiganensis occurs naturally in the soil and can also be brought in by other infected plants.
If water splashes onto the fruit from the soil and the fruit, leaves or stems have a weak spot from insect damage, the bacteria can get in and infect the plants.
There is no treatment for this bacteria and plants need to be destroyed as soon as possible. Don’t plant tomatoes in the same spot for at least 3 years.
To help prevent this disease, water at ground level and try and avoid working with the plants when the leaves are wet.
11. Anthracnose
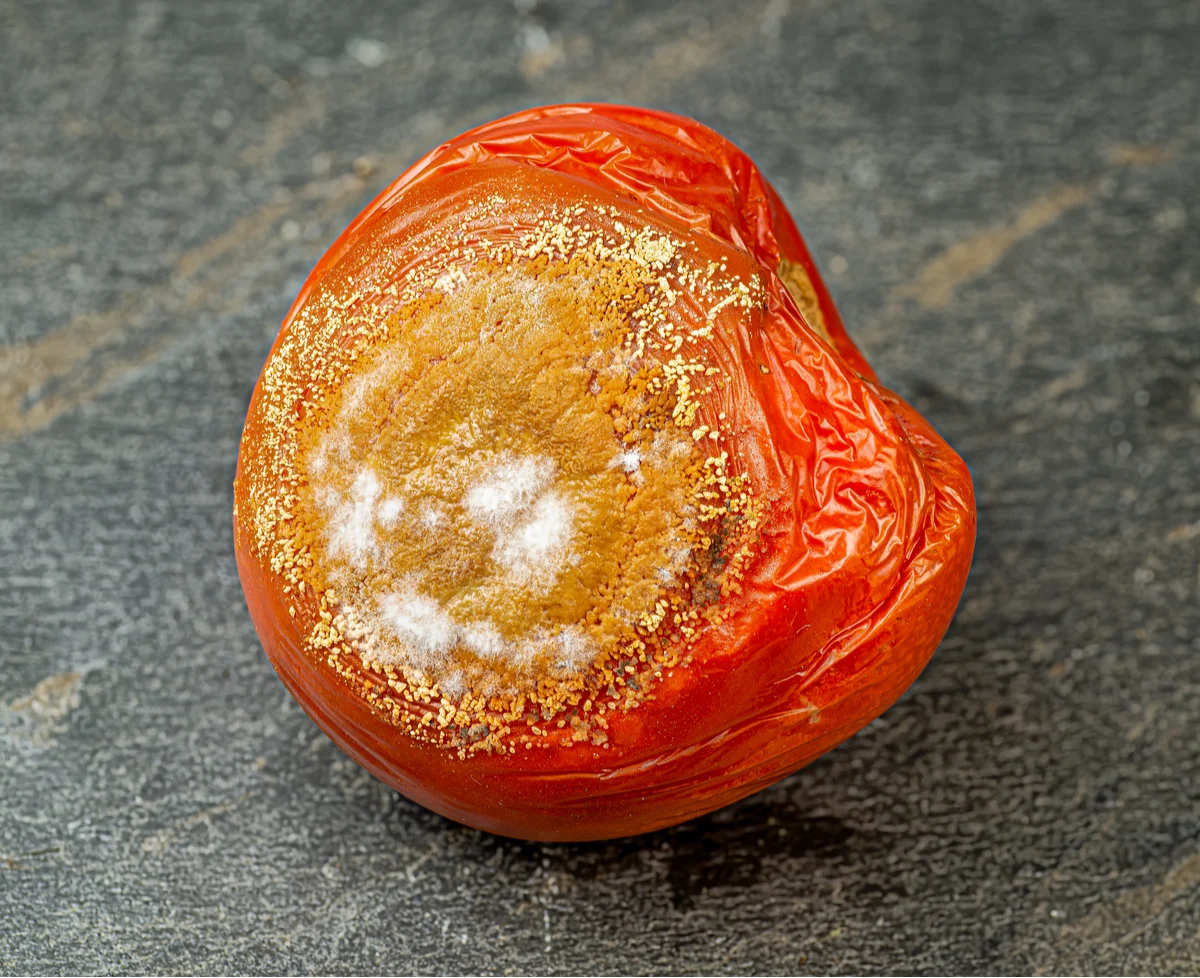
Mushy holes appearing at the blossom end of a ripening tomato may mean the presence of this fungus, known as Colletotrichum phomoides. It is more prevalent in humid hot weather and is often spread by overhead watering.
Overripe tomatoes tend to contract this disease more than others, so its best to harvest as soon as the tomatoes are ripe.
Prevention is better than control when it comes to Anthracnose. However, there are various fungicides that may eradicate the problem if it is mild.
12. Early Blight
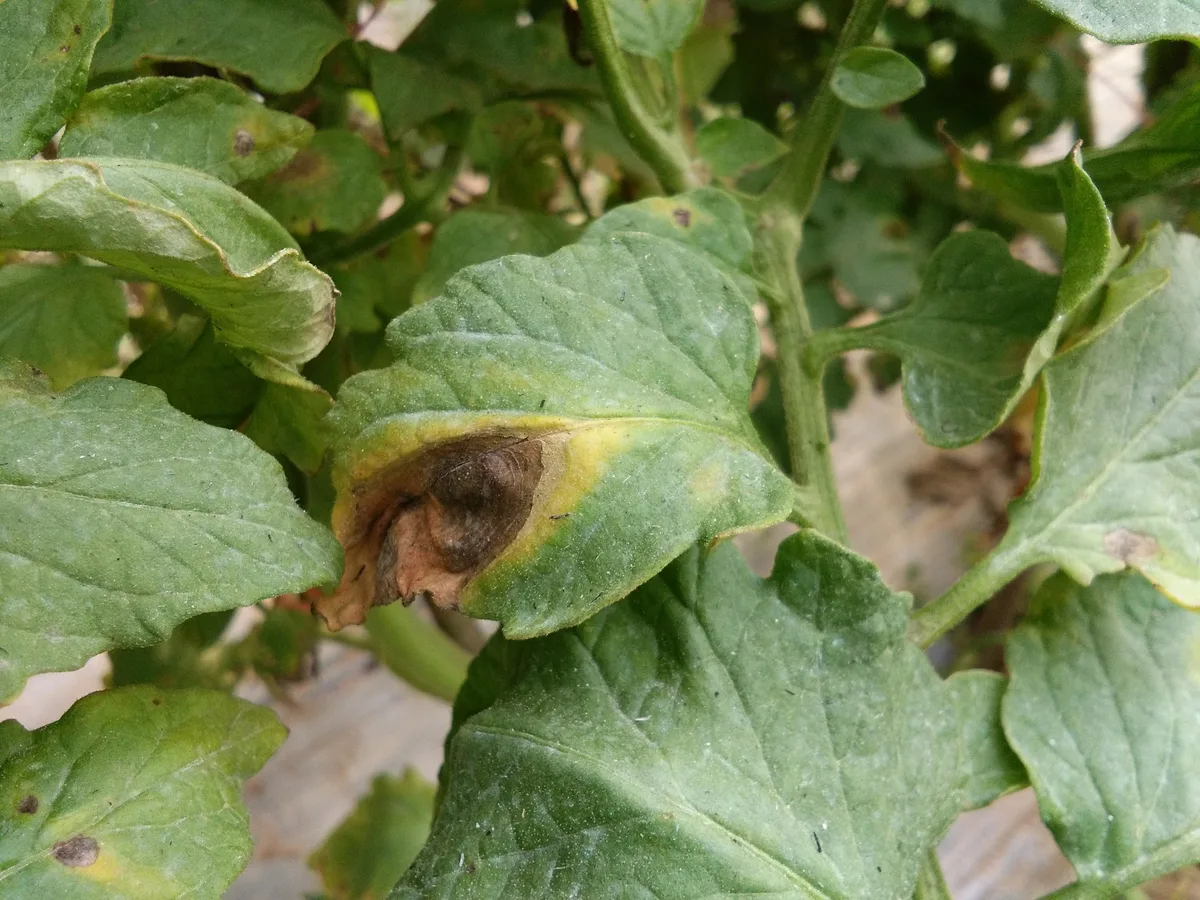
Early blight is caused by the fungus Alternaria solani. Yellow leaves on the bottom of the plant are not usually cause for concern, but yellowing leaves further up the plant may indicate early or late blight.
These are fungal infections that can appear at any time of the season, but early blight usually appears around the time of fruiting in late spring and is more prevalent in wet weather.
Early blight occurs during cool, wet weather, moving up the plant as it spreads. It can be identified by the tan spots and with yellow halos on the leaves. On fruit, sunken dark spots appear on the stem ends and the stems will have sunken dark spots above the soil line.
Spores are carried by wind and splashing water. If the problem is not too severe, early blight can be controlled by using a fungicide. However, fungicides for blight are more a preventative than a cure.
Start by cutting off any infected leaves and destroying them. Spray the plants with a copper fungicide specified for use on early blight.
Make sure to preventatively treat the plants regularly after rain with a bio-fungicide, especially if you are planning future tomato crops. This is a serious issue that you can read more about here.
13. Late Blight
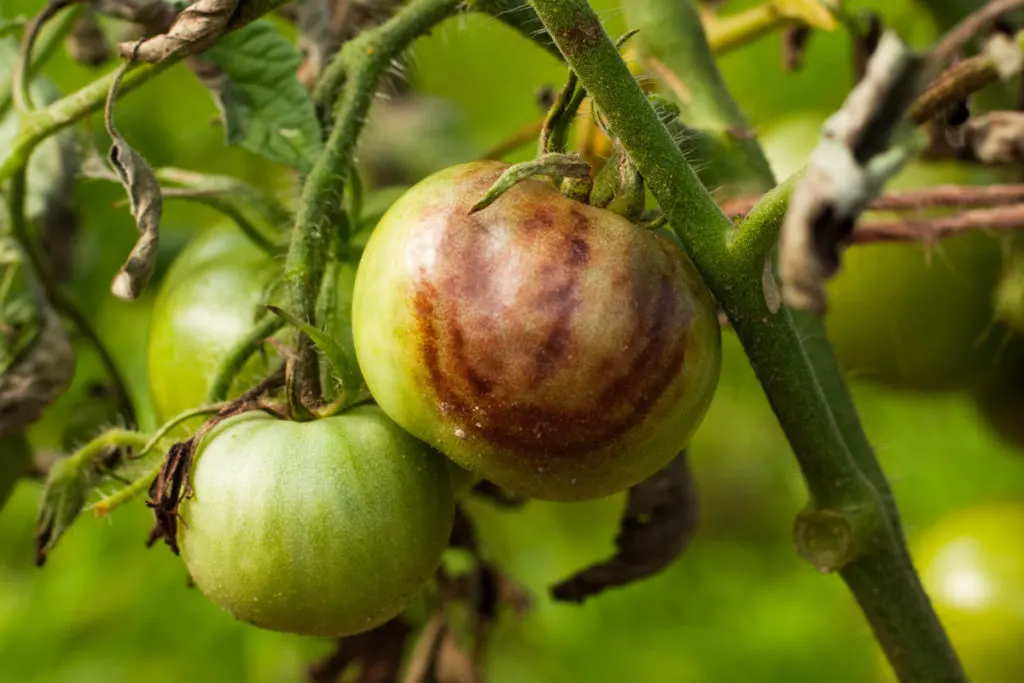
Late blight usually appears in summer or fall and more so in wet weather. It is caused by the fungus Phytophthora infestans. This fungus was the cause of the potato famine of 1845, which gives an indication of the seriousness of this blight.
By the time late blight sets in, it is usually too late to fix. It is highly contagious and spreads rapidly, affecting all parts of the plant and ending its lifespan. Late blight moves quickly by air currents and can kill a tomato plant in a few days.
Look out for pale green spots on the tips of the leaves. These will turn brown to black and in humid conditions, you may see a fuzzy mold on the underside of the leaves. Brown spots may appear on green fruit and a white mold may also be seen.
Unfortunately, there is nothing to do but remove and destroy the plants. Rather prevent the possibility of an outbreak with regular applications of a bio-fungicide, or plant disease-resistant tomato varieties.
14. Septoria Leaf Spot
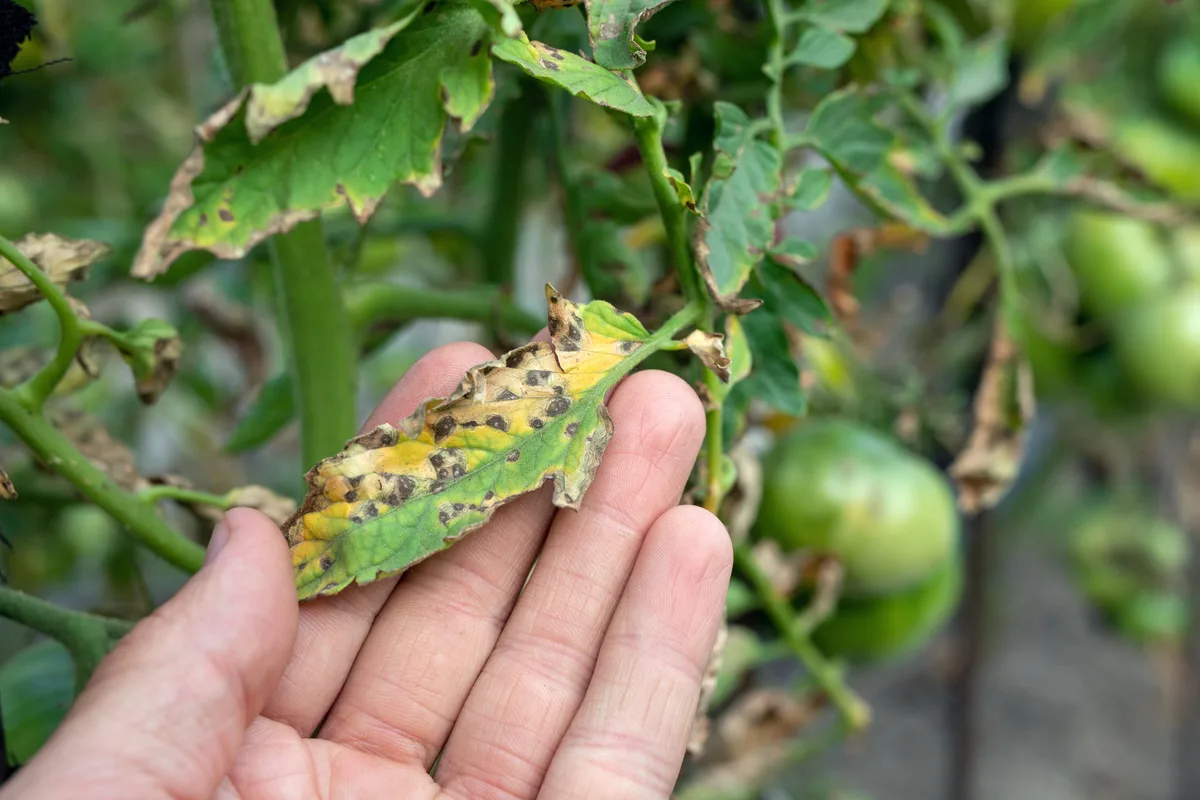
This fungus, Septoria lycopersici, is sometimes mistaken for early blight. However, the spots are not formed in concentric circles, so the difference can be seen fairly easily.
The spots start on the underside of the leaves as round and yellow, moving onto the top of the leaves when they turn brown and black with tiny black dots in the center. Leaves turn yellow, then brown and fall off. The fungus can also infect the stems.
This fungus can be seen at any time in the season, but will be most prevalent in high humidity and wet weather.
Treat as soon as you see the signs with fungicide. Remove any infected parts of the plants and destroy them. Chemical fungicides may help prevent the plants from having to be destroyed entirely, but they can also be harmful to the environment and surrounding plants, so caution is necessary.
15. Fusarium Wilt
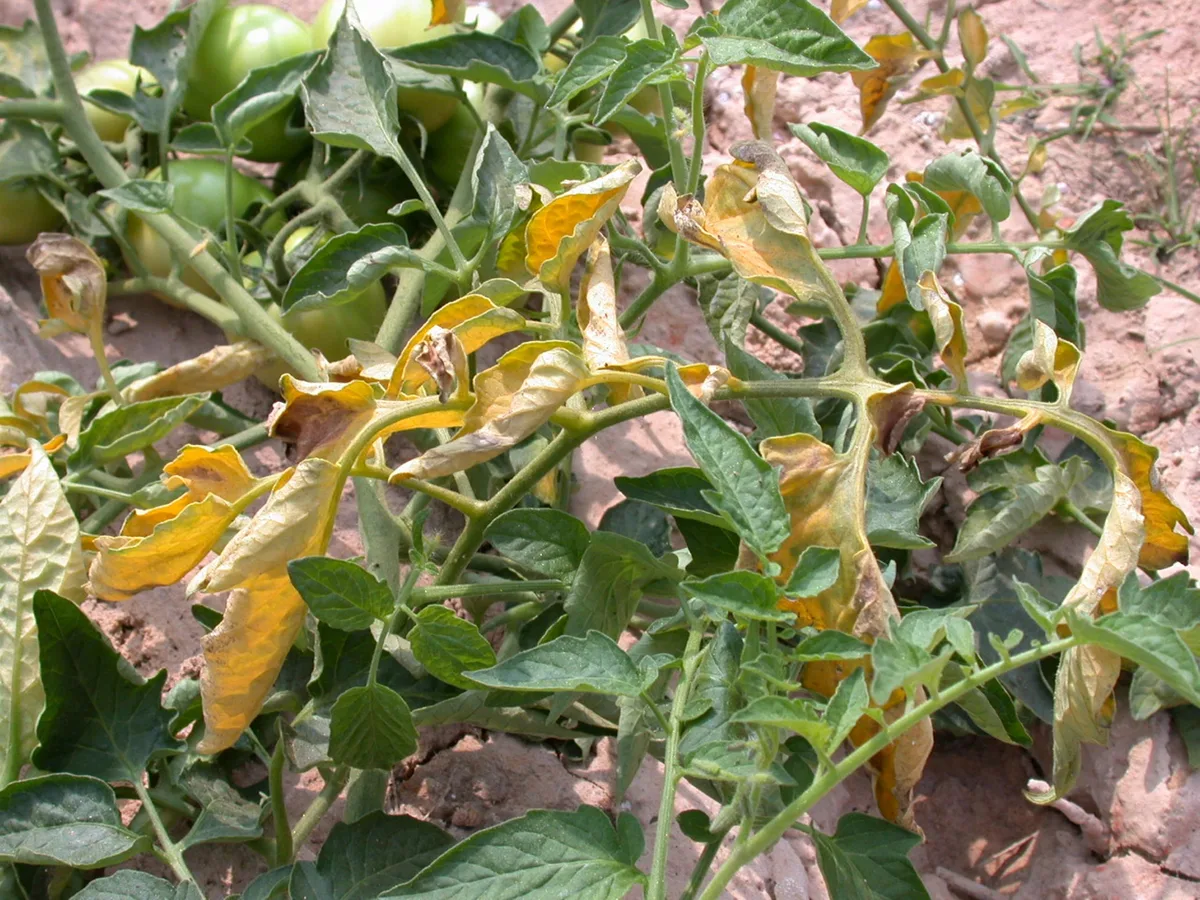
This problem is caused by another fungus Fusarium oxysporum, which lives in the soil. This fungus (and Verticillium dahliae that causes Verticillium Wilt) both have similar symptoms in tomatoes.
Fusarium Wilt gets into the roots, moving up the plant into the stems. There, it clogs the cell systems and starves the plant of water. With water unable to get to the leaves and branches, no fruit will appear and the plant will eventually perish.
The signs of infection are yellowing on one side of the plant, with leaves wilting and dropping as the fungus moves up the plant. You will notice the brown marks on the side of the stems. Weather that is too wet and bad soil drainage can also cause the fungus to appear.
Unfortunately, there is not much that can be done once the problem is discovered. Remove and destroy the plants to prevent spread.
16. Verticillium Wilt
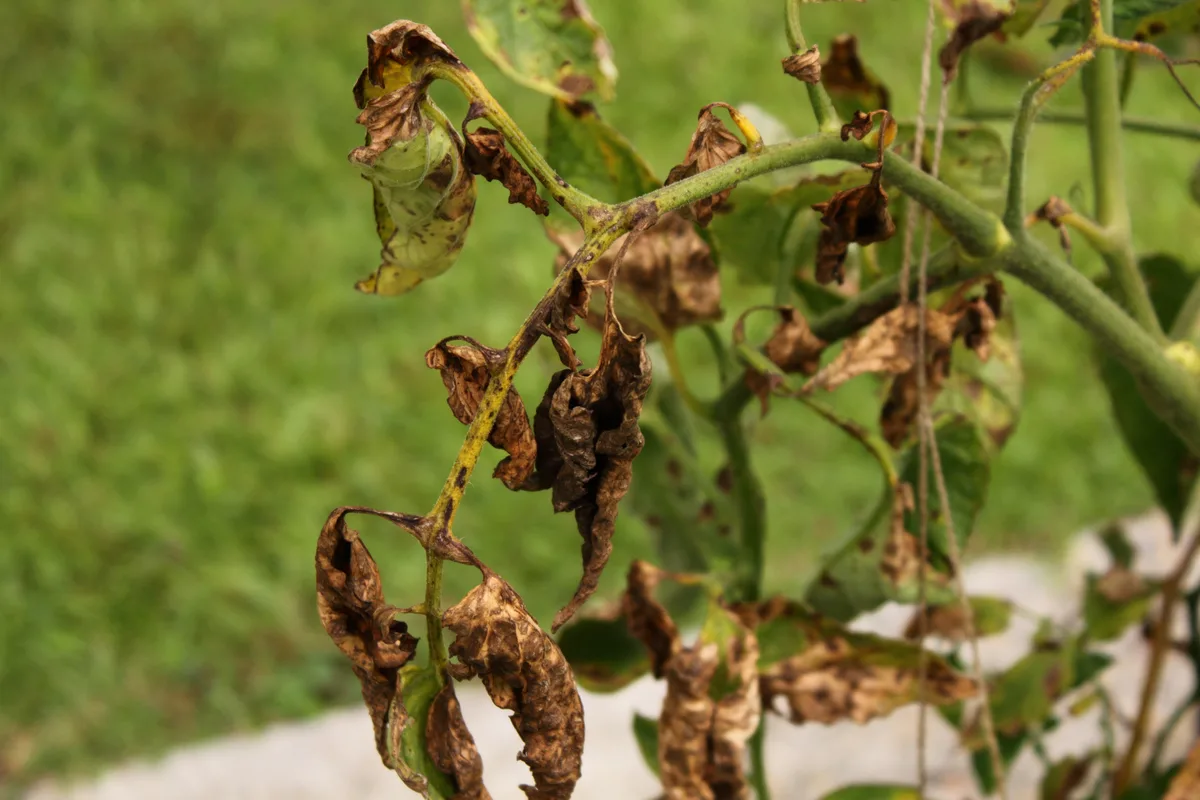
Preventing this disease is more imperative than most as there is no treatment for curing an outbreak.
As with Fusarium Wilt, Verticillium Wilt clogs up the plant’s cells and prevents water from moving through the plant, effectively killing it off. It spreads a toxin that causes leaves to wilt and form spots.
Infected plants will be stunted and underdeveloped. Yellow spots can appear on the lower leaves, ultimately turning brown and falling off the stems. The infection moves up the stems in a V-shape.
Remove infected plants and destroy them. Use good tomato growing practices and regular bio-fungicide preventative treatments to avoid the disease.
17. Powdery Mildew
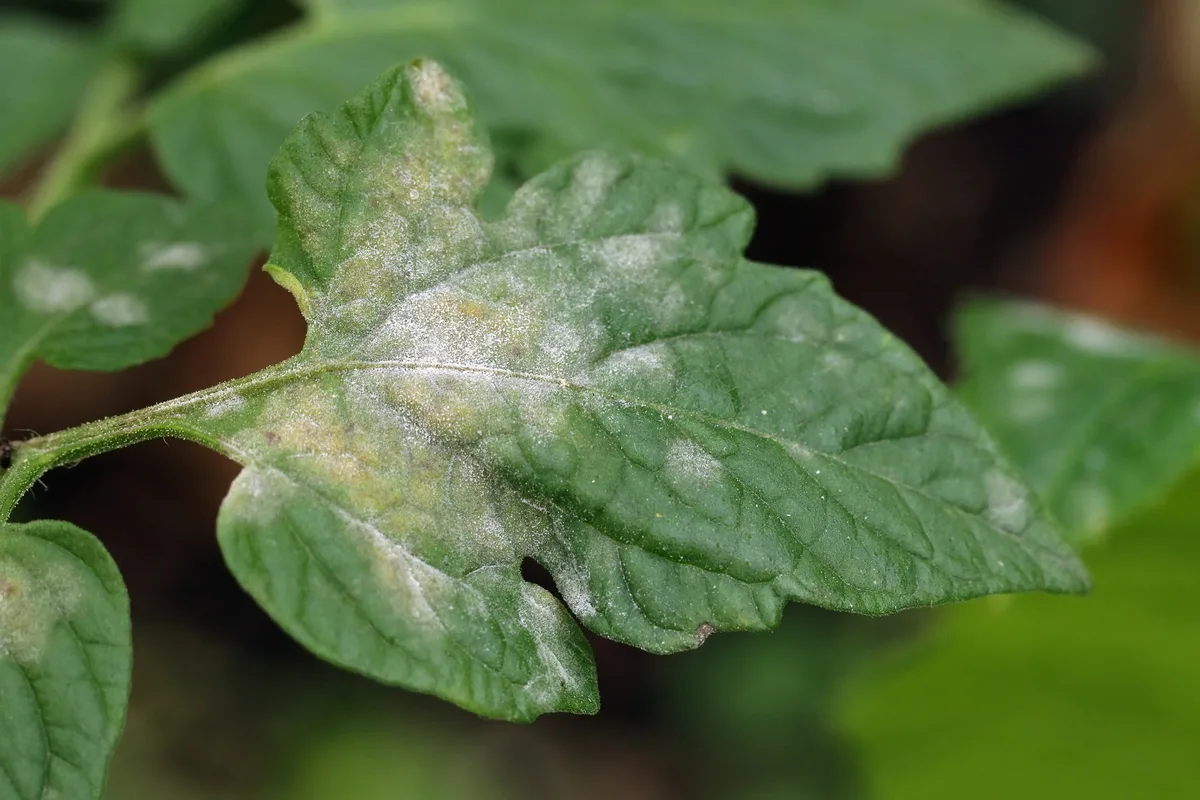
Powdery mildew is easy to identify on tomatoes by the white powdery substance that forms on the leaves. The fungus causing powdery mildew feeds on the cells, causing leaves and stems to yellow but remain on the plant covered in white mildew.
This disease is more prevalent in hot humid weather, especially in wet conditions or when the leaves are watered overhead.
Treatment with neem oil or a fungicide specifically formulated for this particular disease.
Avoid further infections by maintaining airflow between plants, watering the soil (not the leaves), fertilizing regularly, and removing any infected plants immediately.
18. Cutworms
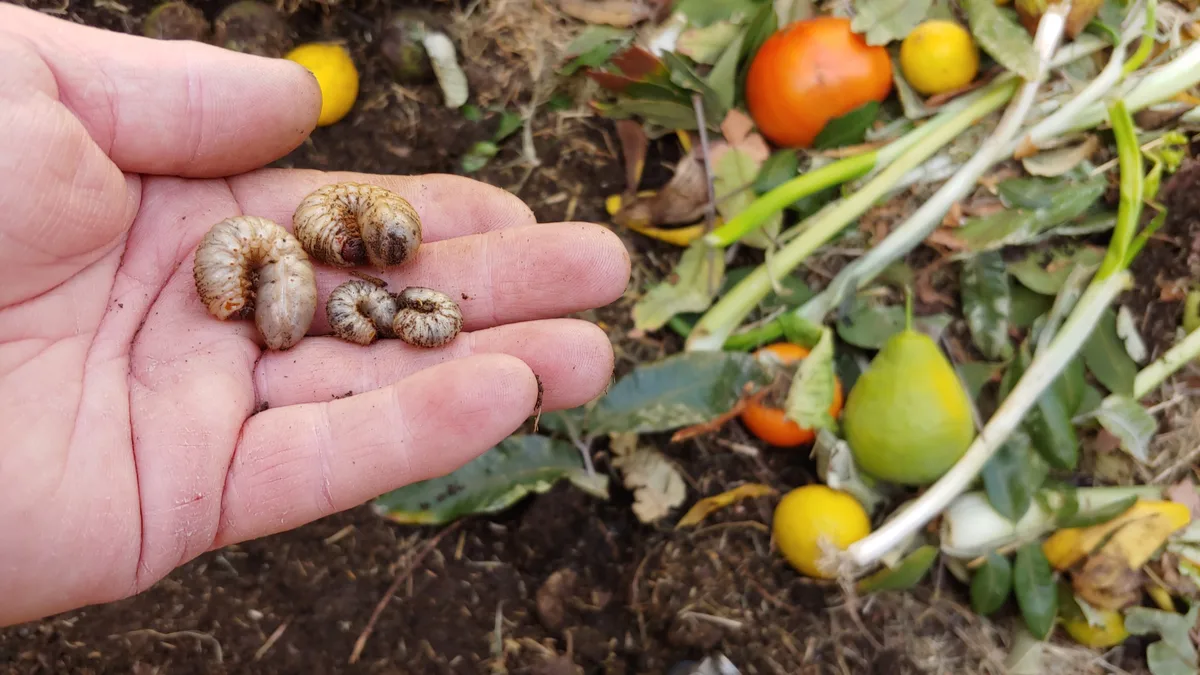
Cutworms are a menace in the garden and can destroy your tomato crop overnight. They feast on stems near the ground and come out at night to do their worst.
Hunt for them at night with a torch and drop them into a bucket of soapy water to kill them. Alternatively, a simple preventative measure for cutworms to stop them from getting to your plants is to make a collar around the stem at ground level.
This protects the stems of new plants by covering with cardboard, paper or foil so that cutworms can’t get to them.
Cutworms can also be a huge problem for cucumbers as well.
19. Aphids
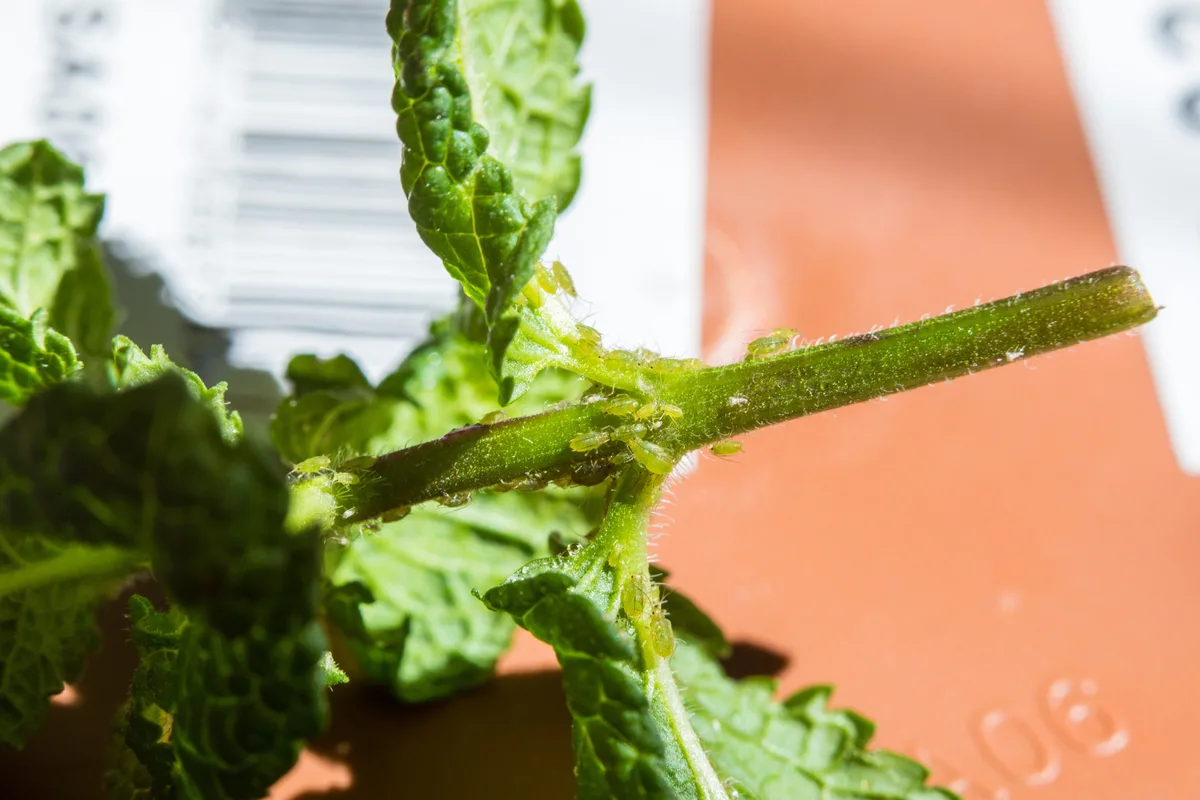
Aphids form large colonies and can usually be found on new growth, flowers and leaves. They suck the sap of plants, causing damaged flowers and deformed foliage. Plus, they are known to attract other plant diseases.
Aphids are fairly easy to control with a natural homemade insecticide, or by introducing predatory insects like ladybugs into the garden.
20. Red Spider Mites
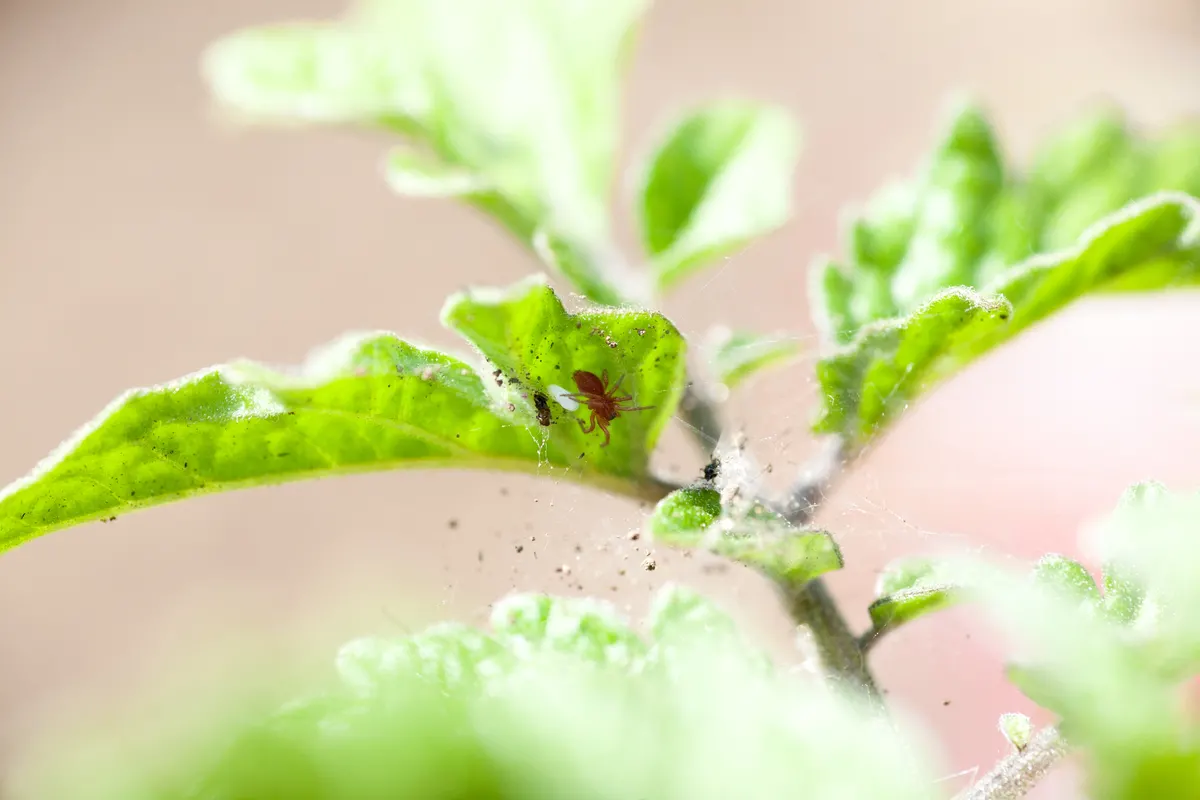
Red spider mites breed and spread rapidly, are difficult to detect, and require perseverance and persistence to control once they have established themselves.
Look out for tell-tale signs of infestation – discoloration of the upper leaf surface, lack of new growth, and plants looking dull and lackluster. Tiny specks of dust and other debris also appear on the leaves.
Spray the underside of the leaves with a miticide. More than a single application is usually needed to control these pests.
21. Whiteflies
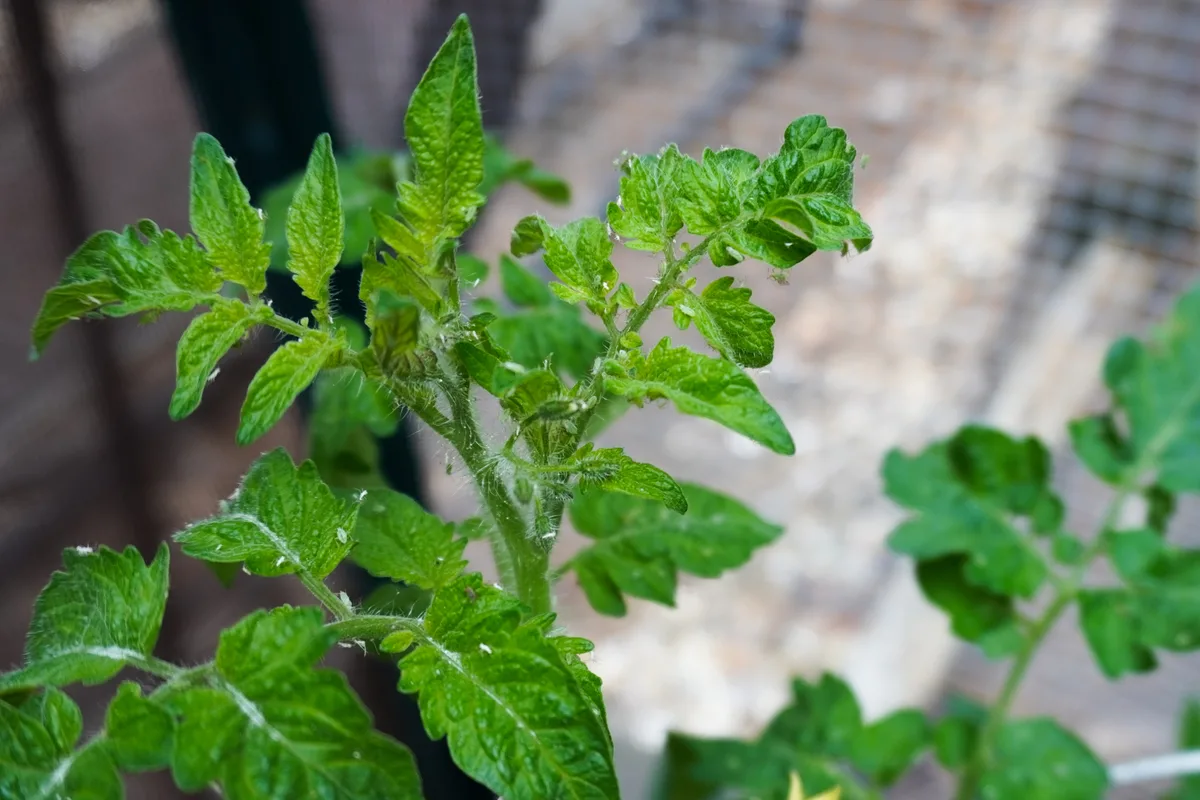
These tiny creatures suck on plant juices and produce a substance known as honeydew. Left untreated, the honeydew can cause fungal diseases. But more than that, whiteflies will cause the leaves to wilt, turn pale or yellow, and stunt the growth of the plant.
They are small, requiring regular checking on the undersides of leaves for sticky honeydew to spot them. You may also be able to see them fly off as a group.
Check for eggs on the undersides of the leaves too. The adult females can lay up to 400 eggs in a circular pattern that hatch in between a week and a month. If left untouched, these will hatch and immediately feed on your plants.
For a natural remedy, dust the leaves with yellow sulfur powder. To make application easier, place the sulfur in a tin with holes in the bottom and shake it over the plant once a week. A small amount of sulfur can also be sprinkled around the stem of the plant to deter whiteflies.
Alternatively, use a commercial pesticide specifically for whiteflies as directed on the packaging. Stick to organic pesticides when dealing with food crops.
22. Tomato Hornworm
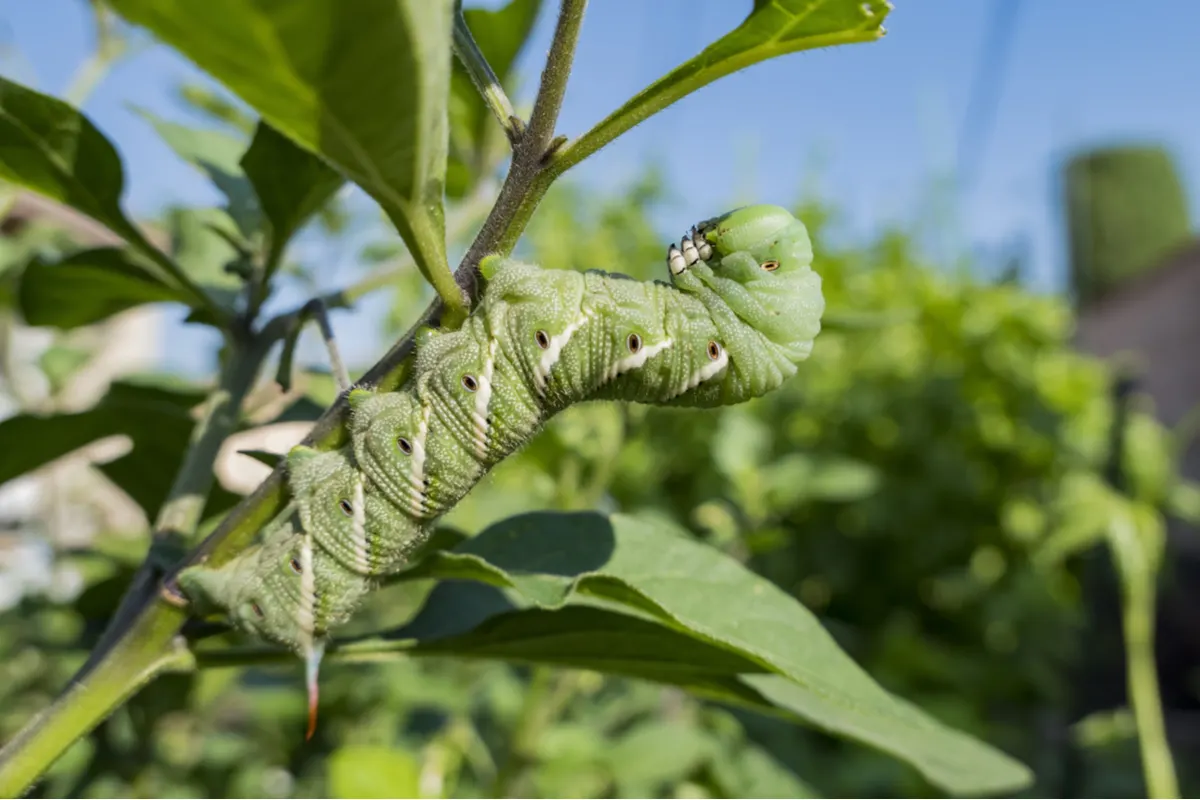
Tomato hornworms are green caterpillar-looking worms with V-shaped white markings that feast on tomato leaves and green tomatoes.
They attach to the underside of leaves, making them hard to see initially, but they will soon make themselves known by destroying the entire plant in a few days.
Hornworms keep to the shade in the day and come out at night to feast. You may need a flashlight to find and remove the worms.
23. American Bollworm
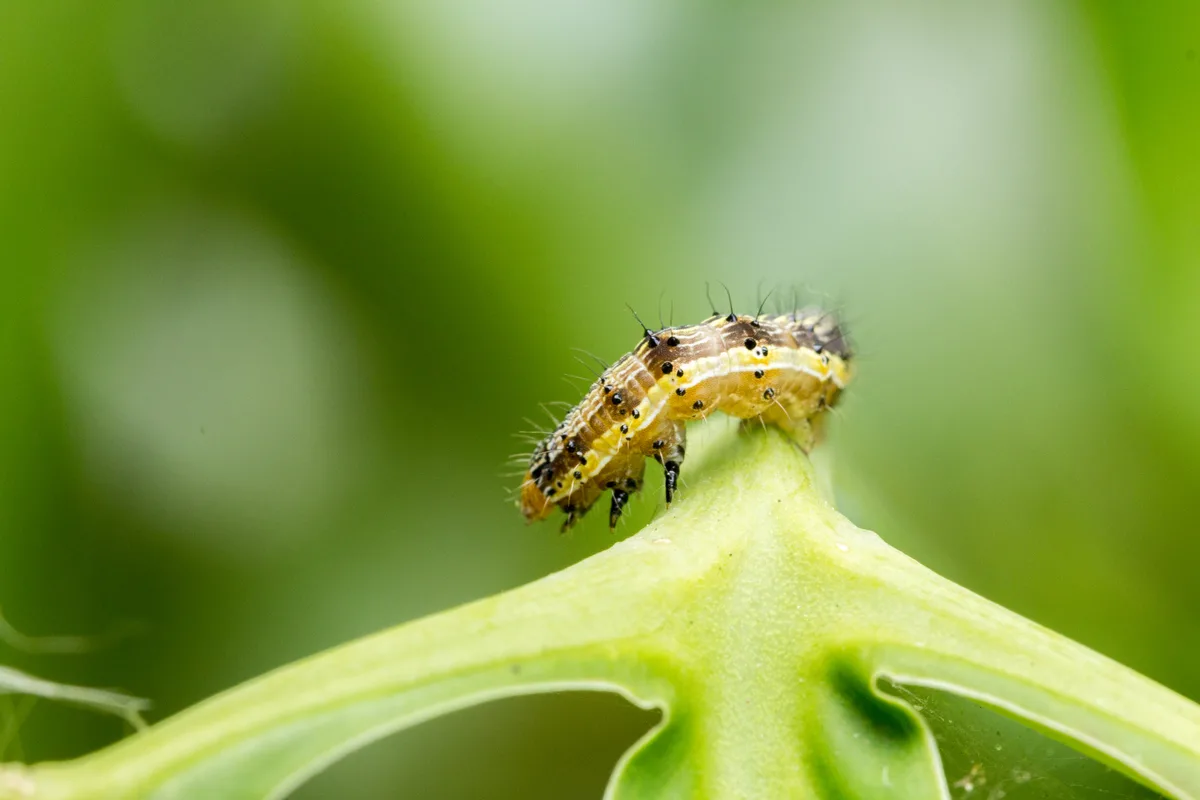
These pests are some of the most destructive as the larvae burrow into the fruit, causing it to rot from the inside.
Look out for holes in the fruit and inspect plants for young caterpillars and remove them. Once the worms have penetrated the fruit, there is not much that can be done. That’s why prevention through regular checking and good care is key.
24. Nematodes
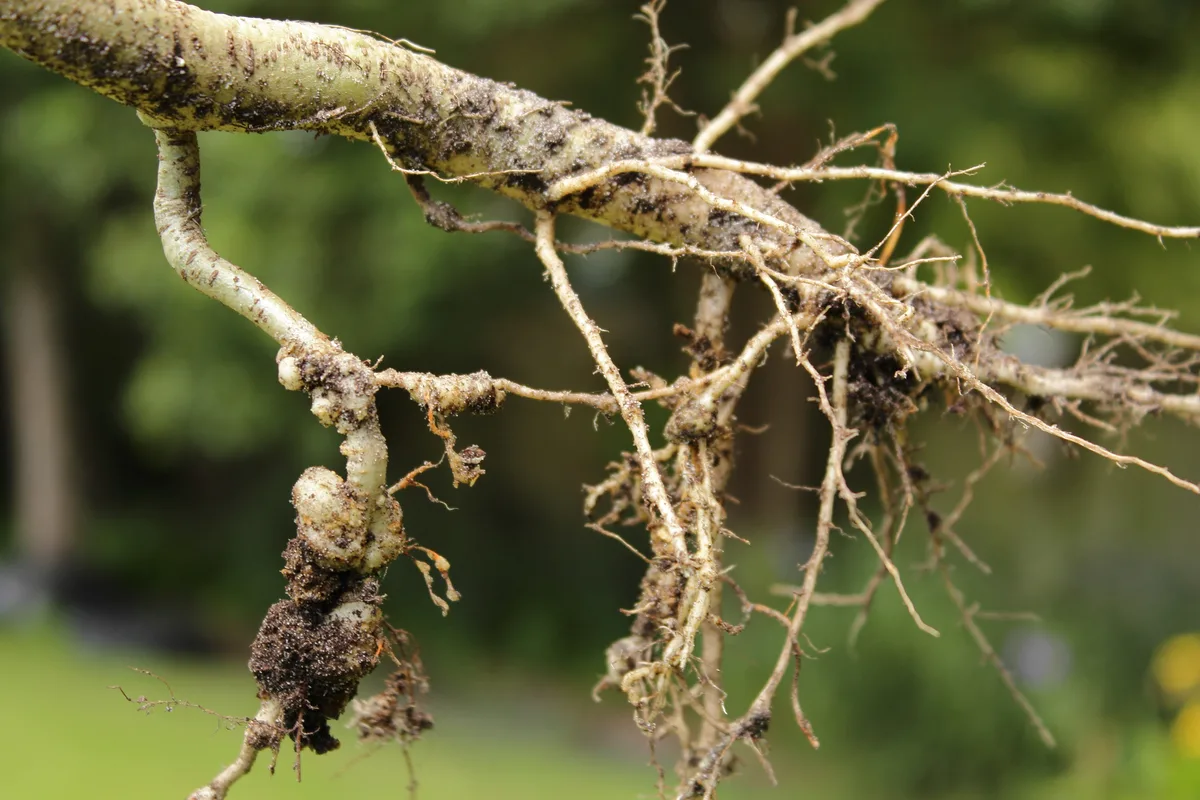
Nematodes or ‘eel worms’ can cause extensive damage to the roots of tomatoes, preventing them from efficiently absorbing moisture and nutrients from the soil and resulting in a poor crop.
Yellowing plants, stunted growth and general decline are some of the early symptoms related to nematodes. However, these symptoms are not fool-proof and may show only in a few tomato plants. To identify this problem, dig up a weak plant and check the roots for knobbly growths.
You can leave the plants in the ground and supplement water and feeding to get you through the season, or dig them all up and start again. You will not be able to grow tomatoes (or many other veggies) in this patch of soil as the parasites are quick to latch onto something else.
Practice crop rotation to prevent a build-up of this pest in the soil. The soil can also be sterilized several weeks prior to planting. After discovering nematodes, plant a nematode-resistant variety next time to improve your chances of a good crop.
It may seem like tomatoes suffer from a lot problems, including many fungal diseases and pest issues. But, they are worth the effort if you give them the right care and employ preventative measures. The reward of picking the perfect tomato, homegrown and healthy, is one to work for.

Get the famous Rural Sprout newsletter delivered to your inbox.
Including Sunday musings from our editor, Tracey, as well as “What’s Up Wednesday” our roundup of what’s in season and new article updates and alerts.

