


I knew it was the right time to write about irises when someone in a local group posted a wheelbarrow full of them with the message:
Hi, I’m lifting bearded irises. They’re free, just take them! Mauve and purple varieties.
A couple of people replied to make arrangements to pick then up; but there were also a few replies along the lines of:
Could you come and lift some of ours too, please? We have hundreds!
How could I not choose my next article topic based on this funny exchange?


I know that spring is not really the best season to lift and divide irises. This is a job that we usually do after the flowers are gone, usually in July, August or September if summer is too hot.
But since these poor gardeners were eager to get overcrowded irises off their hands, their purpose justifies their rush.
There are a few other spring jobs we can put on our gardening calendar now, while we wait for the right time to lift irises.
1. Clean up the foliage.
A good spring refresh always starts with a cleanup, and irises are no exception.


Although I’m a staunch advocate of leaving plants undisturbed over the winter months, I’ve put bearded irises on my list of plants that we DO need to prune in the fall.
But if you haven’t had time for it last year, now’s the time to cut down the dead leaves. If the foliage has frozen over the winter, it probably looks like a slimy and mushy mess anyway.
However, even if you’ve already cleaned up your irises after last year’s bloom, you should still give it a once over now. Remove brown foliage from as low to the rhizome as you can.

Then make sure to remove any leaves affected by leaf spot. This is a common fungus (Didymellina macrospora) that affects iris foliage, and it’s especially common in gardening zones with wet winters.
2. Do some proactive slug control.
Slugs have been the bane of my gardening existence for the past three years. And with temperatures not dropping low enough to kill their eggs over the winter months, slugs are now becoming active right when irises resume their growth in the spring.
Unfortunately, slugs also find young iris leaves an absolute delicacy.
Now that we’ve removed the debris around the rhizomes, we have to inspect them closer for slug eggs. They look like a collection of tiny marbles. Yes, they’re cute. Yes, they’ll wreck havoc on our gardens. Get rid of them.

As a precaution, we can also set up some homemade traps to catch the slugs that have already hatched. My colleague Tracey explains how to use a slug beer trap to get rid of these pests.
3. Inspect for iris borer damage.
The dreaded iris borer (Macronoctua onusta) is a moth.
In its caterpillar stage – peachy-pink and about two inches long – it will chew through the leaves of the iris all the way down to the rhizome.

And then it will continue to feed on the rhizome from the inside out. To add insult to injury, it will deposit its eggs under the foliage – right at the base of the iris plant – in the fall. Then it will resume the cycle of destruction in spring.
The iris borer is by far the most destructive insect that attacks irises, because it completely destroys them from within.
So what can we do in spring to protect our bearded irises from borers?
Look for signs of chewing damage on the leaves. That’s where the borers start. Then look for tiny (about an inch) pink-ish caterpillars. And if you can’t see any, inspect the leaves anyway for thin streaks that look soft and full of water. Remove and discard those leaves immediately.


If, at any point throughout the year, you notice holes in the rhizomes, dig those rhizomes up and dispose of them.
The University of Madison has more information on the life stages of the iris borer, just in case you want to be confident you’re catching the right pest.
4. Fertilize your irises for better bloom.
I have yet to meet someone who grows bearded irises for the foliage. Sure, the spear-like leaves are pretty, but what we’re really interested in are the flowers.
Irises need a bit of a boost after the winter months, so now is the time to feed them with an organic fertilizer that’s low in nitrogen.
A high-nitrogen feed translates into fewer flowers and extra leaves. So look for a solution where the first number on the packaging is lower than the following two. For example, a 6-10-10 organic fertilizer is perfect for encouraging healthy flowers. This low nitrogen iris food fulfils all the above criteria.

If you want to encourage healthy strong rhizomes, that will pay off in spades not just this blooming season, but for years to come, alfalfa pellets are an even better option.
Slow-release alfalfa pellets, such as these AlfaGrow Alfalfa Pellets, will act all throughout the summer without me needing to apply anything else at the height of the blooming season. Just make sure you sprinkle them around the rhizomes, not straight on them.
5. Apply a layer of mulch … maybe.
In most of my spring care guides for popular perennials, I’ll always recommend mulching in spring. It serves several purposes, in addition to keeping the moisture in the soil.
Mulching also helps protect the roots from temperature variations and, of course, prevents unwanted plants or grasses from growing around the irises.
However, I wouldn’t recommend mulching irises by default. Bearded irises, once they get established, are incredibly tolerant to drought. The thick rhizomes store both water and nutrients for emergency use in the future.

Sure, you can mulch them for aesthetic reasons, but keep in mind that heavy mulch may hold too much moisture around the rhizomes. This may even lead to a rot during a particularly wet season.
However (again), if your summers are dry and hot, mulching becomes a necessity. You can do it now, or wait until later in the spring.
So mulching irises is very much a case-by-case, zone-by-zone decision.
6. Do some (partial) lifting, if needed.
Remember how I mentioned that we usually wait until the flowers have faded in mid-summer to lift and divide irises?
I still stand by that recommendation. With one exception: if your irises didn’t bloom very well last year (either didn’t have any flowers or had fewer than usual) and you didn’t get a chance to divide them last year.

The main reason why irises fail to bloom is because they’re overcrowded. And the only way to fix that is by lifting them out of the ground, dividing them, and redistributing them so that you have fewer rhizomes in the clump.
We usually have to do this every three to five years, depending on how quickly the irises are crowding up.
I wrote an entire guide on how to lift and divide irises.
Here is the gist of lifting irises.
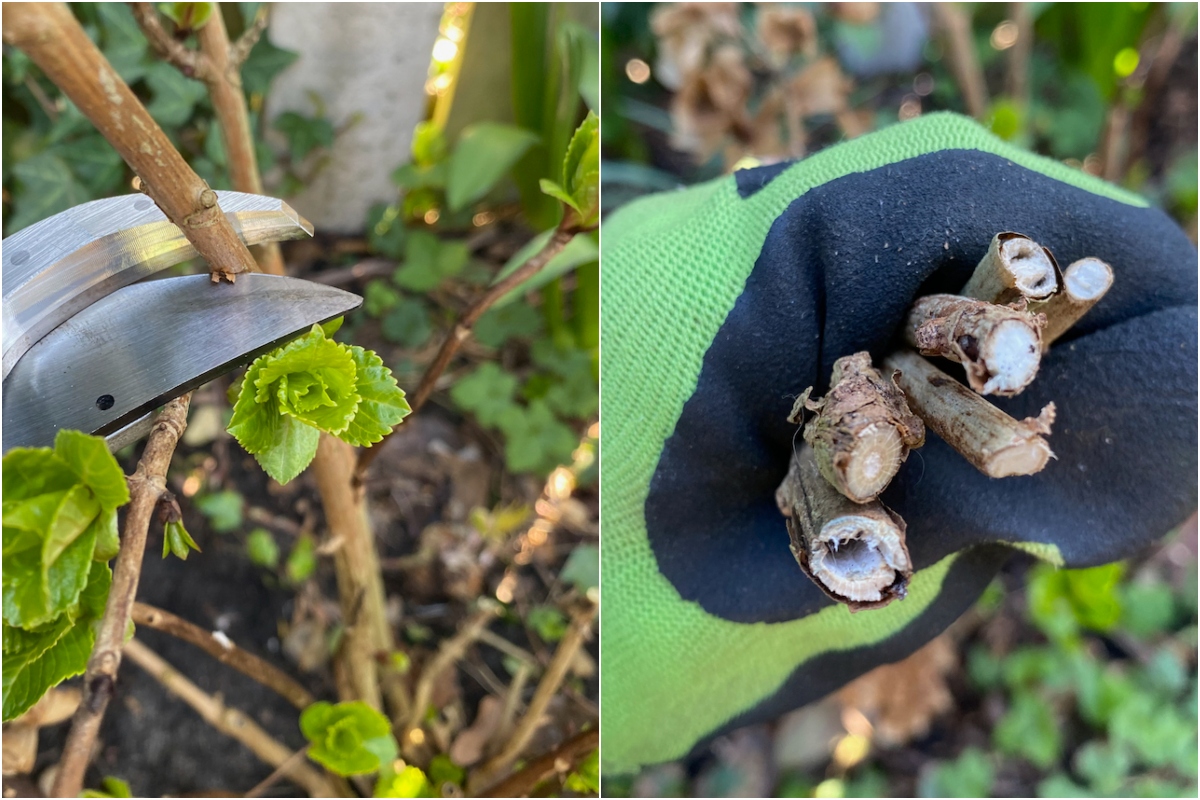
Start by digging a trench around the overcrowded rhizome clump. Then lift up the entire clump using a shovel or hand trowel. Be super careful here not to pierce or score the rhizomes. But if you find any rhizomes that look like they’ve been damaged or have rotted, definitely cut them off and discard them now.

For the rest of the clump, identify the sections that are already growing separately or that have already split and started growing in a different direction. This is where we need to make the cut.
Every section we’re separating needs to have at least a set of leaves (called a leaf fan) and healthy roots. You can then replant each section, grouping a few together.
Or you can share them with your neighbors. A whole wheelbarrow’s worth of irises is just what someone might need to get them started on their gardening journey.
Read Next:


Get the famous Rural Sprout newsletter delivered to your inbox.
Including Sunday musings from our editor, Tracey, as well as “What’s Up Wednesday” our roundup of what’s in season and new article updates and alerts.