


Don’t you just love a salad made with lettuce straight from the garden?
But planting lettuce is another matter.
Those tiny seeds are so fussy – they’re hard to pick up one at a time, it’s tough to get them in the dirt where you want them, and then you can’t see where they landed.
Of course, there’s always pelleted seed or seed tape, but the selection is limited, and it’s always more expensive than a plain packet of seeds.
How about we learn how to make seed tape at home on the cheap, instead.
If you’ve got your seeds, you also have everything you need on hand already. (Probably)
What Is Seed Tape?
Seed tape is thin paper with single seeds glued to it at the correct interval for planting. For instance, if the plant spacing directions are one seed every three inches, that’s the spacing used on the seed tape. Once planted and the soil watered, whatever glue has been used breaks down, allowing the seed to germinate. The paper breaks down in the soil as well.
You simply rip off the length you need for your row or square and lay the tape on the dirt. Then lightly cover it with enough soil to ensure the seeds are sown at the proper depth.
It’s very handy when dealing with tiny seeds like lettuce, carrots, radishes and onions.
What Are the Advantages of Using Seed Tape?
When sowing small seeds, it’s often suggested on the packet to sprinkle the seeds and then thin them out once they have sprouted. By using seed tape, you cut down on seed waste by only planting what you need.
Not to mention using seed tape is far less frustrating than squinting at the dirt trying to see where the tiny seeds landed. You can be sure your seeds are planted the correct distance apart.
Why Should I Make Seed Tape?
The best reason for making your own seed tape is variety. Sure, most seed catalogs will offer seed tape or pelleted seeds, but they usually only offer one variety per vegetable. You end up having to choose convenience over flavor, and who wants to do that when growing their own food?
And some types of seeds you may struggle with may not be offered as seed tape or pelleted. Making your own means you get to plant exactly what you want.
The other great reason to make your own seed tape is that it costs next to nothing to do, and commercially produced seed tapes and pelleted seeds are often more expensive than a simple packet of seed. Granted, it’s only by a few dollars, but if you’re looking to save money, this is an easy way to do it.
Do you have an older gardener in your family or circle of friends? Someone who struggles with mobility issues or arthritis in their hands? Make up some seed tap for them this growing season. They’ll be tickled pink by your thoughtfulness. It’s a great gift any gardener would love.
Which Seeds Work Best for Seed Tape?
Anything on the smaller side that you would direct-sow in rows or squares is a prime candidate for seed tape.
The most popular seeds are:
- lettuces
- radish
- onions
- leeks
- carrots
- arugula
- turnips
- kale
- bok choy
- Swiss chard
Let’s Make Some Seed Tape

We will make a paste of water and flour, much like paper mâché. And the paper of choice is toilet paper; it’s easy to come by and breaks down in the soil the quickest. You can also use paper towels or cheap paper napkins, but toilet paper is the best option as it breaks down quickly by design.
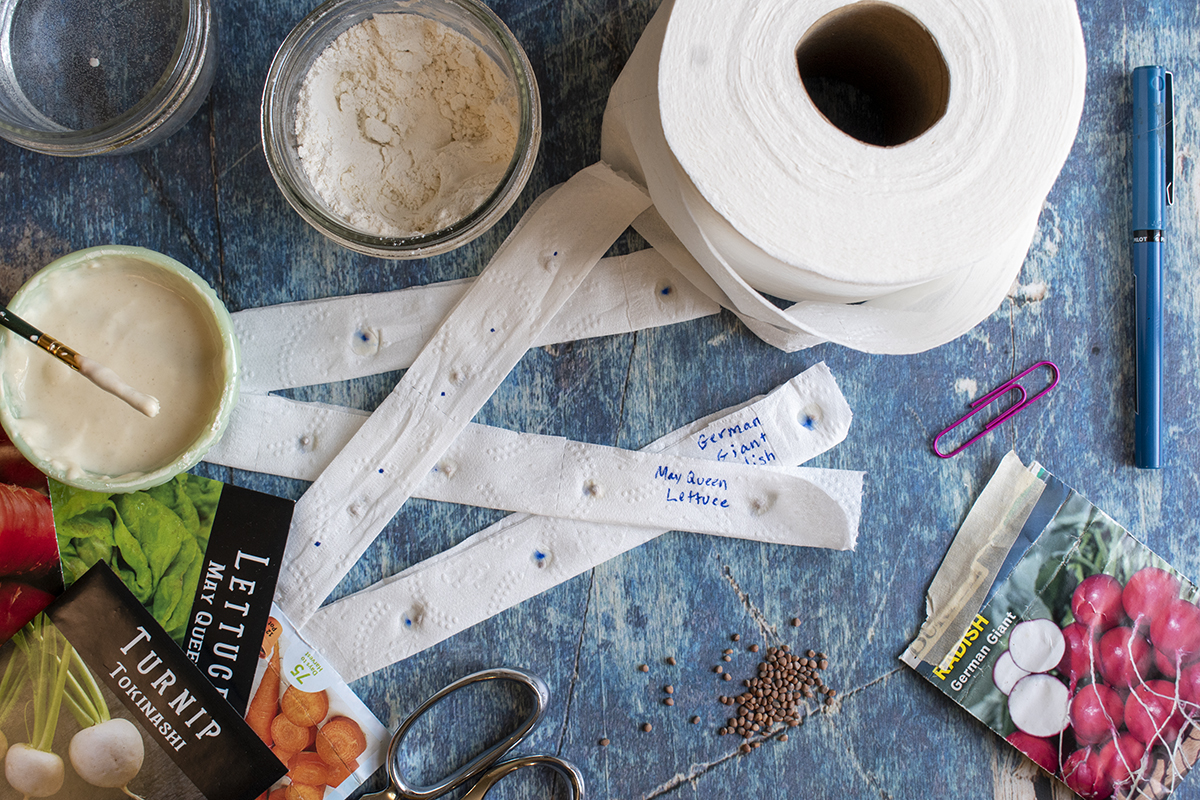
Materials:
- Seeds of your choice
- Water
- White flour
- Toilet paper – the cheaper, the better
- Small paintbrush or cotton bud
- Scissors
- Small cup
- Pen
- Ruler (optional)
To avoid confusion, work with one packet of seeds at a time. Because you’ll be working with tiny seeds, it’s best to do this in a well-lit location.
Preparing the Toilet Paper


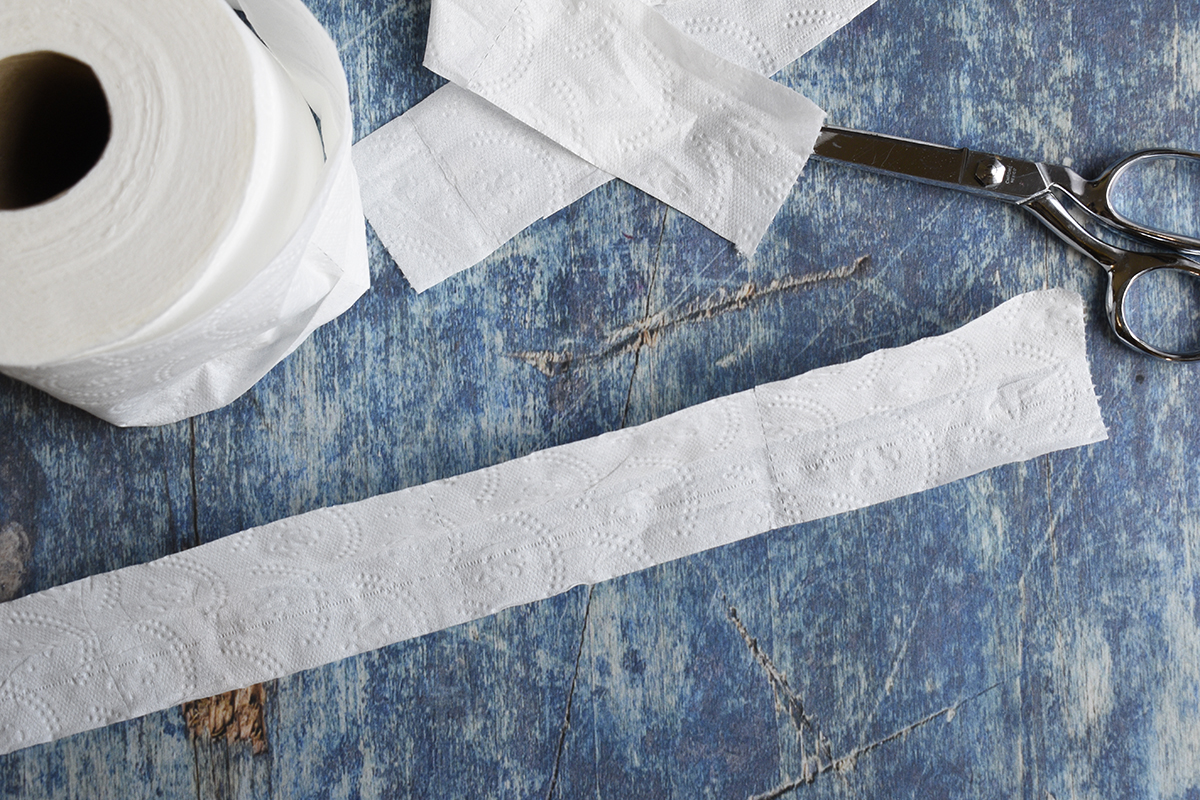
I like to cut the toilet paper 2” wide; this width makes folding the paper in half lengthwise easier later on. Cut a length of toilet paper as long or as short as you like. I find it best to do either one-foot-long or one-yard-long lengths. It all depends on my garden layout and whether I’m planting this particular vegetable in rows or 1’x1’ squares. Consult your garden plan and figure out what will work best for you.
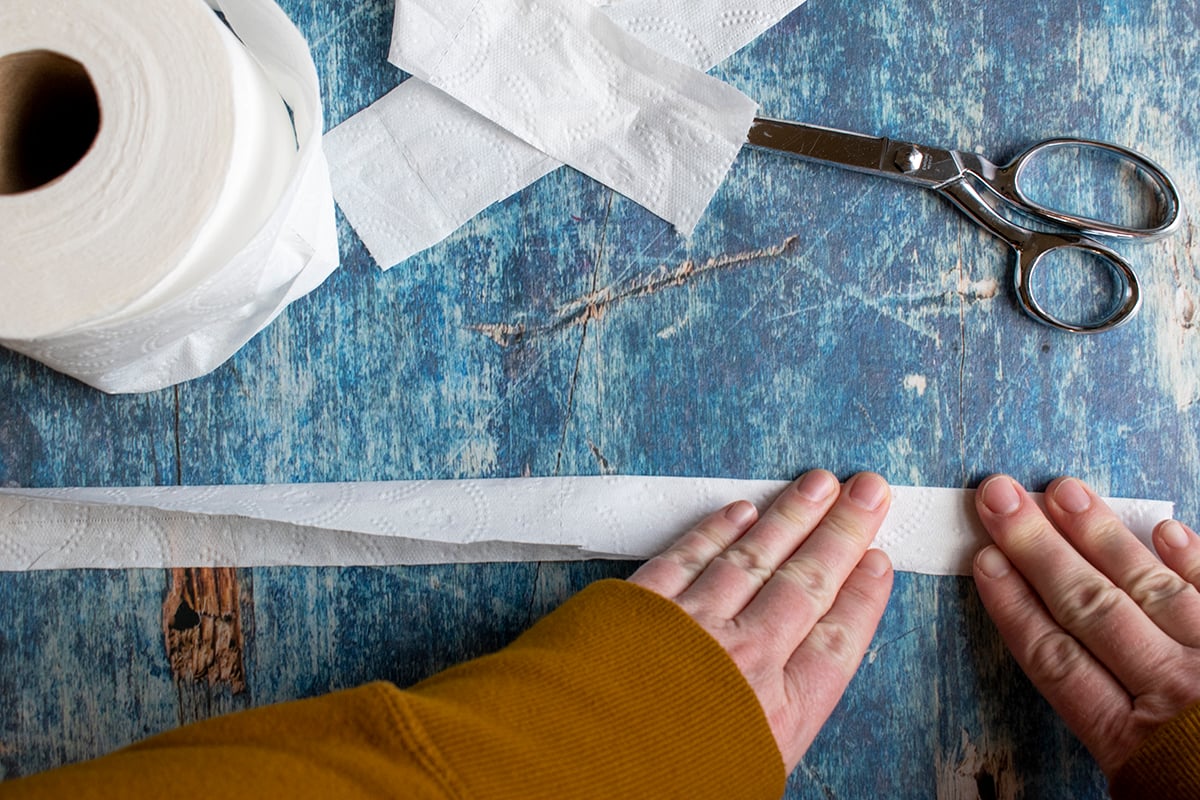

Fold your lengths of toilet paper in half lengthwise and press the crease down firmly but carefully, so you don’t tear the paper. Open the strips back up.

Measure and Mark
Check the back of the seed packet for the recommended plant spacing. You don’t always have to follow this; if you use the square foot gardening method, you’ll want to use the recommended plant spacing for that type of gardening.
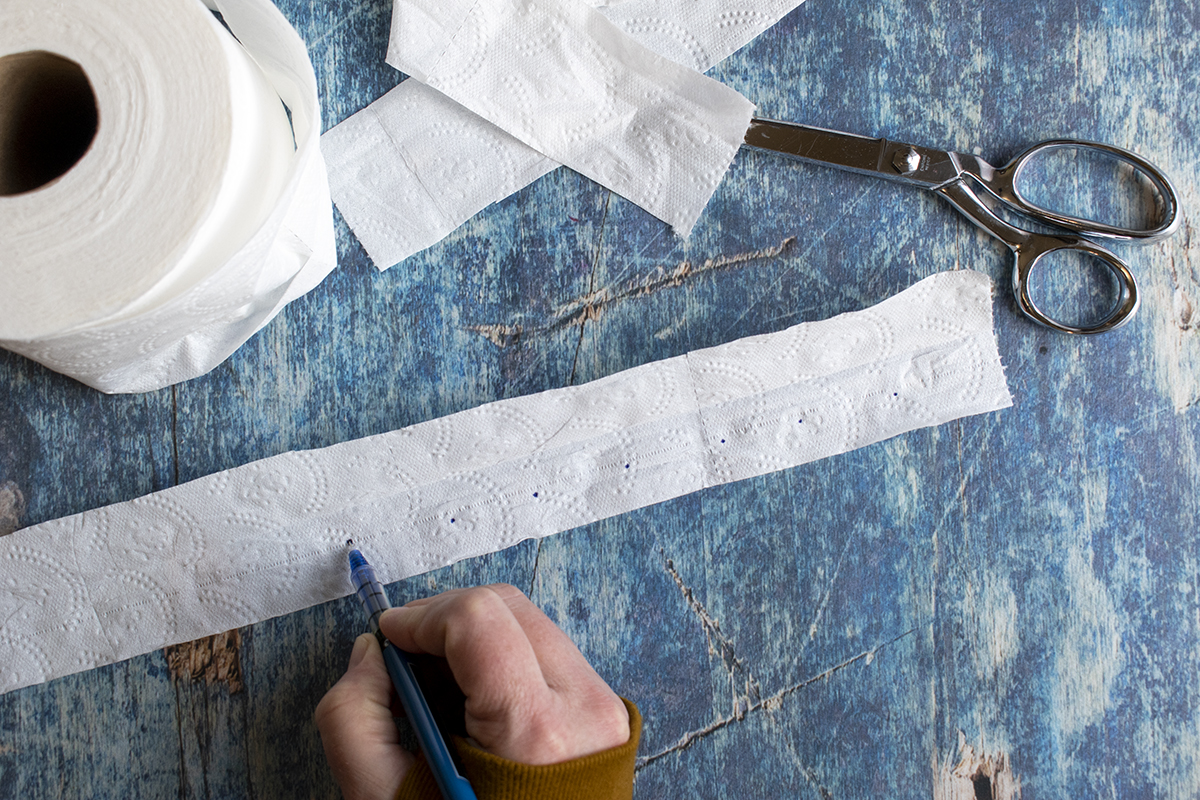

Using a ruler, or you can eyeball it, mark dots on the length of toilet paper where each seed should be placed. You’ll want to place them in the middle of one side of the strip of paper, so that once it’s folded back on itself, the seeds will be centered in the seed tape lengthwise.
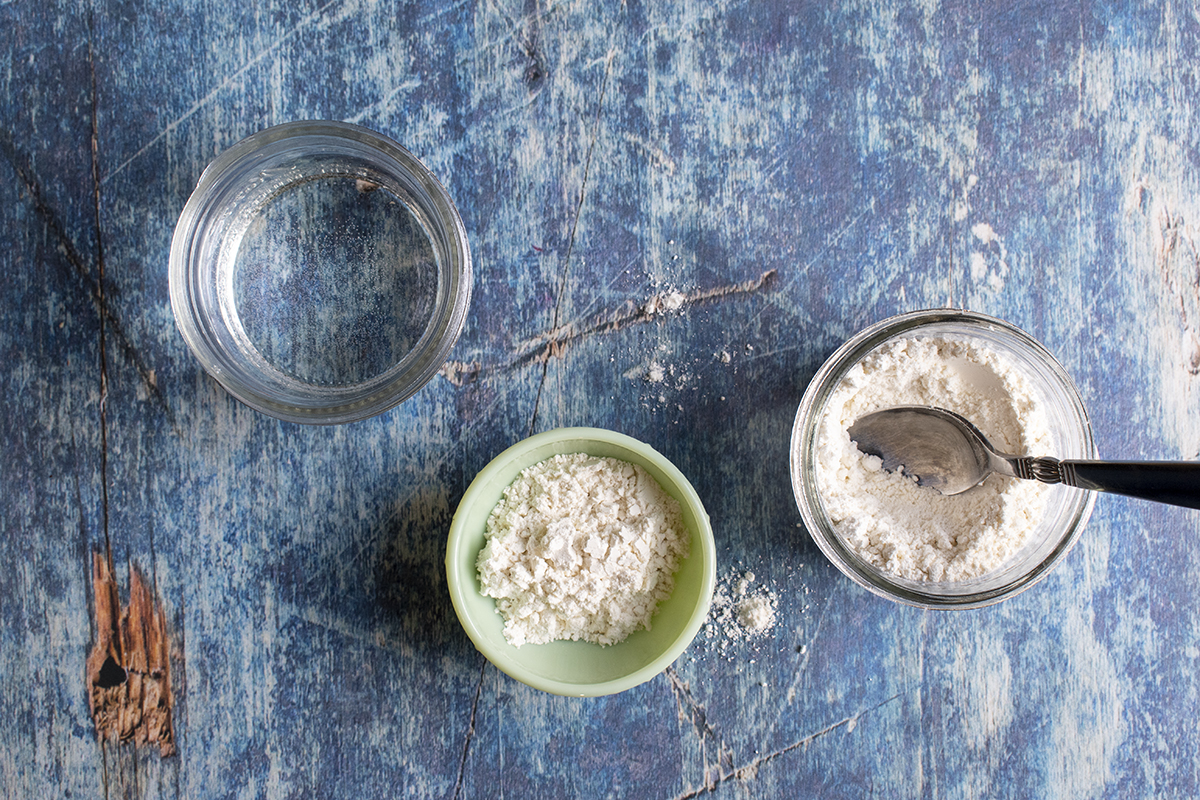
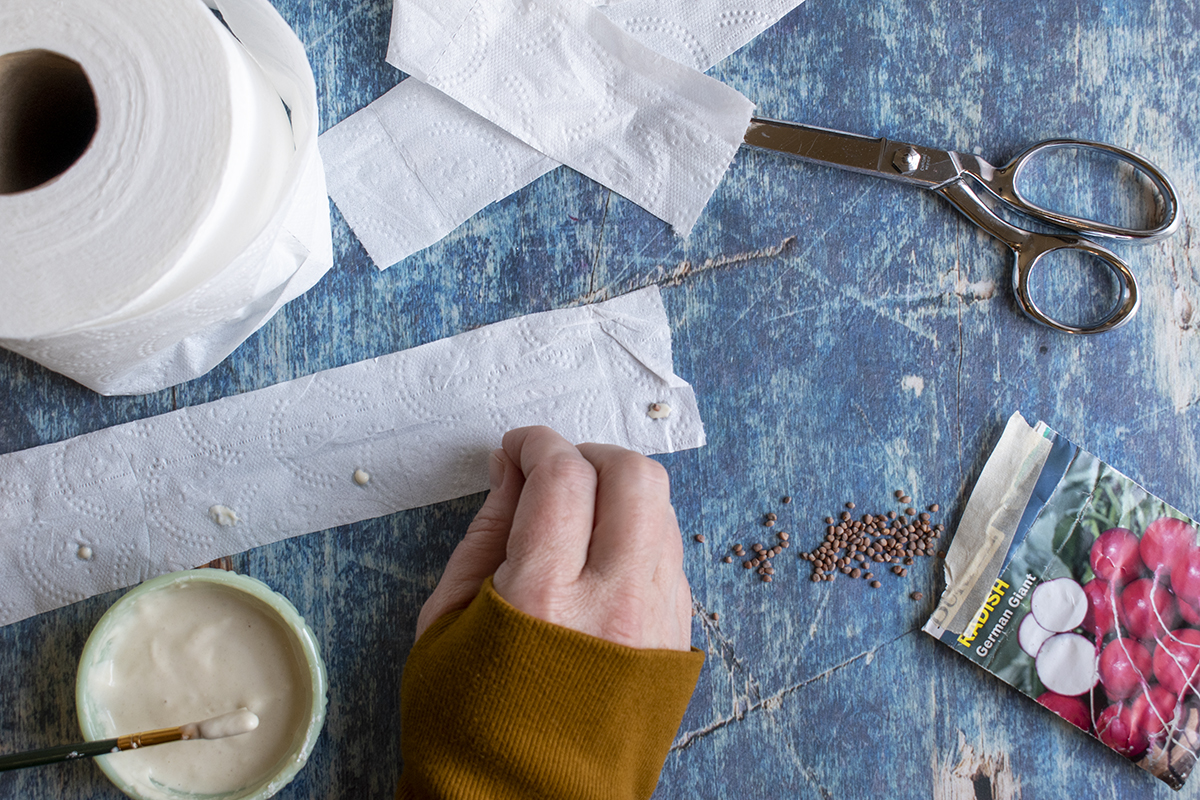
Mix Your Paste and Glue the Seeds
Mix equal amounts of flour and water in the cup – a tablespoon of each works well to start. You don’t need a lot of the paste mixture.
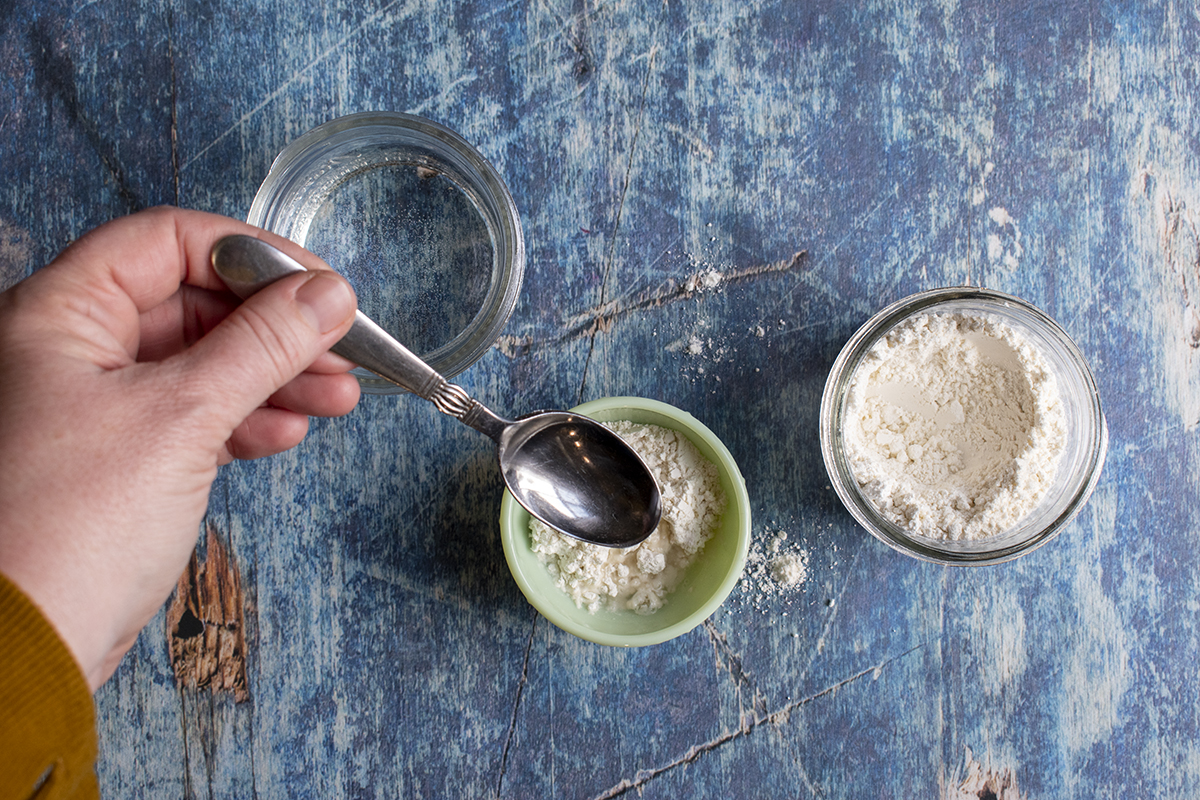

Stir until a paste is formed about the consistency of school glue. It shouldn’t be runny. Dip the paintbrush in it; the paste shouldn’t drip off the paintbrush. Add more water or flour as necessary to get the right consistency.
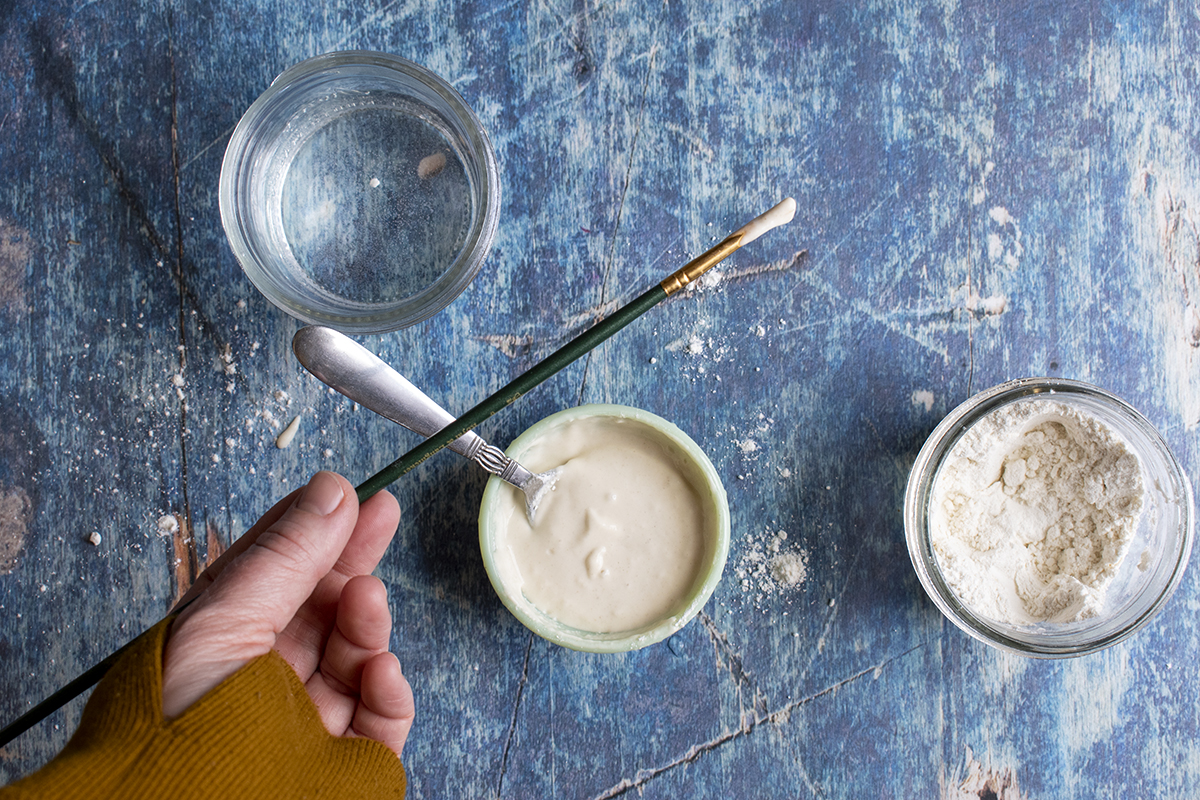

Pour your seeds out onto a paper towel or a plate, so they are easy to spread out and pick up individually.
Dab a small dot of glue onto each pen mark on the paper; you want to aim for the size of the top of a pencil eraser.
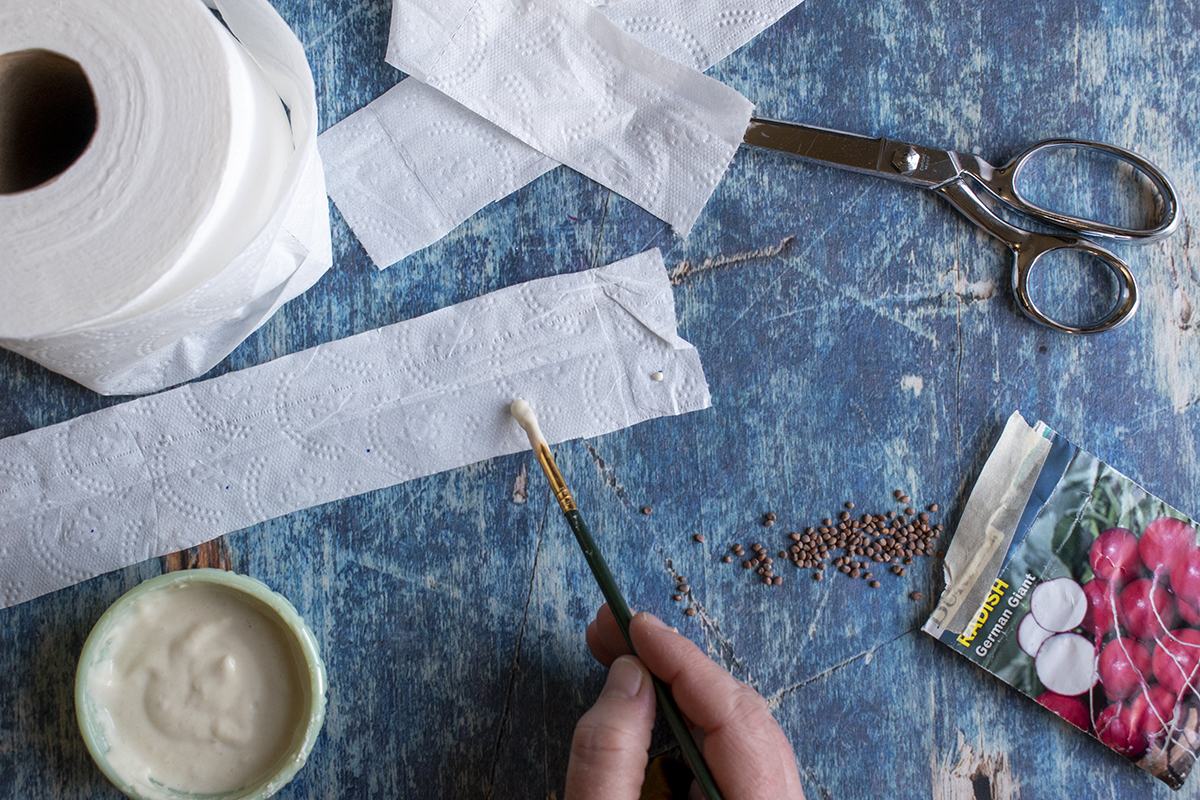

Now drop a single seed onto each dot. Once you’ve filled the length of seed tape, fold the paper back over onto itself and gently press each glue dot.
Let the glue dry completely before storing your seed tape away.


Don’t Forget the Label
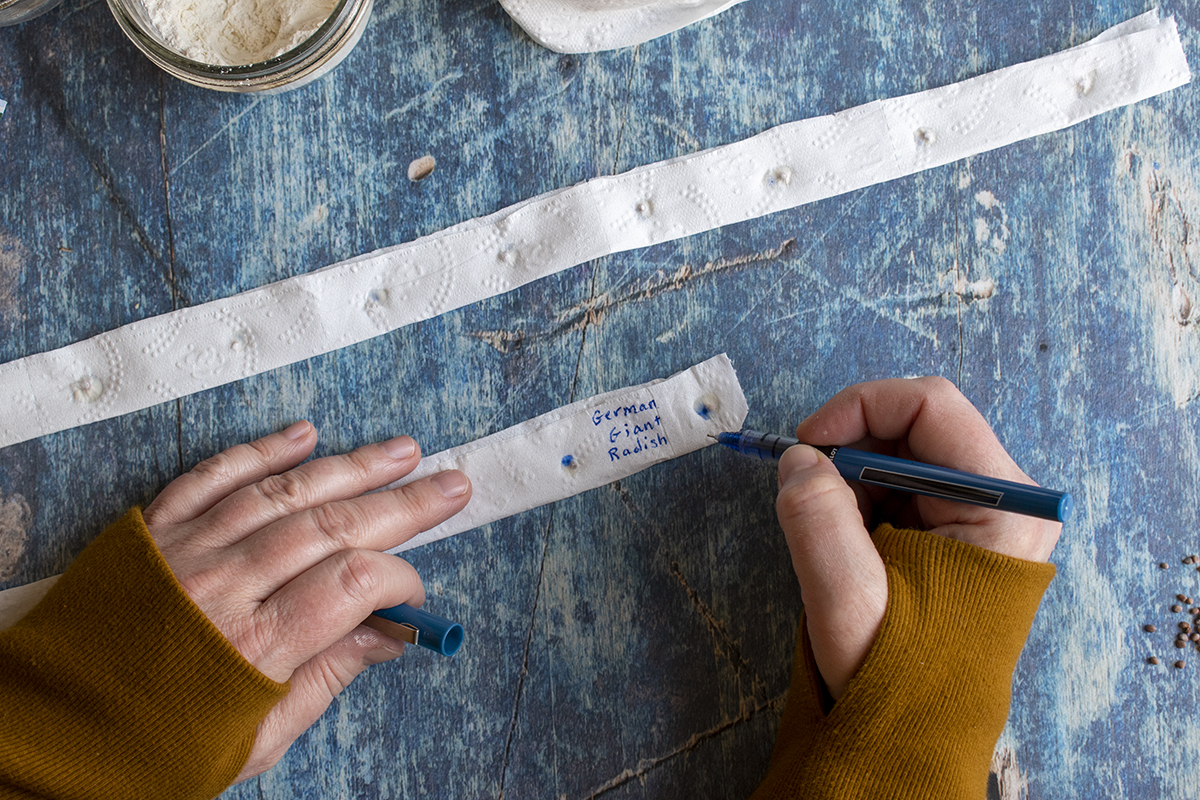

Now that you’ve gone to all this trouble to make your beautiful seed tape don’t forget to label it with the seed type, planting depth or other important information.
And when you’re planting, make sure you use the end that’s labeled last otherwise, you’ll be left with a random roll of seed tape wondering what it is. Ask me how I know.
How to Store Your Homemade Seed Tape
The easiest way to store seed tape is to roll it up on an empty paper towel or toilet paper tube. You can clip it in place with a paper clip or slip a thin rubber band over it to hold it in place.
Be sure you don’t get your seed tape wet and store it somewhere dark, cool and dry. It’s best to store it in an airtight container. I keep all of my seeds in these plastic ammo cans with a packet of desiccant. (These ammo cans are the perfect shape and size for seed packets, plus I like the irony of storing seeds in something meant to store bullets.)


Another simple way to store seed tape, which also makes labeling unnecessary, is to wrap the seed tape around the empty seed packet gently. This way, you still have all the information you need for those seeds, and your tape is stored neatly.
How to Plant Your Homemade Seed Tape
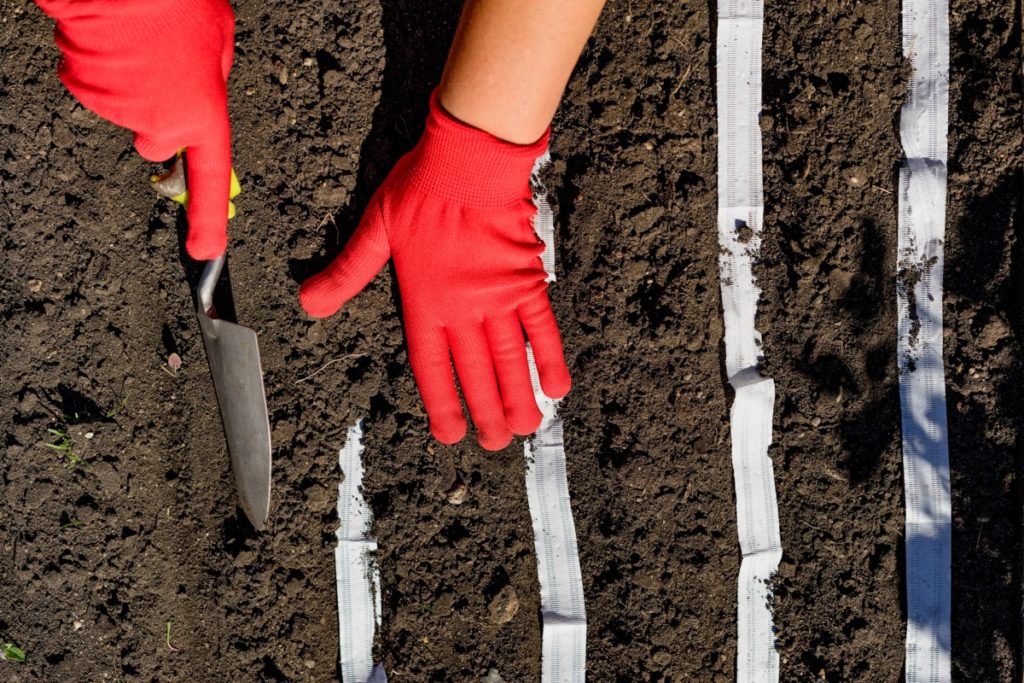

When it’s time to plant, simply rip off enough tape to plant in your row or square and lay them out on top of the soil. Again, make sure you either use the end that isn’t labeled or relabel the tape after cutting off what you need.
You just need to cover the tape with the correct amount of soil to ensure the proper planting depth for those particular seeds. Label, water, and wait! It’s as simple as that.
Making seed tape is a great rainy spring day activity. And once you’ve used it in your garden for a season, you may find it becomes an annual tradition.
Using seed tape does make planting certain types of vegetables much easier. And when you can make it at home for pennies on the dollar, why wouldn’t you?
If you want even more great tools to make your gardening jobs easier check out – 12 Best Gardening Tools That Most Gardeners Overlook

Get the famous Rural Sprout newsletter delivered to your inbox.
Including Sunday musings from our editor, Tracey, as well as “What’s Up Wednesday” our roundup of what’s in season and new article updates and alerts.