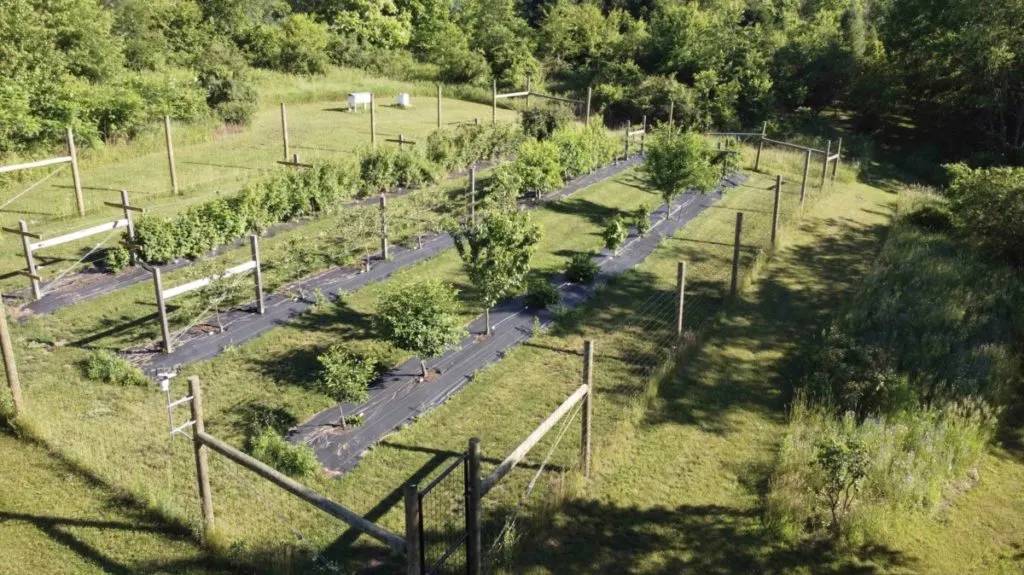
We always dreamed of establishing an orchard at Pencil Creek, our little farm in southcentral Pennsylvania, but for more than ten years, other projects took priority.
It wasn’t until we finished building the Superbarn, the home we plan to age into, that our orchard finally came into focus.
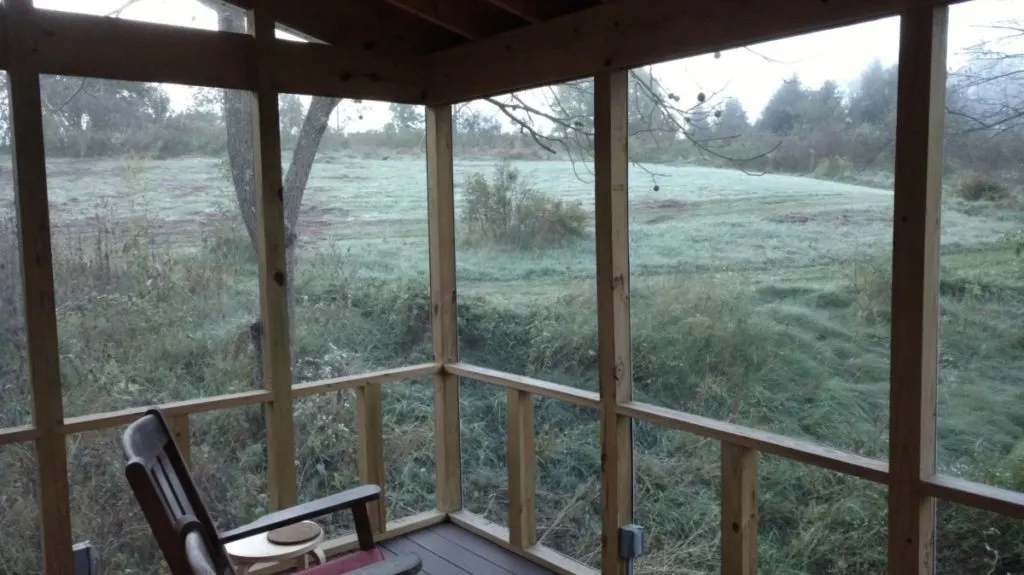
My wife Shana and I were out on the porch watching a summer storm sweep across Blue Mountain. The air was electric. Toads were trilling. A green heron was stalking our little pond.
It was perfect.
Except it wasn’t, quite.
“Something’s missing,” I said.
“What could possibly be missing?” Shana asked.
I pointed at the scrubby hill to the left.
“Maybe we should grow grapes on that hill. A little vineyard. We could make wine.”
“We looked into that,” she said. “But you didn’t like any of the varieties that actually grow in Pennsylvania.”
“True,” I said.
“Also, what about the deer? I believe your exact words were, ‘That hill is a deer superhighway.'”
“That does sound like me,” I said. “Well, if not grapes, then maybe fruit trees. Espaliered fruit trees might be nice.”
“And berries,” Shana said. “Lots of berries for jam.”
The pond darkened as the storm approached. The toads started to trill a bit louder. I fetched a pad and pencil and we began to brainstorm.
First Stop: Our Local Ag Extension
The brainstorming session was a lot of fun. At the end of it, our pad was covered in sketches and lists of fruit.
We knew where we wanted our orchard to be and what we wanted to grow in it.
Our first problem was existential: was our dream orchard even possible?
Setting aside for a moment the expense of establishing an orchard — which is considerable — we weren’t at all sure that we had the right ingredients for one.
By ingredients, I mean a suitable location; a list of trees and plants appropriate to our climate; and a strategy for protecting those trees and plants from all manner of hazards, including drought and deer.
These ingredients vary enormously by location. What works for us here in southcentral Pennsylvania wouldn’t be right for an orchard in Florida or Idaho.
So where do you turn to find answers for your particular locale?
Here in the United States, we have an excellent resource in the form of the USDA National Institute of Food and Agriculture, which hosts the Land-Grant University Website Directory.
The directory lets you search for an Ag Extension office in your home state. This led us to a very informative article on the Penn State Extension website. The title couldn’t have been more prosaic: “Orchard Establishment — Site Selection and Preparation.” But it was a treasure trove of information.
The article laid out the ideal conditions for planting an orchard in Pennsylvania.
Since cold air, the enemy of spring blossoms, tends to pool in low areas, the orchard should be on uphill or rolling land — and preferably south-facing. It should have excellent drainage; be protected from the wind; but not be overshadowed by tall trees.
The soil should be well-drained; fertile; have the proper pH; and contain all the right minerals and organic elements.
The tree rows should be oriented along a north/south axis to take full advantage of the sun’s transit.
The article was great, but there were an awful lot of “shoulds.”
How Close to Ideal is Close Enough?
Of course, we don’t live in an ideal world.
Lucky for us, the scrubby hillside next to the Superbarn was looking pretty promising. There was a decent slope and good drainage, but it wasn’t exactly south-facing. The tree rows wouldn’t be oriented perfectly north to south, but at least they’d be in the ballpark.
Or would they? Just how big was the ballpark?
And what about the soil?
According to the Penn State article, there was a mystifyingly long list of potential defects in our soil. The section on soil sampling, testing, and amendments seemed overwhelming. We wanted to get started right away, but some situations seemed to require planting two year’s worth of cover crops first.
Was our orchard really that far away?
We were now armed with all sorts of information, but what we needed was real-world advice.
Enter Tim Clymer, the owner of Threefold Farm just over the mountain in Mechanicsburg. Tim came highly recommended by some of our local farmer friends, both for the unusual fruits he specializes in, like figs and kiwi berries, and for his open-mindedness to new approaches to farming.
He was a bit surprised when we asked him to be our orchard consultant. Farmers tend to be extremely generous with advice, and we got the sense that we could have twisted his arm to answer all of our questions. But we also knew that our project was going to take him away from his own busy farm, and we wanted to make sure he was properly compensated for his time and expertise.
After meeting with us and studying the proposed site, Tim sat down and wrote us a step-by-step plan for building our orchard. He detailed the fruit varieties that have done well at his farm and shared his list of favorite agricultural suppliers.
In the end, his consulting fee was very reasonable. It was the best money we spent on the project.
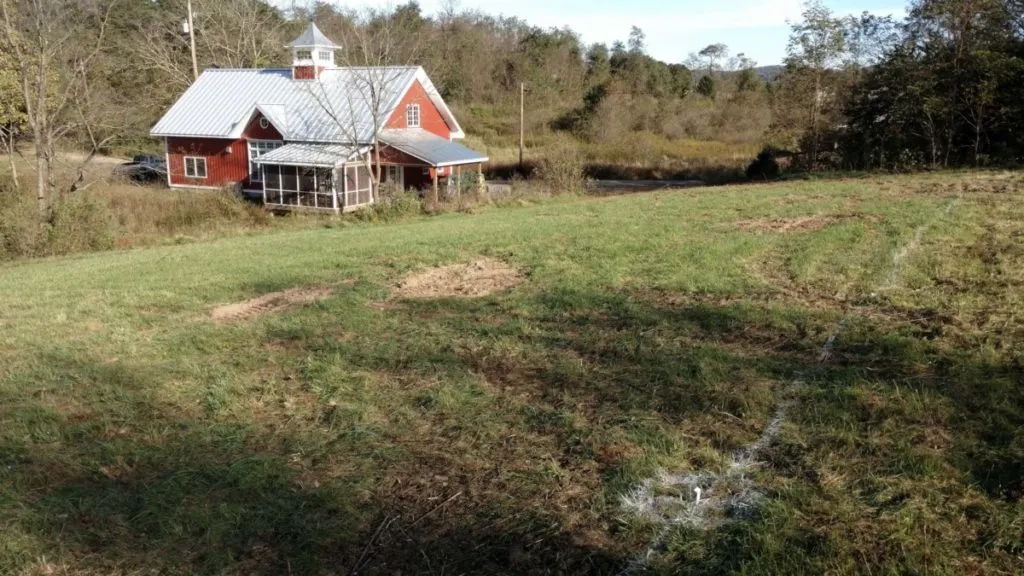
Clearing the hillside took a lot more time and energy than we expected. Note the painted layout line for the future deer fence.
Amending the Soil for Happy Trees
It looked as though our proposed site for the orchard was going to work. Tim wasn’t crazy about its orientation to the sun but pronounced it “decent.” And the site had the added advantage of being close enough to the house to run a water line for irrigation without the enormous expense of drilling a new well and running electricity to power it.
We dug some test pits for an informal survey of the soil.
Tim’s conclusion was that there was nothing that couldn’t be corrected with a thick blanket of mushroom soil.
This was the first we’d heard of mushroom soil, also known as “spent mushroom substrate,” a steam-pasteurized melange of straw, moss, dust, meal, manure, and other ingredients that vary a lot by region. On Tim’s recommendation, we ordered up fifty cubic yards of it, enough to cover the entire orchard 6” deep.
The idea was to spread the mushroom soil in the fall; cover it with a blanket of silage plastic over the winter; and let the worms go to town, drilling up and down through the layers of soil and mixing them together.
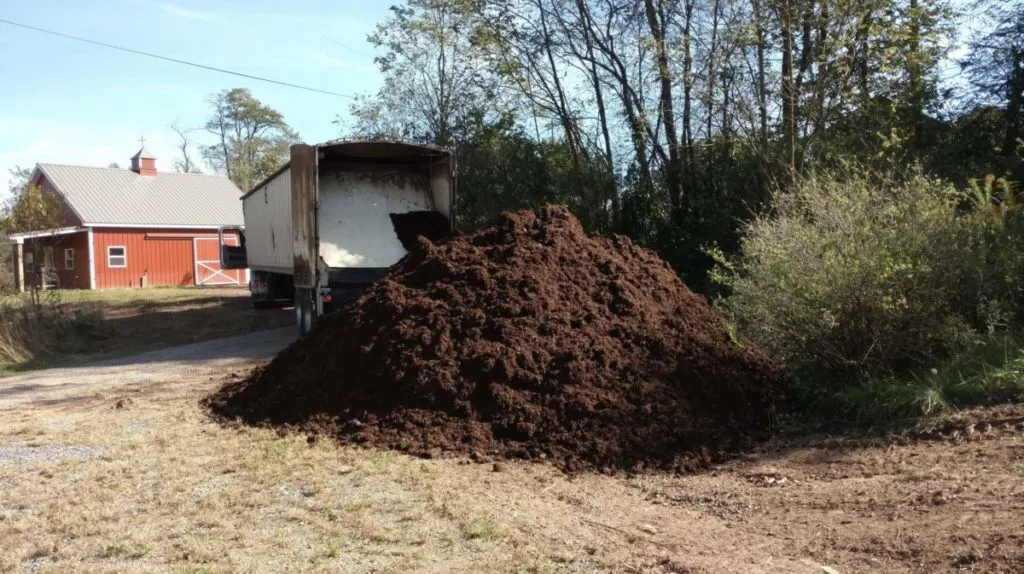
Mushroom soil is clumpy, dense, and quite heavy.
We found that a shovel worked best to fling it into place, followed by a final smoothing pass with a rake.
We ordered the silage plastic from a local agricultural supply house. It came in thick, heavy-duty sheets like enormous tarps that weighed a couple of hundred pounds. Be ready with strong friends the day you lay it — especially if there’s any kind of wind.
And have plenty of cinderblocks on hand to weigh down the plastic. You’ll basically be spreading a giant sail on the ground. Pay special attention to the windward side of the plastic. The last thing you want is for the wind to catch an edge and create a huge billowing nightmare.
(Don’t ask me how I know this.)
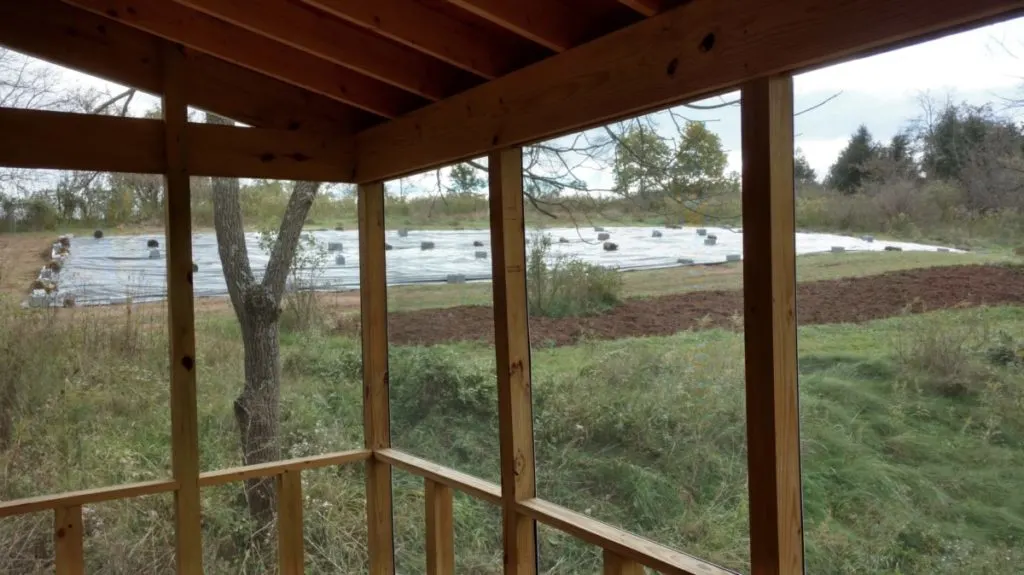
At this point, the orchard was off-limits to heavy equipment. The soil was now well on its way. No compaction allowed.
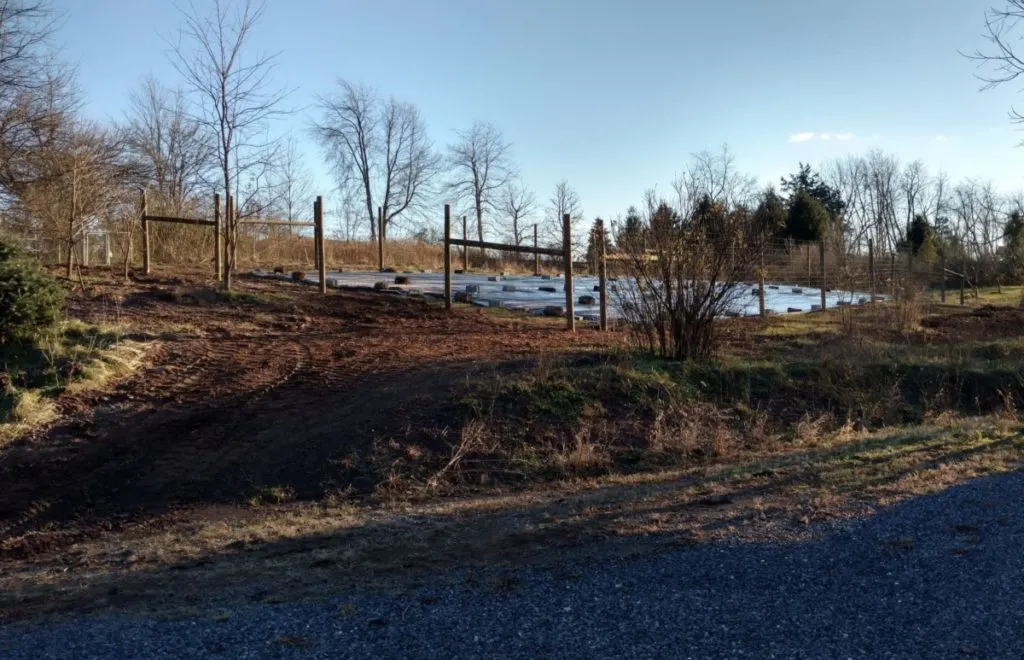
Building a Deer-proof Fence — with the Wrong Kind of Lumber
Next it was time to turn our attention to the problem of keeping deer away from our precious trees and bushes.
The phrase “deer superhighway” wasn’t really hyperbole. We live on land that has been famous for an abundance of deer since long before European settlers arrived.
We knew we were going to invest a lot of time and money in our orchard plantings. Now was not the moment to skimp on deer countermeasures.
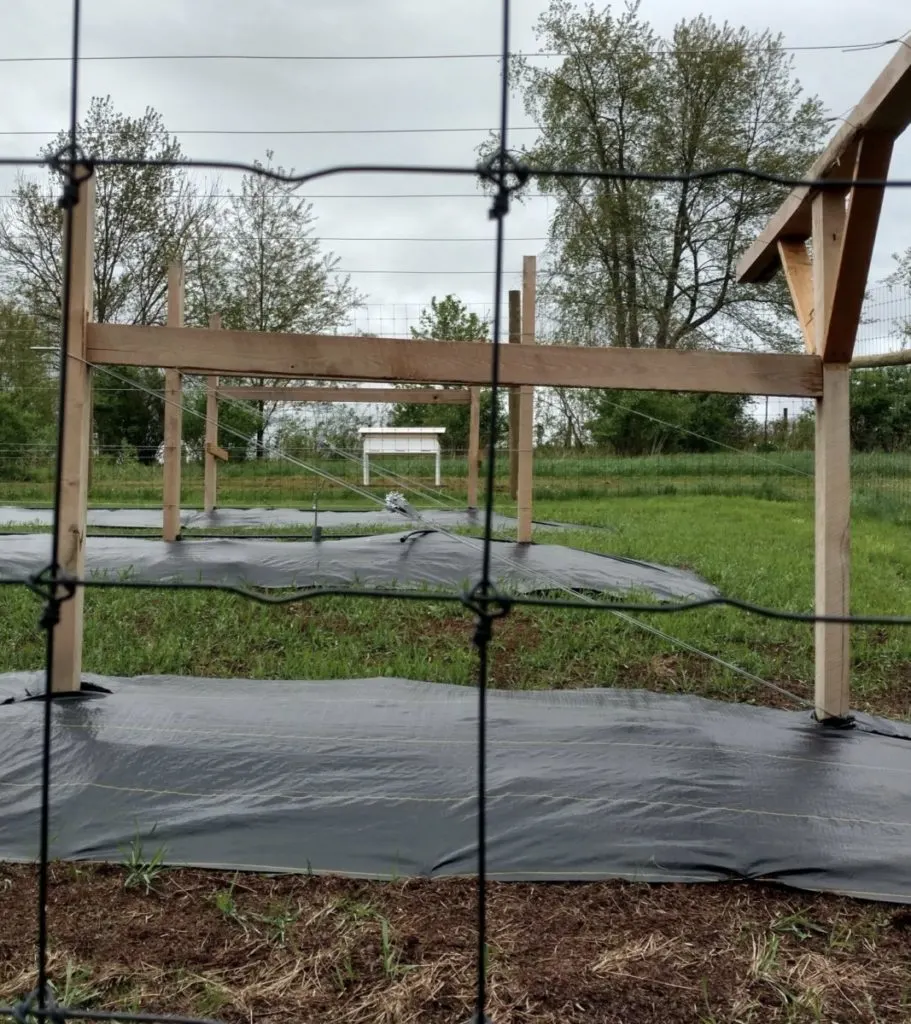
We decided to install an 8′ tall deer fence with 4″ galvanized mesh and pressure-treated posts — even though we knew pressure-treated was the wrong kind of lumber.
Why wrong?
There are several agencies that certify farms in the U.S. as “organic,” but all of them agree on one point: there can be no wood on an organic farm that has been treated with toxic preservatives.
This includes creosote, which is commonly applied to telephone poles and railroad ties; and water-based, copper-treatments, which are cooked into lumber for fenceposts and other exterior structures.
Pressure-treated wood used to contain really poisonous ingredients like arsenic or chromium, but the latest formulas are much less toxic.
Even so, in the first year especially, the chemicals in pressure-treated wood can leach into the soil and introduce new, and potentially unhealthy, biocides.
Organic certification is expensive and relevant only to commercial operations, not to backyard orchards. Even so, we wanted to make every effort to avoid introducing contaminants into the soil we’d worked so hard to amend.
Here in southcentral PA, we can’t just use regular lumber as a substitute for pressure-treated.
An untreated pine fence post will rot away in just a few years in our climate.
There are decay-resistant substitutes for pine. These include softwoods like cedar and redwood, which happen to be astronomically expensive in our area; or hardwoods like oak and black walnut, which are only slightly less pricey.
But one hardwood is a favorite of farmers around here for its local abundance and its adamant refusal to rot when sunk in the ground: black locust.
We wound up using locust for all of the trellis-work in the orchard.
Unfortunately, it just wasn’t possible to source locust fenceposts in 12’ lengths, which is what we needed to build an 8’ deer fence.
The only other option would have been to install metal fence posts, but that would have driven the cost through the roof.
In the end, we compromised and went with pressure-treated posts. Even so, the deer fence was the orchard’s single largest expense.
Keeping the Orchard at Shoulder Height
The phrase “aging in place” has shaped all of our building projects here at Pencil Creek.
We designed the Superbarn to accommodate single-floor living and to be easily adaptable in case one of us suffered a loss of mobility.
We built raised beds in our garden partially because we like how productive they are, but also to minimize crouching and stooping. We chose a waist-high design for our beehive for the same reason.
Our planning for the orchard was no different.
I’d always been fascinated by espaliered fruit trees. And there’s no denying that aesthetics played a huge role in our decision to learn the technique. (Look out for a future “how-to” article on espalier.)
But there’s a practical aspect to an espaliered fruit tree, above and beyond its sheer geometric beauty: year after year, the tree and its fruit stay within comfortable reach.
Our espaliered trees will never grow higher than shoulder height.
This represents a huge advantage over traditional fruit trees, even of the so-called “dwarf variety,” some of which can easily grow to ten or even fifteen feet.
So we knew we wanted to espalier our fruit trees. This meant we need to build a trellis.
Actually, given our specific orchard plan, it meant we needed to build three different kinds of trellis.
Our row of berries would require a trellis with two 2”x4” crossmembers on each post. Wires strung through the ends of the crossmembers support the high and low berry branches.
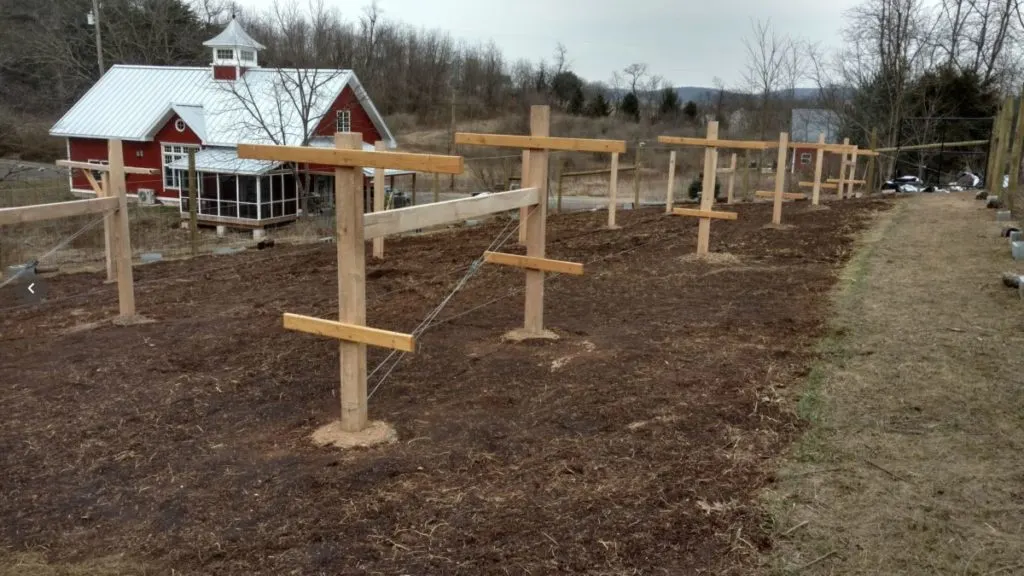
The posts for the espaliered fruit trees, on the other hand, wouldn’t need crossmembers. The orchard wire for those would be strung right through the 4”x6” posts.
The kiwi berries would require a special run of trellis to accommodate the male and female bushes, which are both necessary for pollination.
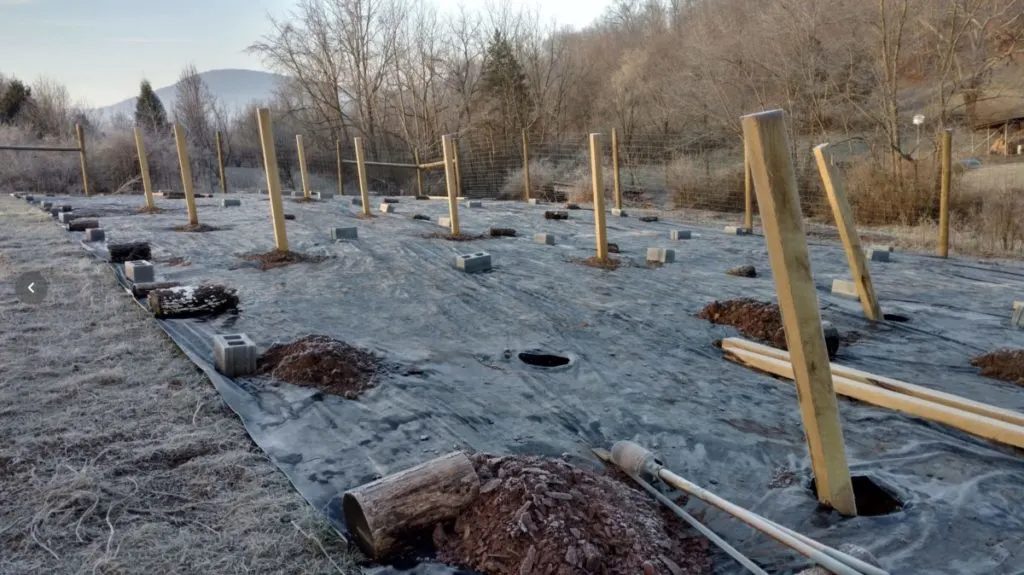
There were a lot of post holes to dig — and all of them by hand.
Remember: no soil compaction at this stage; thus, no heavy equipment. Not even a tractor with an auger attachment.
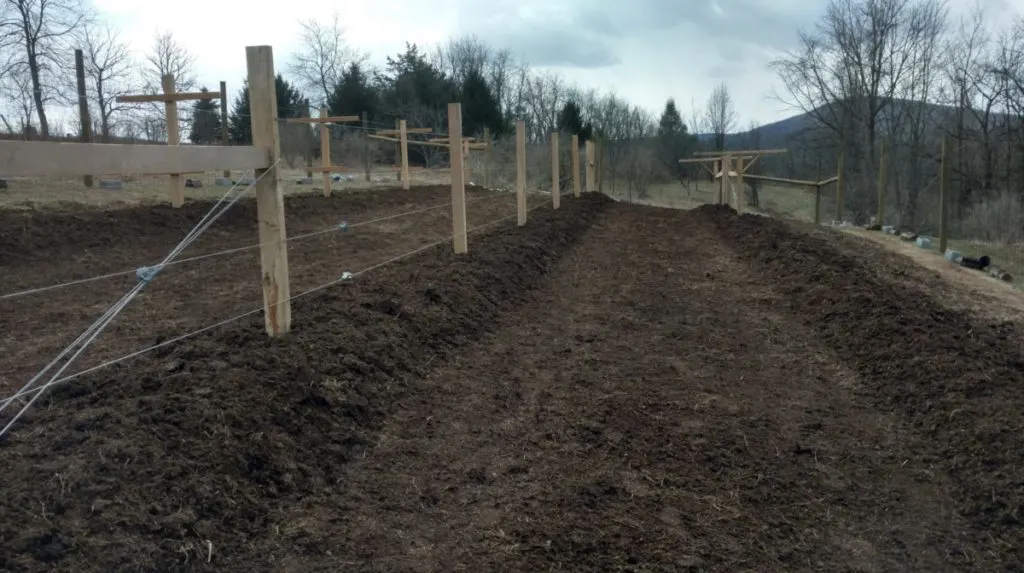
Orchard wire puts a tremendous tensile load on trellis posts. If you don’t hit the proper depth in your holes and you fail to set your posts in concrete, the weight of fruit-laden, mature trees can be enough to bring down your trellis. I wound up using an electric jackhammer to bust through hard shale in several of the holes — no shortcuts allowed.
I’ve already mentioned our quest for locust posts. We fell short when it came to the deer fence but lucked out with an Amish farmer who carried locust posts milled specifically for trellis.
A word to the wise: always pre-drill locust posts for fasteners.
The wood is dense enough to shear screws and will often split before it takes a nail.
When the posts were set and the sections of trellis were ready for their orchard wire, we hired our deer fence installer to come back and run the wire. I acted as his helper that day, both to keep costs down and to learn the ins and outs of running orchard wire.
Planning for Drought
Given the increase in summer temperatures in recent years, and the increasing volatility of the weather generally, we decided to irrigate our orchard to give ourselves the flexibility to manage future dry spells.
As I mentioned, this played a role in siting the orchard in the first place. Before we finalized our plan, we made sure that our existing well pump had enough power to deliver water to a spot on the hill above the orchard. The elevation above the well is particularly important here, since a well pump has to work harder for every foot it has to push water uphill.
The only alternative to tying into our existing water lines would have been to drill a new well — a very expensive propositional in these parts — and run electricity to it.
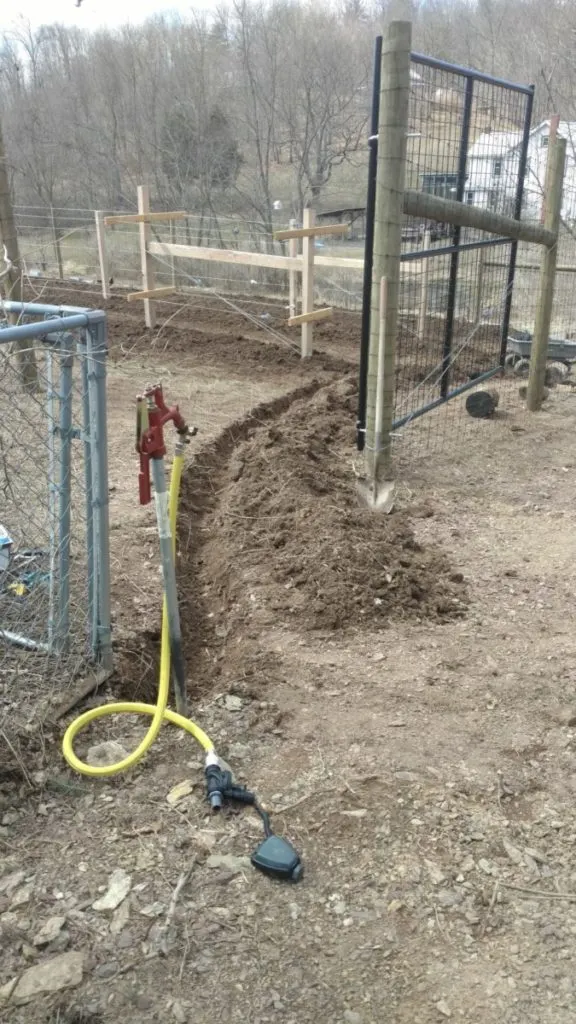
Even so, tying into a hydrant about 100 yards away was still a project. We had to trench below the frost-line and across a gravel lane; plumb in the new 1” PVC water line; and install a frost-free hydrant above the orchard.
Compared with all that, running the irrigation system in the orchard itself was pretty straightforward.
Once the hydrant was established, I dug a shallow trench into the orchard from the base of the hydrant to the heads of the three tree rows, then ran a length of 3/4″ plastic pipe from the hydrant to act as an irrigation “header.” Then I teed into that with standard 1/2″ orchard tubing.
The orchard tubing runs the length of the tree rows. You can easily install little spouts at the base of every tree or bush. There’s a special tool for piercing the orchard tubing that makes a perfectly sized hole for the spouts.
We finished up by adding a programmable timer valve to our irrigation setup to automate the process if needed, but so far we’ve been fine turning the water on and off manually.
Dressing the Tree Rows in Silage Plastic
There was one final task before we were ready to start planting: dressing the tree rows in silage plastic.
This step actually touched on two important priorities: age-proofing and drought-proofing.
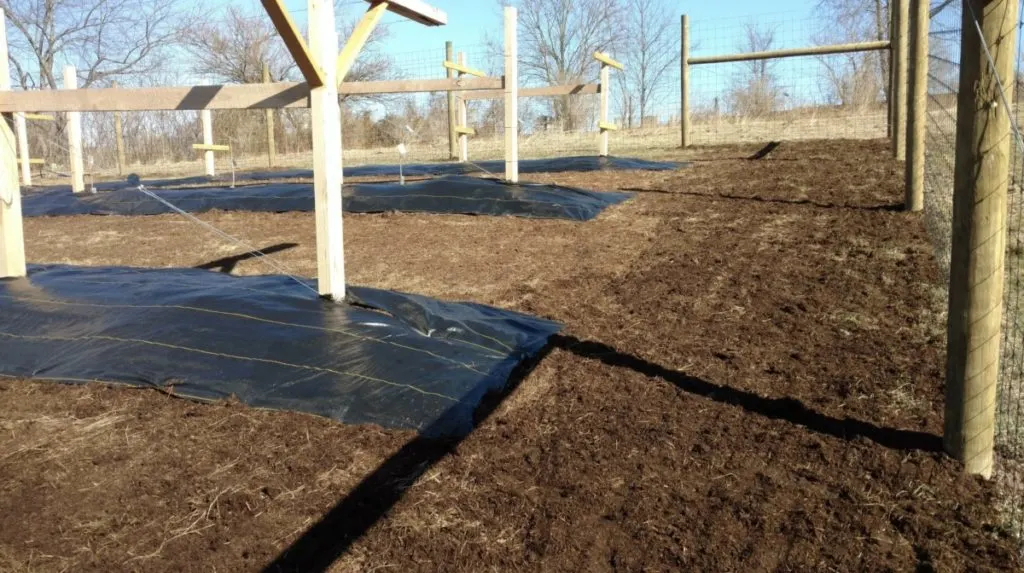
The silage plastic controls weeds at the bases of the trees, which radically reduces the amount of kneeling and crouching we have to do when we’re weeding.
And, in addition to keeping the soil warmer in the winter, the plastic helps to retain moisture in the summer, which reduces the amount of water necessary for irrigation.
(The fact that worms love all that shade and privacy is just a bonus.)
We’d set aside the huge sheets of silage plastic that we took up in the spring. Now we cut one of those sheets into strips to cover the tree rows. The strips were tailored to the trellis posts and secured to the ground with long steel landscape staples.
Planting the Orchard — Finally!
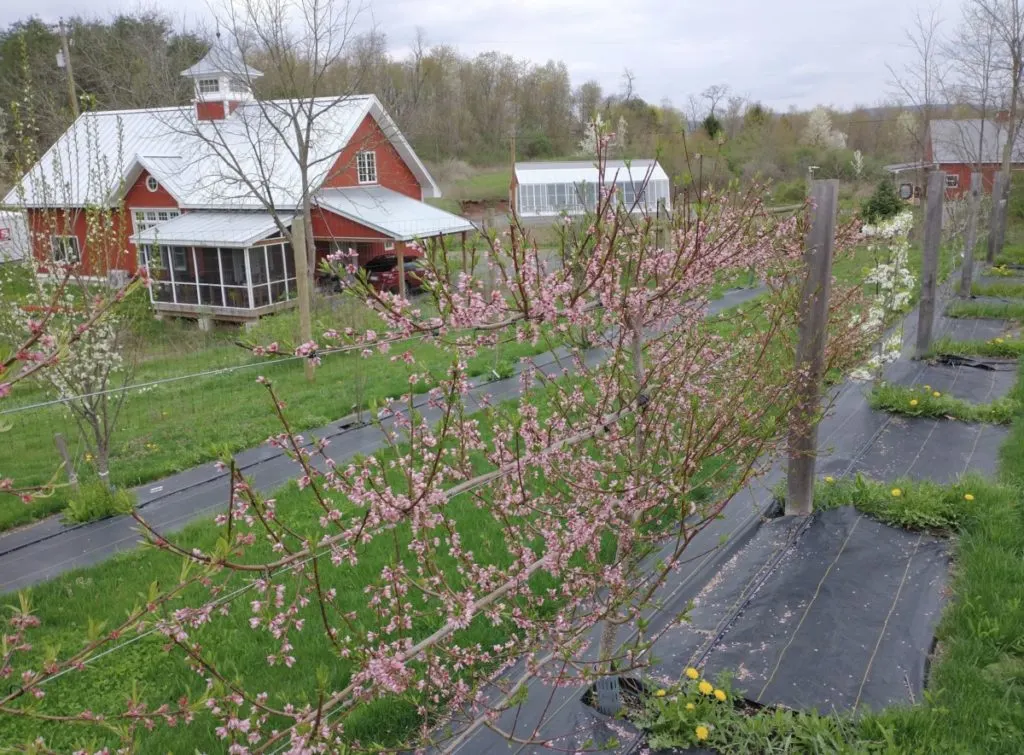
Shana and I had come up with a pretty eclectic list of trees and plants for our orchard. She got her row of berries — primarily black raspberries, our favorite fruit for jam. We also planted yellow and red raspberries, too, along with a few varieties of blackberries.
The middle row was for relatively traditional espaliered fruit trees: plums, peaches, pears, and apples.
The bottom row was for more exotic creatures: sour cherries, apricots, figs, pawpaws, and kiwi berries.
After the orchard was planted, we seeded grass between the rows.
The berry bushes and the more conventional trees came from an excellent tree farm in Adams County, PA. Tim supplied us with the fig trees. Most of the exotics came by mail from Edible Landscaping.
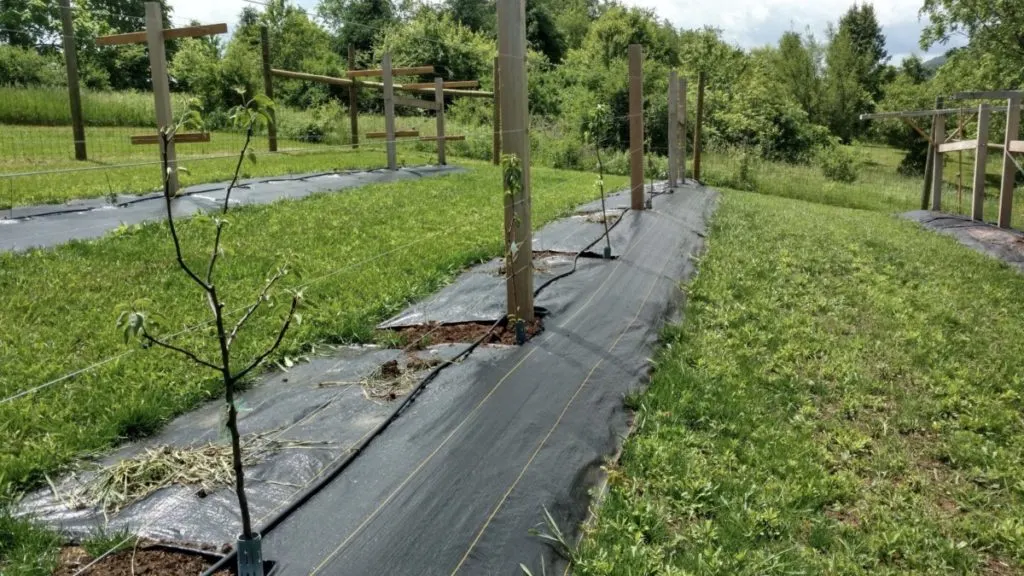
In the three years since we established our orchard, we’ve trained our tiny trees into gorgeous living walls.
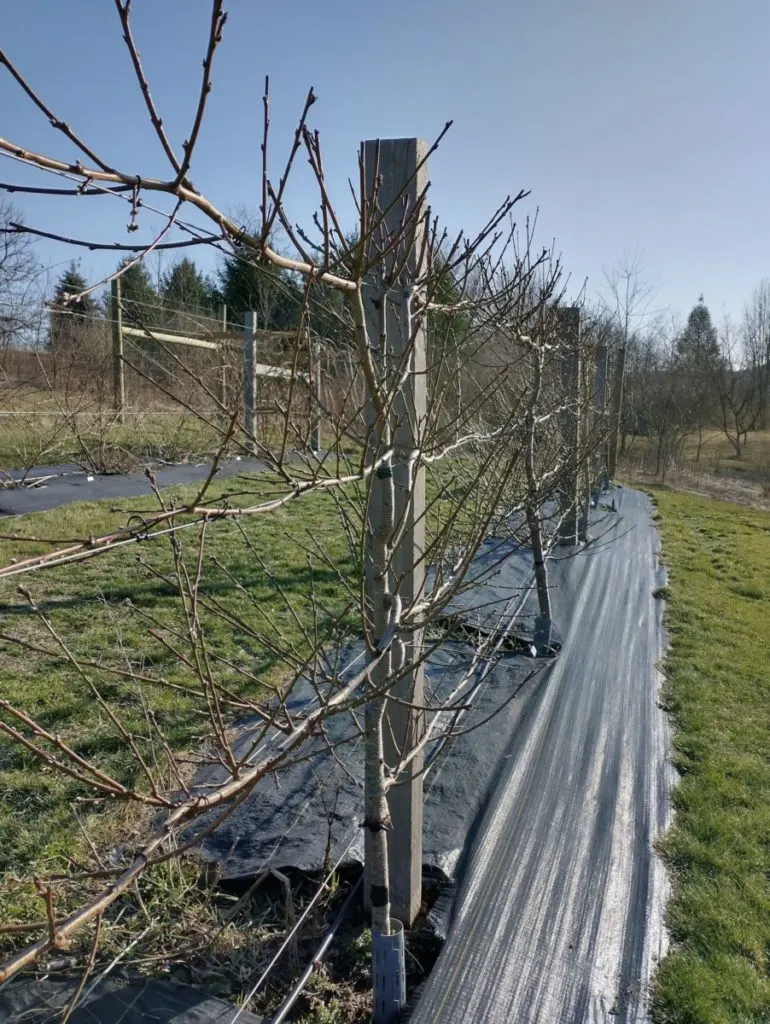
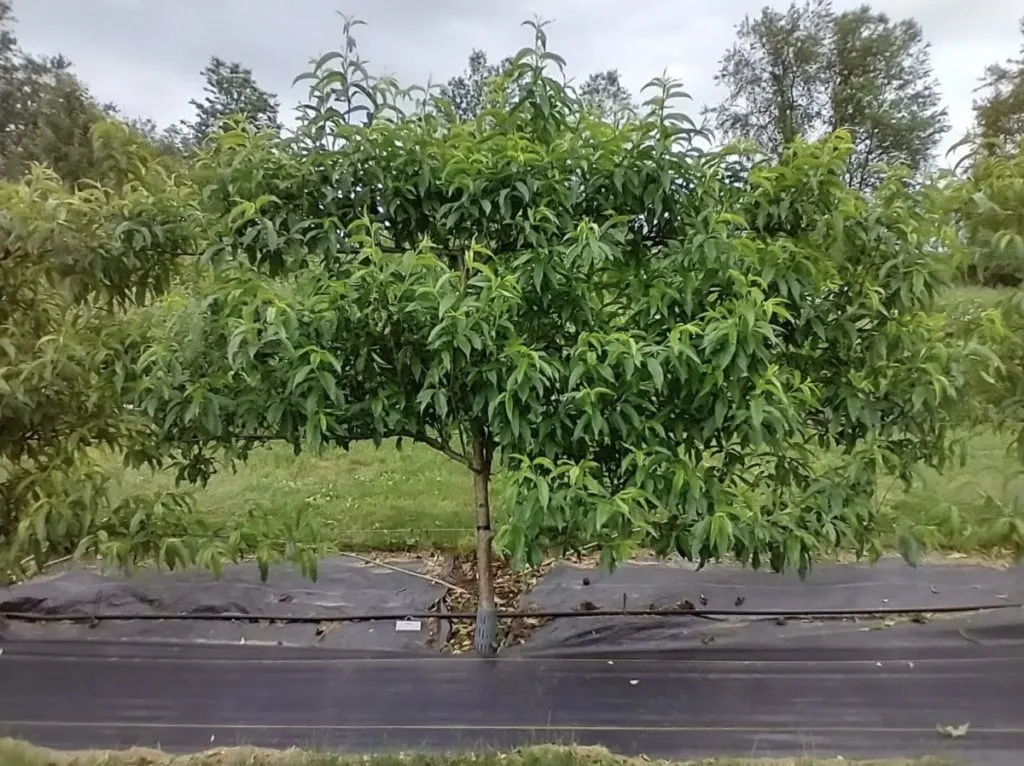
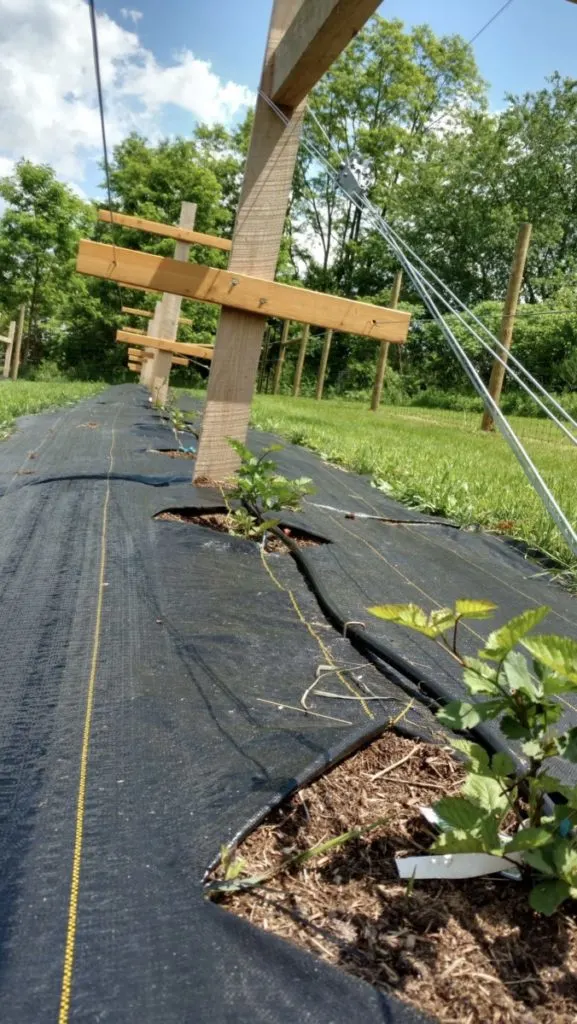
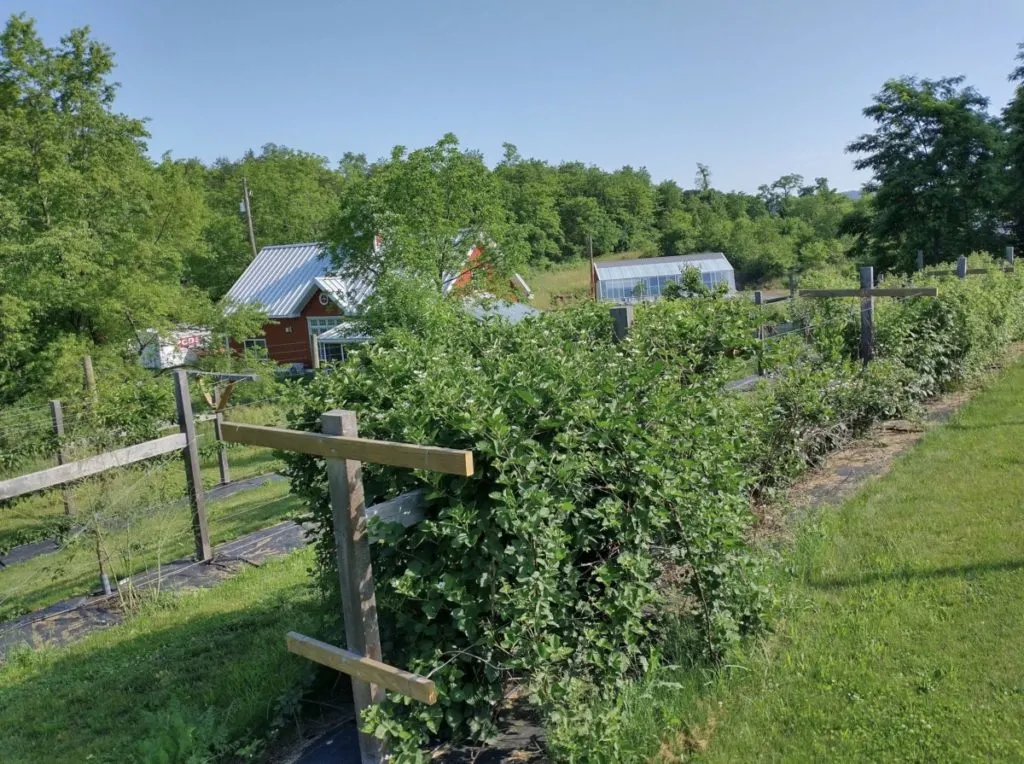
There has certainly been a learning curve to the orchard, especially in terms of the espaliered trees.
Mistakes have been made! We’ve also learned the heartbreak of a late frost that wipes out most of the year’s fruit.
But the trees are looking good and the berry row has been producing like crazy.
Above all, we’ve learned the deep satisfaction that comes from caring for an orchard, day in and day out, year upon year.
Three years isn’t very long in the life of an orchard. We know we’re only at the beginning, but we’re loving the journey.
And the view from the porch?
It’s finally perfect.

Get the famous Rural Sprout newsletter delivered to your inbox.
Including Sunday musings from our editor, Tracey, as well as “What’s Up Wednesday” our roundup of what’s in season and new article updates and alerts.
