


One of the highlights of coming back home from my late summer vacation is getting to interact and reconnect with my own garden. I did not have a gardening-free vacation, not by a long shot. We visited botanical gardens, snacked on fresh tomatoes from my in-laws garden and even toured a castle garden.
But returning to a garden where I’ve grown every single plant is high up on the list of things that bring me true contentment.
I came back ready to hit the ground running – or dig the dirt squatting, depending on how literal we’d like to get. Fall is a busy time in the garden, and this fall, you’ll find me saving seeds, dividing plants and taking as many cuttings as possible.
The first item on my to-do list is to propagate my hydrangea by taking some fall cuttings. I’ll be propagating my French hydrangea (hydrangea macrophylla) – also sometimes referred to as mophead hydrangea or bigleaf hydrangea.
When is the best time to take hydrangea cuttings?
Hydrangea grows best if you propagate it from semi-hardwood cuttings (also known as semi-ripe cuttings). This means we’ll be using new growth (this year’s growth), but we’ll need to give it a bit of time to harden up.

So, it’s better to wait until early to mid-fall to propagate hydrangea. The plant is still actively growing, but by this point in the year, it’s easy enough to see what stems would make the best cuttings.
I’m a big proponent of propagating perennials in the fall anyway since I really have more time to putter around with cuttings when I’m not knee-deep in starting seeds. I also have more pots available for cuttings in the fall for the same reason.
Gardening is all about juggling priorities, isn’t it?
Here’s how to take hydrangea cuttings. It’s easy, I promise!
1. Select the best stem for cutting.
I usually start these tutorials by advising you to prepare the potting soil where you’ll plant the cuttings before you start.
But I am switching it up a bit in this article because:
1). Someone commented that that bit is boring because everyone knows how to put dirt in a pot. (Do they, really?)
and
2). There are a couple of details to pay attention to when you select a stem, and I wouldn’t want them to get lost downstream in the post.
If you can only remember one thing, let it be this – What matters most of all is using a stem that hasn’t had any flowers on it this summer.
A non-flowering branch will have more energy to put into growing roots than one that’s already been in bloom for most of the summer.

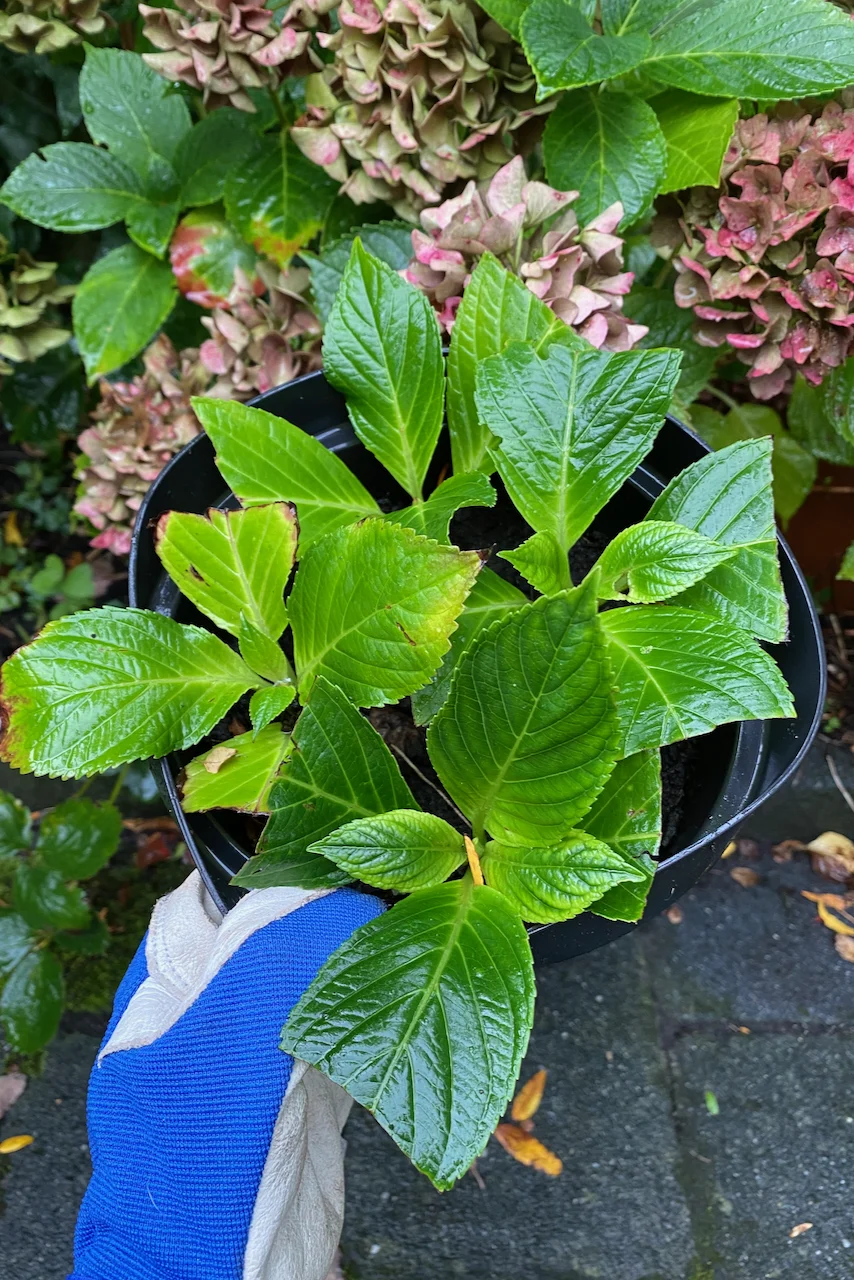
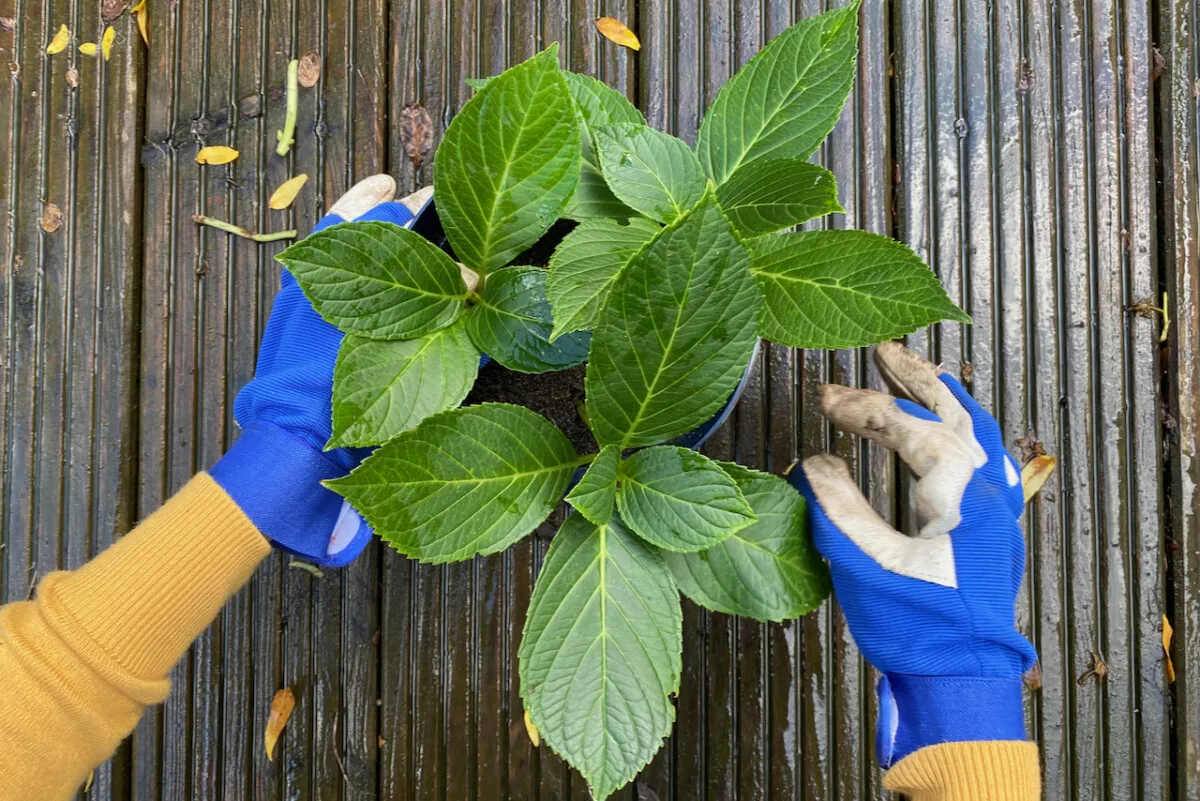
Have a look at one of my French hydrangeas. Can you tell which branches will make good cuttings?
I’ve identified at least three, but let’s start with the strongest-looking one. This is what it looks like on the plant.


What if I can’t find any non-flowering stems?
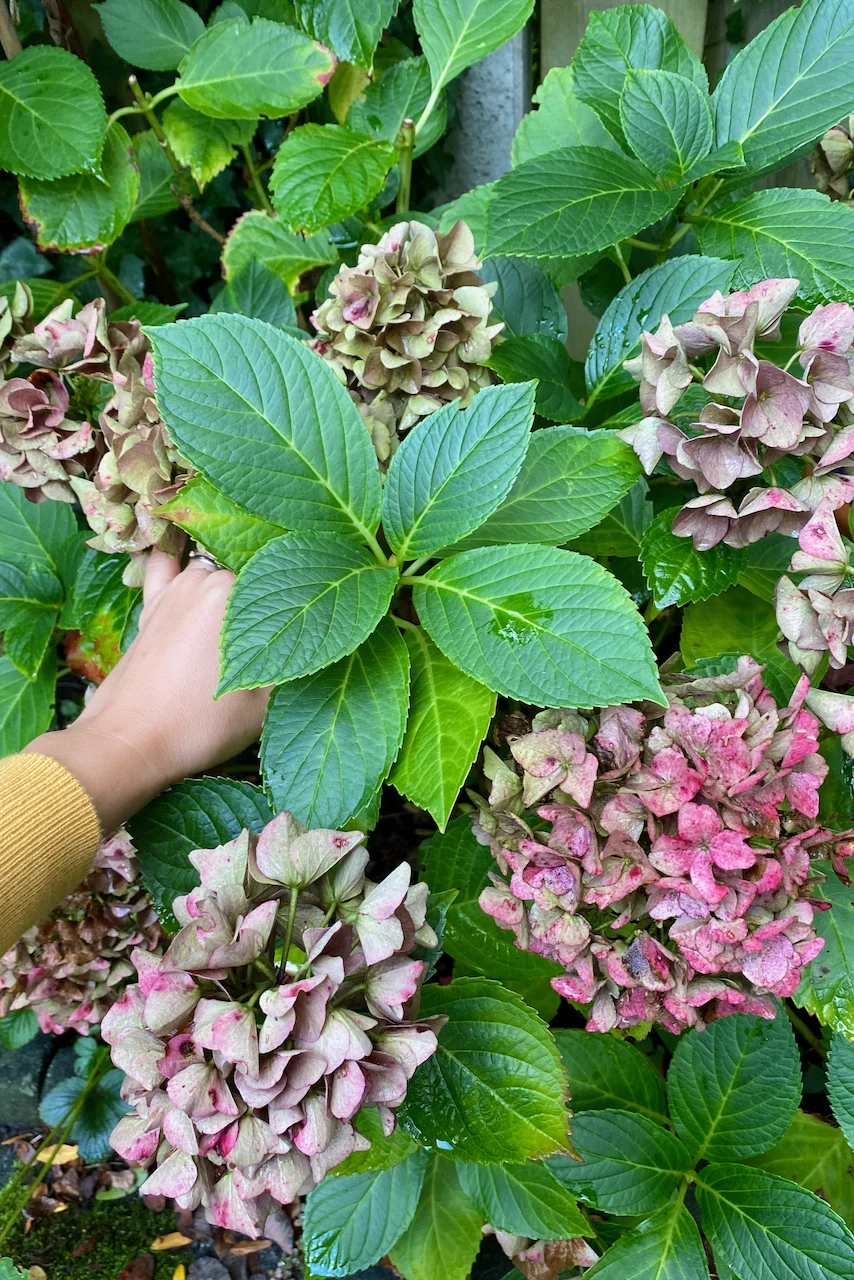
Sometimes, especially if you’ve been very heavy-handed with the fertilizer in the spring, your hydrangea may end up super-packed with blooms, just like the one in the photo below.


It may be tricky to find a non-flowering stem, but they’re out there, I promise. Check for them either deeper into the shrub, behind the first layer of flowers, or at the base of the shrub.
Keep in mind that you can also cut secondary growth. Have a look at the photo below. The side shoots are perfect for cuttings, while the center one has already flowered.


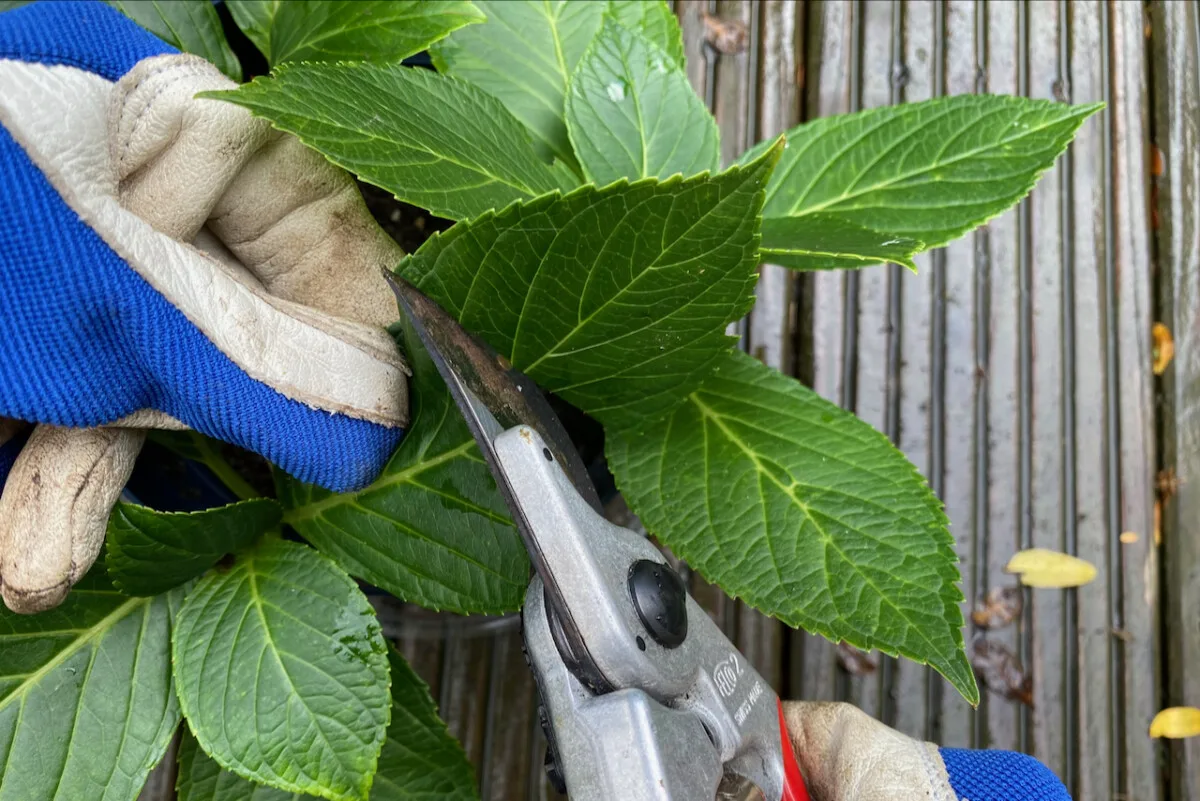
Where do you make the cut on a hydrangea?
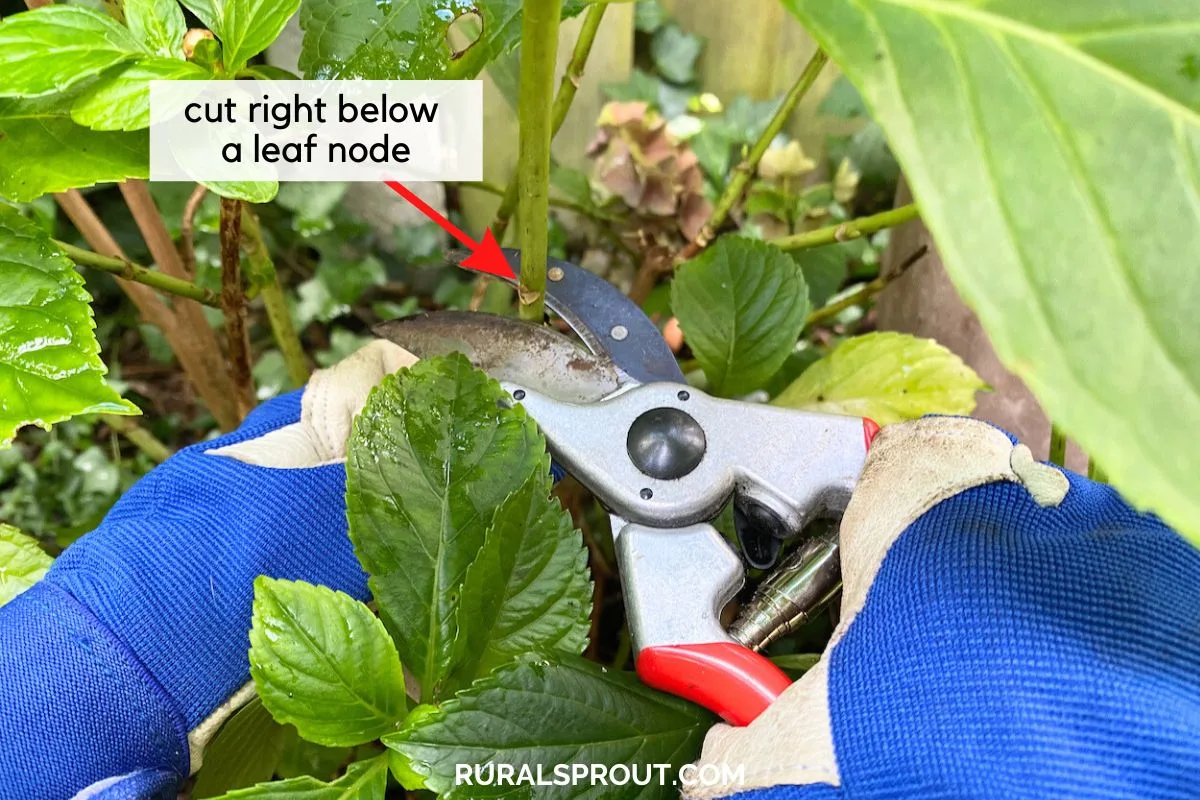
The golden rule of propagating this way is to always cut right below a leaf node. This is where the highest concentration of growth hormones is, and it’s where the new roots will originate.
You also need to have at least one extra leaf node that can go underground. Again, that will be a good origin point for roots. (I’ll show you more later.)

Plus, it helps save on container vertical space if you don’t unnecessarily bury a length of unproductive stem. I’m taking a cutting that’s about 4 to 6 inches in length (that’s approximately 10-15 centimeters).
One stem will only give me one cutting on a hydrangea this size, so I’ll continue to take a few more cuttings to maximize my chances of success. (These are the best hand pruners out there, by the way.)
I’ve generally had good luck with hydrangea cuttings – a one hundred percent success rate, with all the cuttings taking root. But I’m a cautious gardener, and I like to hedge my bets.
2. Prepare your hydrangea cuttings.
Let’s start by removing all the leaves that would go underground. First, we don’t want them rotting in the soil and contributing to an unhealthy growth medium. Second, this move helps “free up” more underground leaf nodes, thus giving the plant better chances of rooting.


Remember to leave the top set of leaves on the plant to continue collecting energy through photosynthesis.
If you’re impatient or anxious about your cuttings forming roots fast enough – or if you simply left this task for way too late in the fall – you could try using a bit of powdered rooting hormone.
I usually skip this extra step because I found that using high-quality compost in the potting mix has the same effect.


3. Plant your hydrangea cuttings.
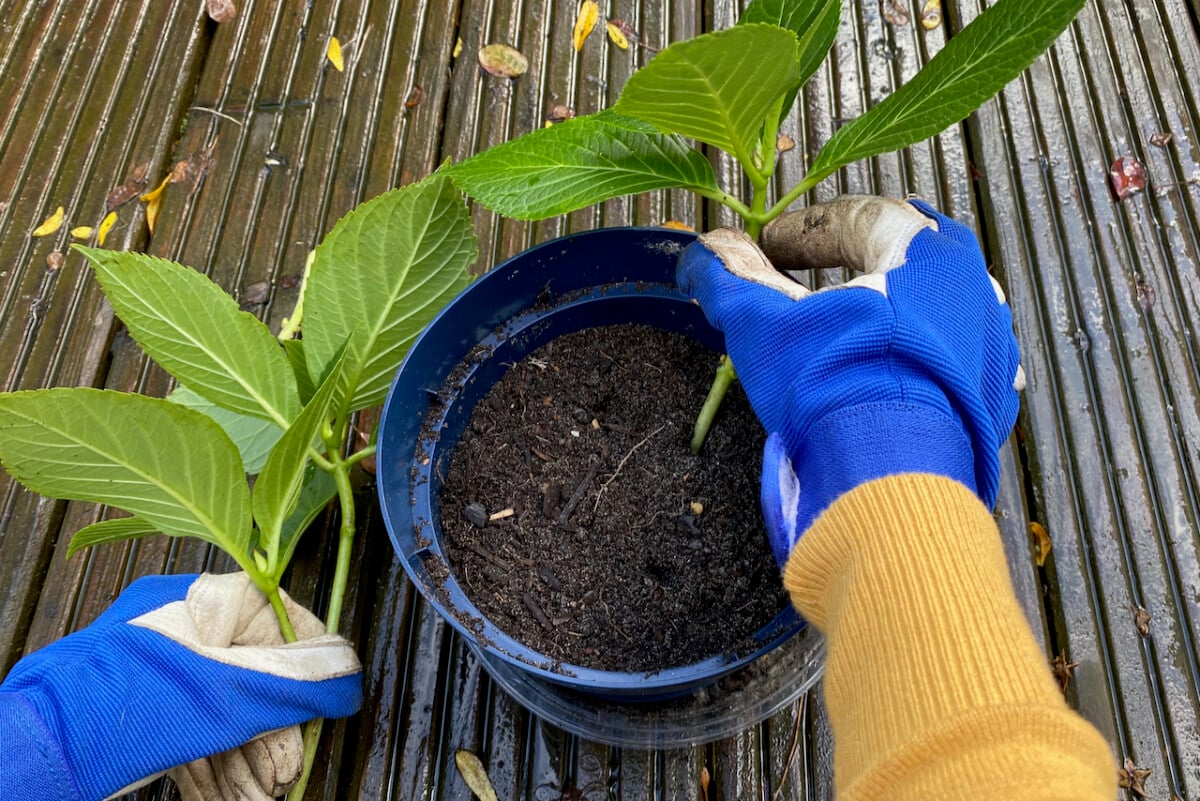
Now that our cuttings are ready, all we need to do is stick them in the soil. I’m using a pot that’s tall enough to accommodate at least two leaf nodes length-wise.
In my small garden, I prefer to plant several cuttings into one larger pot to keep things simple and manageable. This reduces the number of containers I have to move around, as I move them to a more sheltered location for the winter months.
And because the container is larger, it doesn’t dry up as quickly as single-stem pots.

In my experience, the most important factor in choosing the right soil for hydrangea cuttings is making sure it’s draining well. Since I’m propagating my French hydrangea in the fall, there will be plenty of rain drenching the containers. (As you can see from my photos, it was a super wet day when I was taking the cuttings.)
If the soil retains too much water, then the cuttings will simply rot before taking root. We want to avoid that at all costs.


When I propagate cuttings, I use a mix of about eighty percent potting compost and twenty percent horticultural sand. You can also add a handful of perlite to make the soil less water-retaining.
It really doesn’t matter as long as you make sure that the soil drains well and quickly, especially if you’re planning on leaving the cuttings outside, in the elements.
4. Don’t forget the aftercare!
I’m doing this propagation in the fall when the heat of the summer is already behind us. So, I’m not going to bother with cutting all the leaves in half. I’ll trim just a few.
But if you’re taking the cuttings in late summer, when your hydrangea is done blooming, remember to reduce the surface of the remaining leaves. This will help lower the amount of water that the cutting loses through perspiration.

Similarly, reducing the surface of the leaves will allow for better airflow in the container if you’re trying to fit in more cuttings in the same pot. (I always am.)
Then, water the cuttings to help them settle in. Top up the potting soil if needed.
If it doesn’t rain, remember to keep your cuttings watered, but not super drenched.
If I were propagating this French hydrangea in the summer, I would move the container in the shade. But since the sun is not as strong or as direct in the fall, I’ll let it get as much sun as it can while it can.

Also, remember to move the container to a sheltered location in the winter before the temperatures dip below freezing.
How long does it take for hydrangea cuttings to root?
It takes about a month to six weeks for hydrangea cuttings to root. They will root a bit faster if the soil is slightly warm rather than cold. So, if you’re having a warm fall, you’re in luck. Otherwise, you can move the cuttings to a more sheltered location, such as a greenhouse, a sunroom or an enclosed porch.
After about a month, you can tug a little bit on the cuttings. If there’s resistance, it means that the cuttings have already formed roots.
Here’s how the cuttings that I took about six weeks ago are doing.
Again, if I were propagating a couple of months earlier, I would separate the cuttings and repot them into individual pots after they had rooted. But since it’s already quite late in the season, I’ll let them overwinter together. They will pull through better in a single large container.
Now go on and take your own cuttings! But remember, it can get pretty addictive.
Related Reading: 4 Important Fall Hydrangea Jobs (& One Thing You Probably Shouldn’t Do)

Get the famous Rural Sprout newsletter delivered to your inbox.
Including Sunday musings from our editor, Tracey, as well as “What’s Up Wednesday” our roundup of what’s in season and new article updates and alerts.