Plastic milk containers or milk jugs can be recycled. But the high quality plastic can also be used in a number of different ways around your home and garden.
Before you recycle them, you might want to consider using them to avoid buying new plastic items or other new products. Making full use of waste materials is one great step to take if you want to live more sustainably.
I myself do not drink much milk. Very aware of the environmental and ethical concerns surrounding the dairy industry, I often choose vegan nut milk or oat milk options instead. But others in my household do drink it.
If you do not wish to go dairy free, of course, it is best to get milk in glass bottles, to avoid plastic use altogether. (Unfortunately, we cannot get organic milk delivered in glass bottles where we live.)
Better yet, take steps to become more self-reliant and consider keeping livestock on your own property for milk production. (Goats could be a better option than cattle for smaller homesteads.)
Of course, not all of us have this option. So until things improve, we may be forced to accept this source of plastic into our homes.
When this is the case, we should reshape the way we view plastic packaging, and make full use of this versatile material whenever we can.
To help you take this step to reduce consumption and reuse, here are 21 innovative uses for plastic milk containers in your garden:
1. Make a Vertical Garden With Plastic Milk Containers
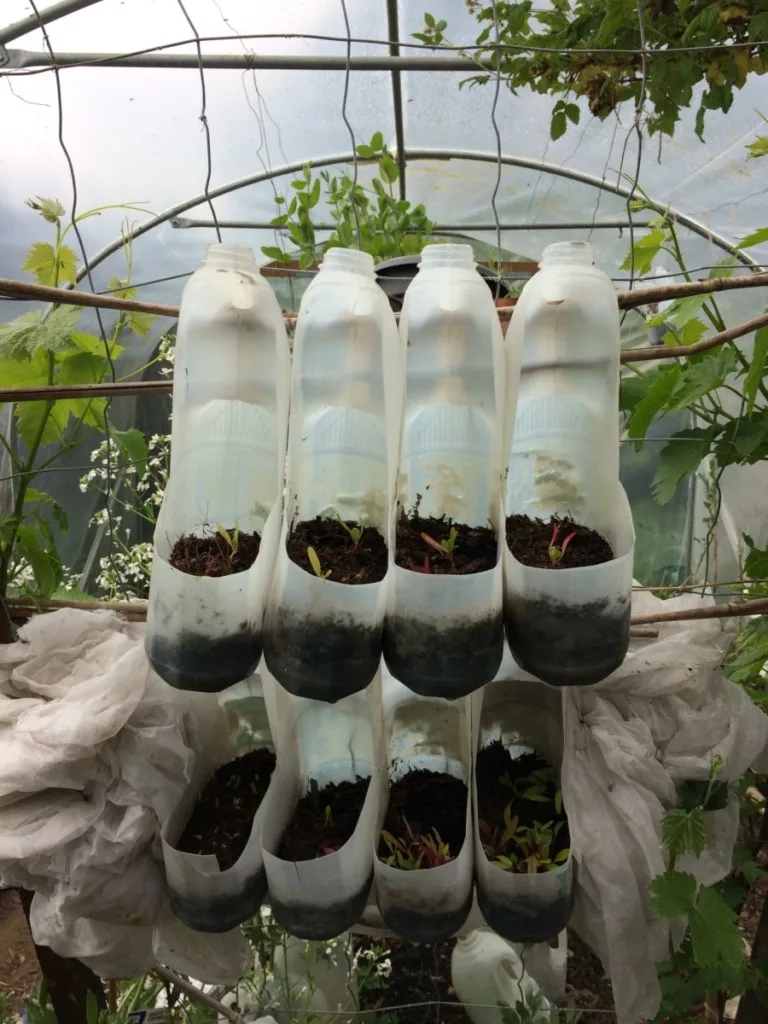
The plastic handles on milk containers mean that they can easily be strung along a wooden pole or branch. This opens up a range of options for using them as the planting sections in a vertical garden.
Cut away the plastic, leaving the base and handle of each milk container in place. Poke a few drainage holes in the base of each one, and fill the bases with soil/compost/ potting mix. Line up rows of containers, and stick a branch, cane or long slat of wood through the handles of each row.
You can then affix these horizontals to a vertical wooden frame, or stick the ends through the sides of an existing sturdy trellis (as I have done in my polytunnel).
Alternatively, you can save the top ends of the bottles (with caps) along with the handles, and plant into these. By running perforated hose/ pipe through the caps, you could create a self-watering vertical garden, to save on the effort involved in watering by hand.
2. String Plastic Milk Containers on a Wire to Make Hanging Gardens
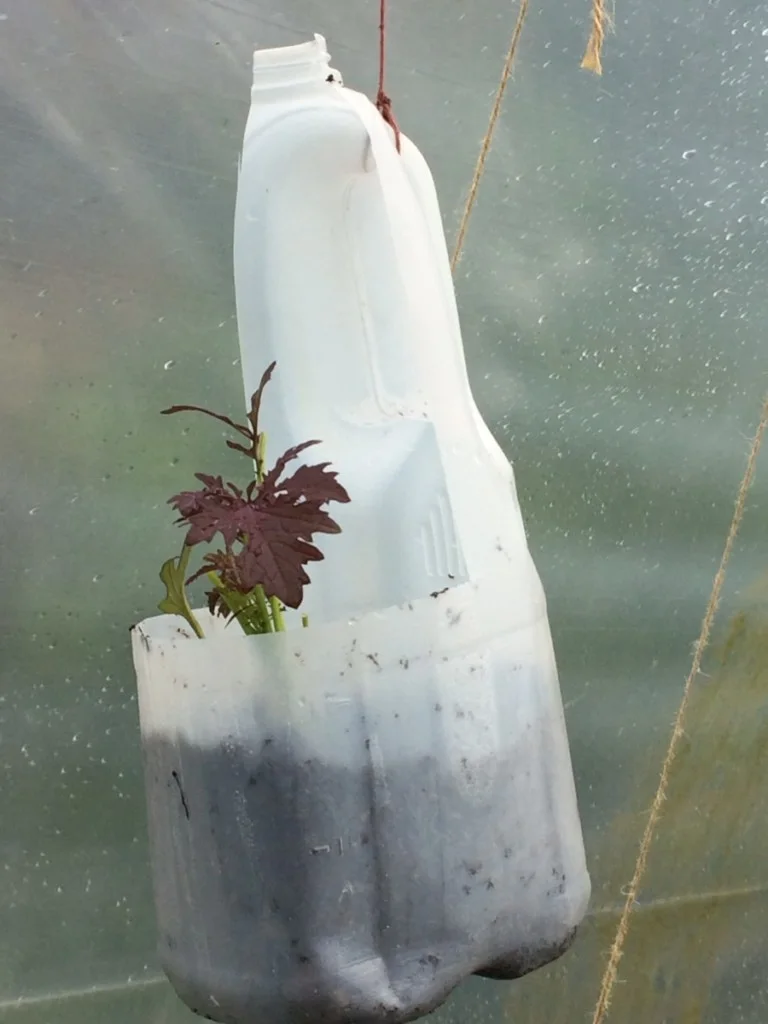
A similar idea involves removing all but the handles and bases of the plastic milk containers. Add drainage holes and fill them with your growing medium. Then string them along a length of wire to create a cost-free hanging garden. (You could even consider growing tomatoes upside down.)
String the wire between supports on a pergola, porch or veranda, or between support struts on a polytunnel or greenhouse. You could also attach two hooks to a wall or fence, and string the wire between them.
3. Thread Them Onto a Cane or Branch for an Indoor Garden
Milk containers, again retaining the handles and bases, can also be used to create an indoor garden, to make the most of a sunny wall area inside your home. If they are for indoors use, don’t add drainage holes. Instead, use these containers as the bases to catch the drips from pot plants and seedlings you grow indoors.
As long as you don’t add any plants or pots that are too heavy, you can simply attach twine or string to the ends of the cane or branch and hang this indoors garden structure (With three milk container plant supports) from a sturdy picture hook.
4. Make a Watering Can With a Spout

You don’t need to buy a watering can to water your plants. You can simply cut off your plastic milk container’s top, including the top part of the handle. The handle then becomes the spout, and you can use the container as a rudimentary watering can.
This could be perfectly satisfactory to water a container garden, or your collection of house plants.
5. Make a Watering Can with a Sprinkler Lid
This watering can with a spout is fine for more mature plants. But seeds and seedlings will often require more gentle watering. Again, you do not need to go out and buy a watering can with a sprinkler head. You can make one for free with a plastic milk container.
Simply take the lid of the container and, using a strong needle, or a pinprick drill, make a series of small holes in the plastic. Fill the container with water, replace the lid, and you can use this to more gently water all the little seedlings you sow.
6. Make a Soil/ Compost Scoop
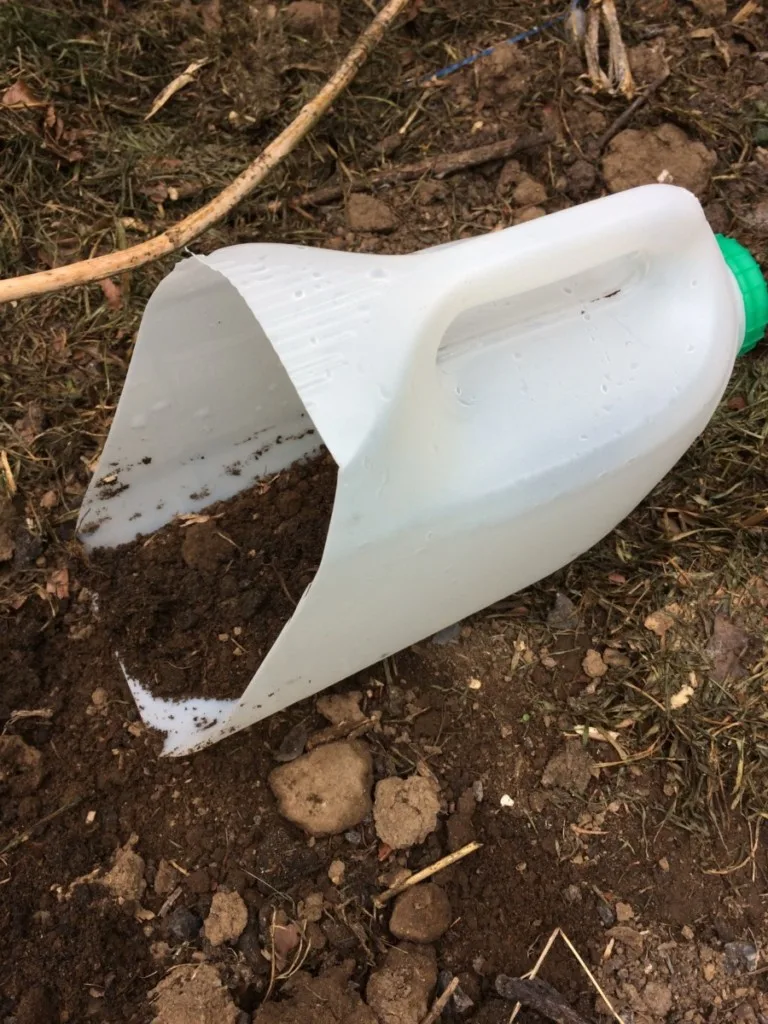
Cut off the base of your milk container at a diagonal angle, leaving less plastic on the handle side. Keep the lid on.
What you are left with can become a very handy scoop for use in your garden. You can use it to scoop up soil/ compost/ potting mix etc.. Take off the lid and the scoop can also become a handy multi-purpose funnel.
7. Use Plastic Milk Containers as Small Cloches
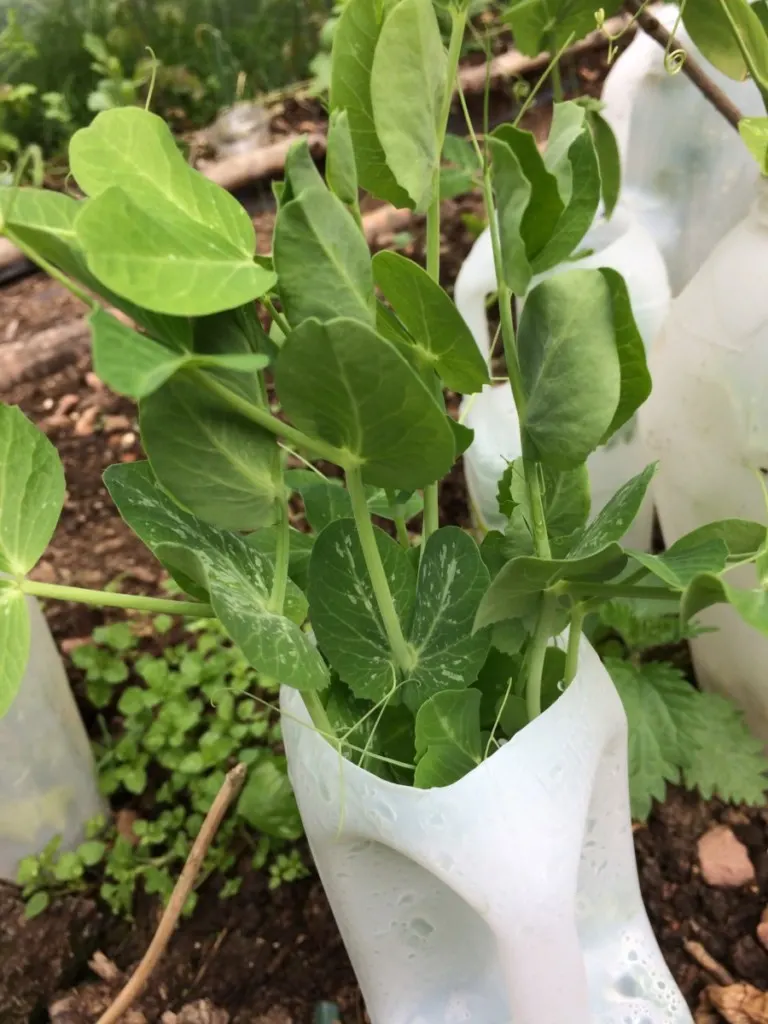
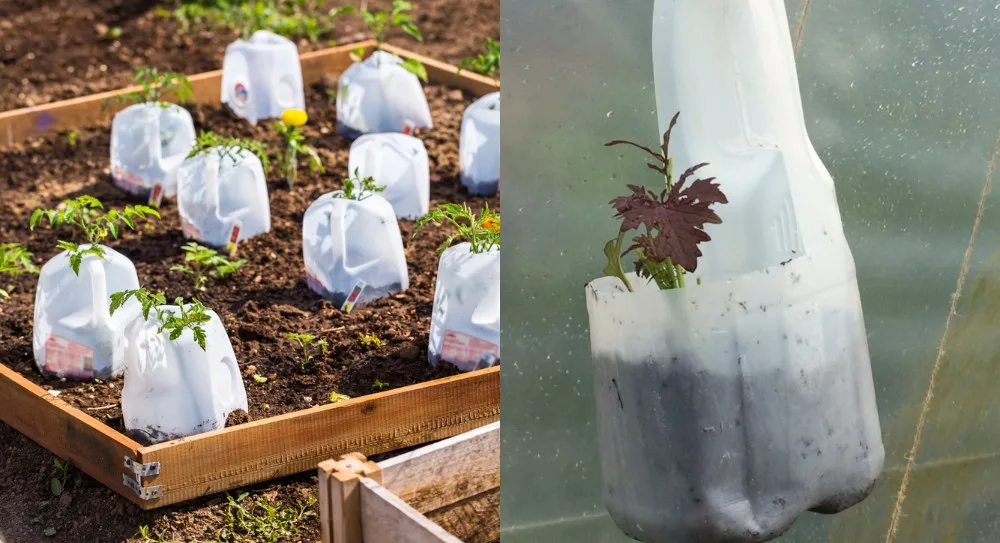
Cut off the bases of your milk containers around 3-4 inches from the base. Remove the lids. The top sections can now become handy cloches to cover and protect young plants and seeds in your garden. This can help protect them from frosts and other weather conditions early in the season, and also keep them safe from pests.
(I use cloches like these to protect early sown peas and beans in my polytunnel from mice and voles, for example.)
Snip holes in the top and bottom of each handle and you can also insert thin sticks or stakes through them. This will anchor your plastic cloches to the ground and stop them from blowing away if you are using them outdoors.
8. Use The Bases for Seed Starting Trays
When you are using the tops of your milk containers as cloches, don’t throw the bases away. You can add drainage holes and your growing medium to each one and use them to start seeds. This avoids the need to buy seed trays, plugs or plastic pots.
9. Or as Plant Saucers or Bases For Potted Plants
Without drainage holes, you can also use these plastic milk container bases as make shift plant saucers. Or as bases to catch the drips from potted plants inside your home.
10. Create Plastic Collars To Protect Plants From Pests
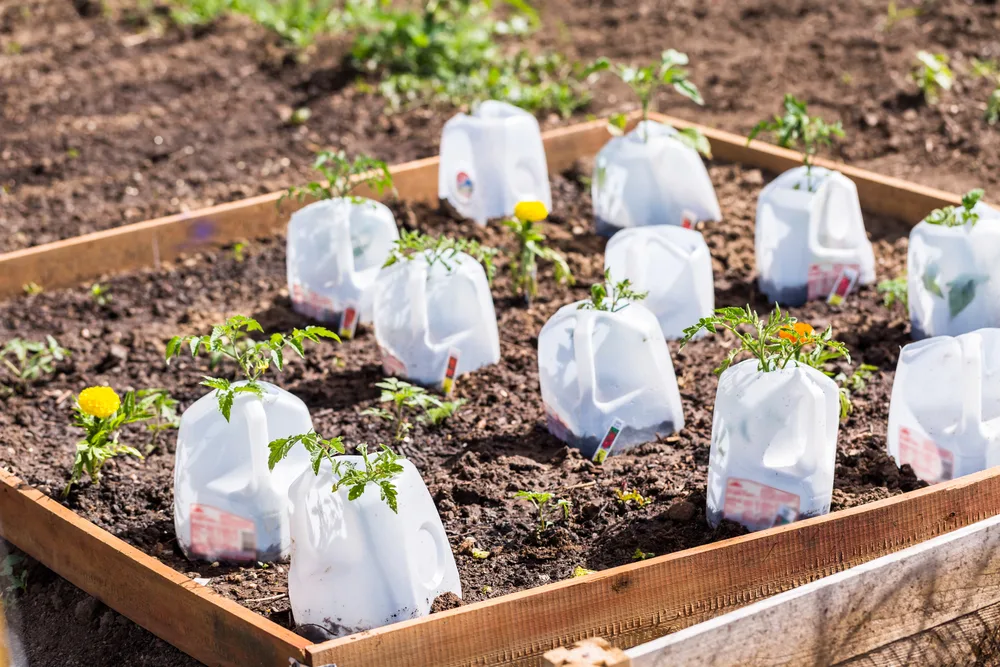
As seedlings and young plants begin to outgrow your milk container cloches, you can cut off the tops and leave just the centre section of each container remaining. This allows plants to grow up through the centre, but leaves a plastic collar which can provide the plants with protection from pests.
I find that this is beneficial when we have a bad year with mice and voles. Plastic collars could also help protect plants from slug damage, and from a range of other pests.
11. Use Them To Store DIY Liquid Fertilizers For Your Plants
One easy way to use milk containers without altering them at all is to use them to store DIY liquid feeds for plants.
I sometimes use milk containers to store some compost tea, or comfrey liquid fertilizer for use in my garden. Just be sure to label them so you always know what they contain.
12. Use Them To Regulate Heat In a Greenhouse or Polytunnel
You can also use whole plastic milk containers filled with water to regulate the heat in a greenhouse or polytunnel. Or to provide a little extra warmth to tender plants outdoors by building a wall of water filled containers around them.
The water filled bottles are a great way to add thermal mass. They store heat energy from the sun during the day, and release it slowly when temperatures fall. So they make things a little warmer at night and could help to stave off frosts.
13. Use Water-Filled Milk Containers To Hold Down Row Covers Etc..
If you cover crops for any reason – for extra warmth or for pest protection for example – you can hold down row covers, fleece, or meshing with water filled milk containers.
This is a simple, low cost way to make sure these remain in place, and won’t blow away.
14. Make an Easy DIY Bird Feeder
To make an easy DIY bird feeder, make gaps in the sides of the container large enough to accommodate the birds you want to feed. Stick two sticks or canes through just below these holes to give birds something to perch on. Then add your bird feed, and hang the container by the handle in a suitable tree.
15. Make a Place for Butterfly Puddling
Cut off the base of a milk container just below the handle. This gives you a plastic container that you can sink into the soil. Bury it in the soil up to the rim, and fill it with sand and gravel. Place a few smooth, flat rocks on top and around the edges. Then fill it up with water so that it is damp on top. Keep it topped up.
Place this near some nectar-filled flowers, and it can become a perfect place for butterflies to ‘puddle’. (For salts and nutrients they don’t get from nectar.)
16. Make a Toad Habitat
Cut off the front section of your bottle, keeping the neck and opening at the top, the handle section and the base. Bury this in the soil in a quiet corner of your garden, so the opening at the top is still free, and there is a hole at the front. Fill the base with a little soil, dry leaves and other organic matter and it becomes a wonderful cool, damp place for toads to hide away in.
17. Make Some Garden Lighting
The cloudy, white plastic of milk containers could also be ideal for creating some gentle, diffuse lighting in your garden.
Add some solar powered LED lighting in each one. Then place them along a path, or string them up beside a seating area or patio. You could also consider using non-toxic paint to create diffuse lighting in different colors.
18. Make a Hands-Free Berry Harvesting Container
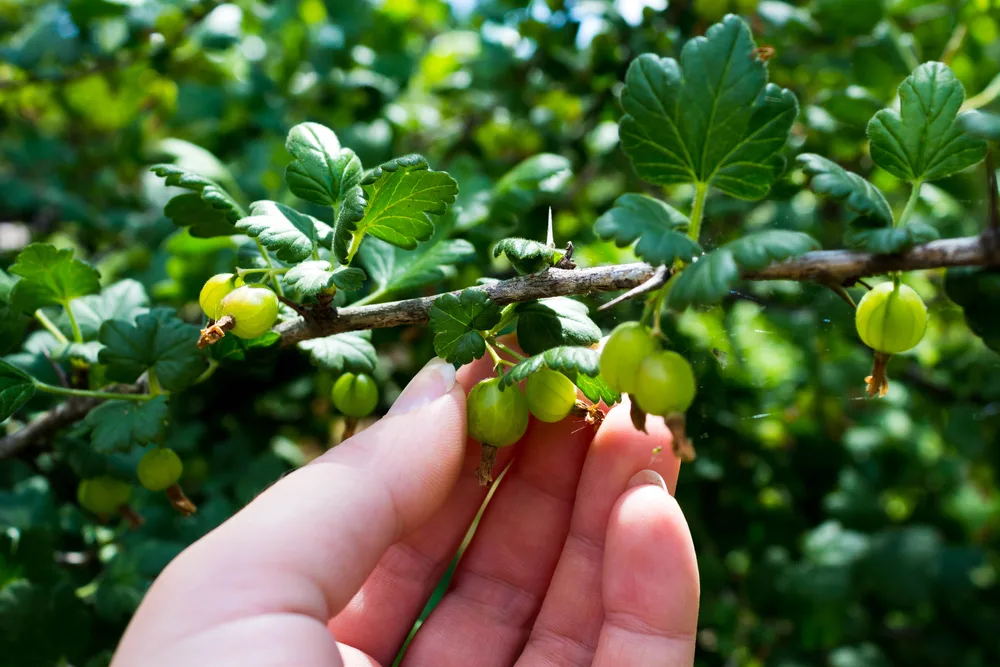
Cut off the top quarter of the milk container opposite the handle. Then stick a belt through the handle and fasten it around your waist.
This can be a handy, hands-free receptacle for you to use during a berry harvest, especially when you may need two hands for particularly hard to harvest berries like gooseberries.
20. Cut Some Plastic Plant Labels From the Off-Cuts
When you are working on other projects, you can also make use of the portions you cut off your milk containers. Cut sections of plastic into strips and you can mark these up with permanent marker and use them as plastic plant labels.
21. Make Some Beautiful Garden Art
There truly are plenty of ways to use plastic milk containers in your garden. You can not only use them in the practical ways described above. You can also consider using this sturdy plastic to make some garden art to enhance your outside space.
For example, why not use some non-toxic paints to create plastic flowers, or plastic butterflies to hang somewhere in your garden?
If you use your imagination, you will discover that there are plenty of ways to reuse an old milk container before you send it for recycling.

Get the famous Rural Sprout newsletter delivered to your inbox.
Including Sunday musings from our editor, Tracey, as well as “What’s Up Wednesday” our roundup of what’s in season and new article updates and alerts.


